
Peru Wall Mount Chrome Shower Set With Hot And Cold Mixer Valve And Handheld Shower Installation
|
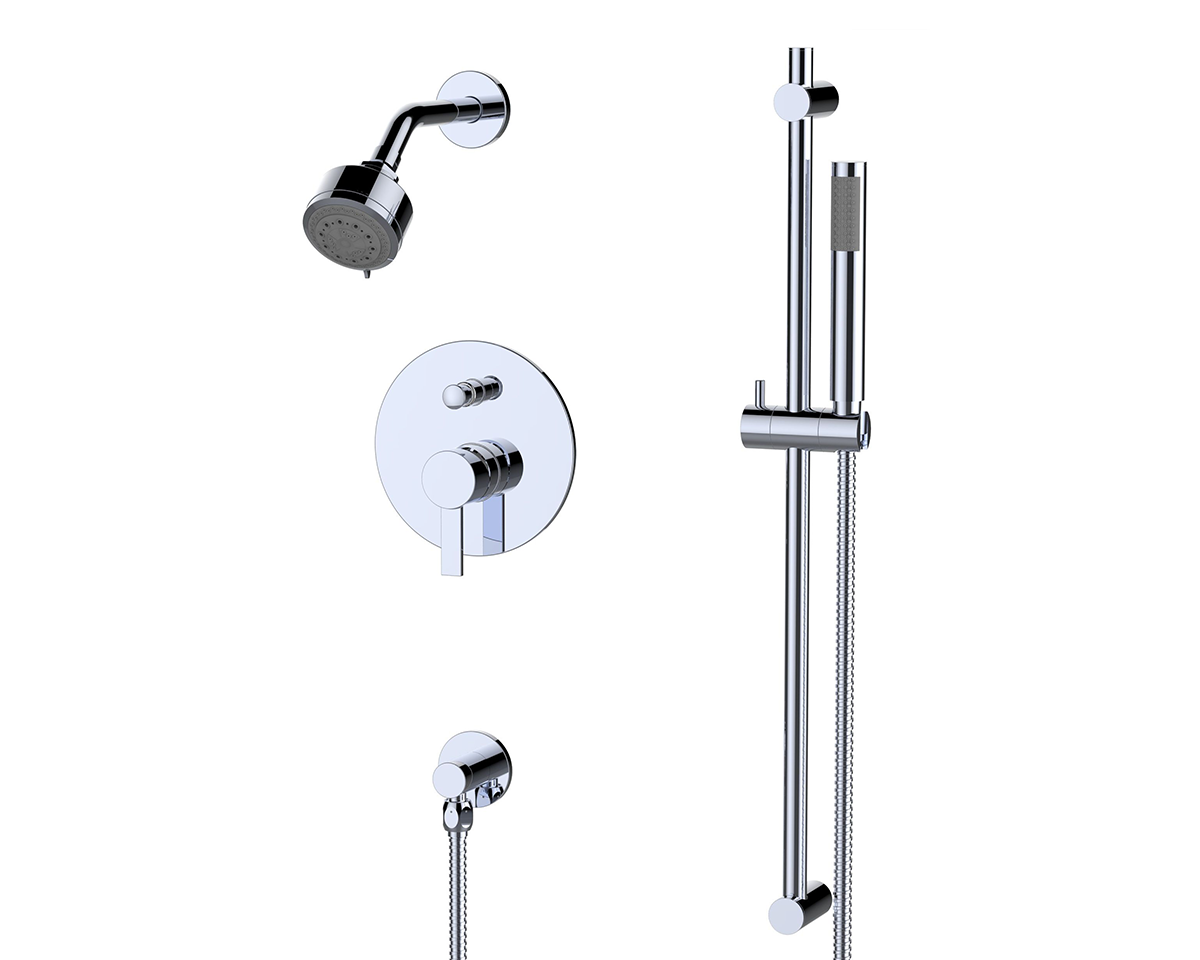
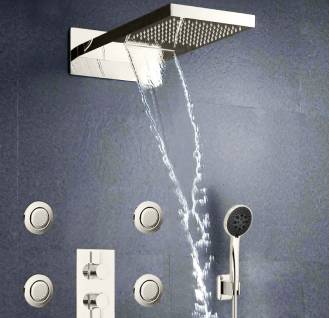
Peru wall mount shower set is the perfect choice for a bathroom that takes a contemporary yet minimalist approach to design. It has a streamlined look and appeal, and the wonderful and sleek polished brass finish sure adds a modern twist to the shower set. The shower set is a good choice for a modern bath that comes along with a hot and cold mixer. The chrome finish is classy and elegant, and that comes with a ceramic Valve core and brass body, offering a sleek look that needs to adjust the temperature hardly each time. Simple and modern designs easily match your bathroom style. Offering you the best water temperature for your family. The thermostatic shower system is a high-flow 3-way shower valve with new technological coating layers electroplating to anti-rust, never getting rust.
|
|
Peru Wall Mount Chrome Shower Set With Hot And Cold Valve Mixer And Handheld Shower Features:
- Type: Shower Set
- Valve Core Material: Ceramic
- Cold / Hot Water Control: Single Holder Dual Control
- Mixer: Valve Mixer
- Style: Contemporary
- Number of Handle: Single Handle
- Shower arm: 12"
- Finish: Chrome
- Body Material: Brass
- Spout Material: Brass
|
|
BathSelect® Manufacturer Warranty Information
- Before you begin, please read the installation instructions below. Observe all local building and safety codes.
- Unpack and inspect the product for any shipping damages. If you find damages, do not install them.
- Please note all showers must be installed by a professional and certified plumber otherwise, warranty might be voided.
|
|
Mixer Installation
Hand-Held Shower Installation
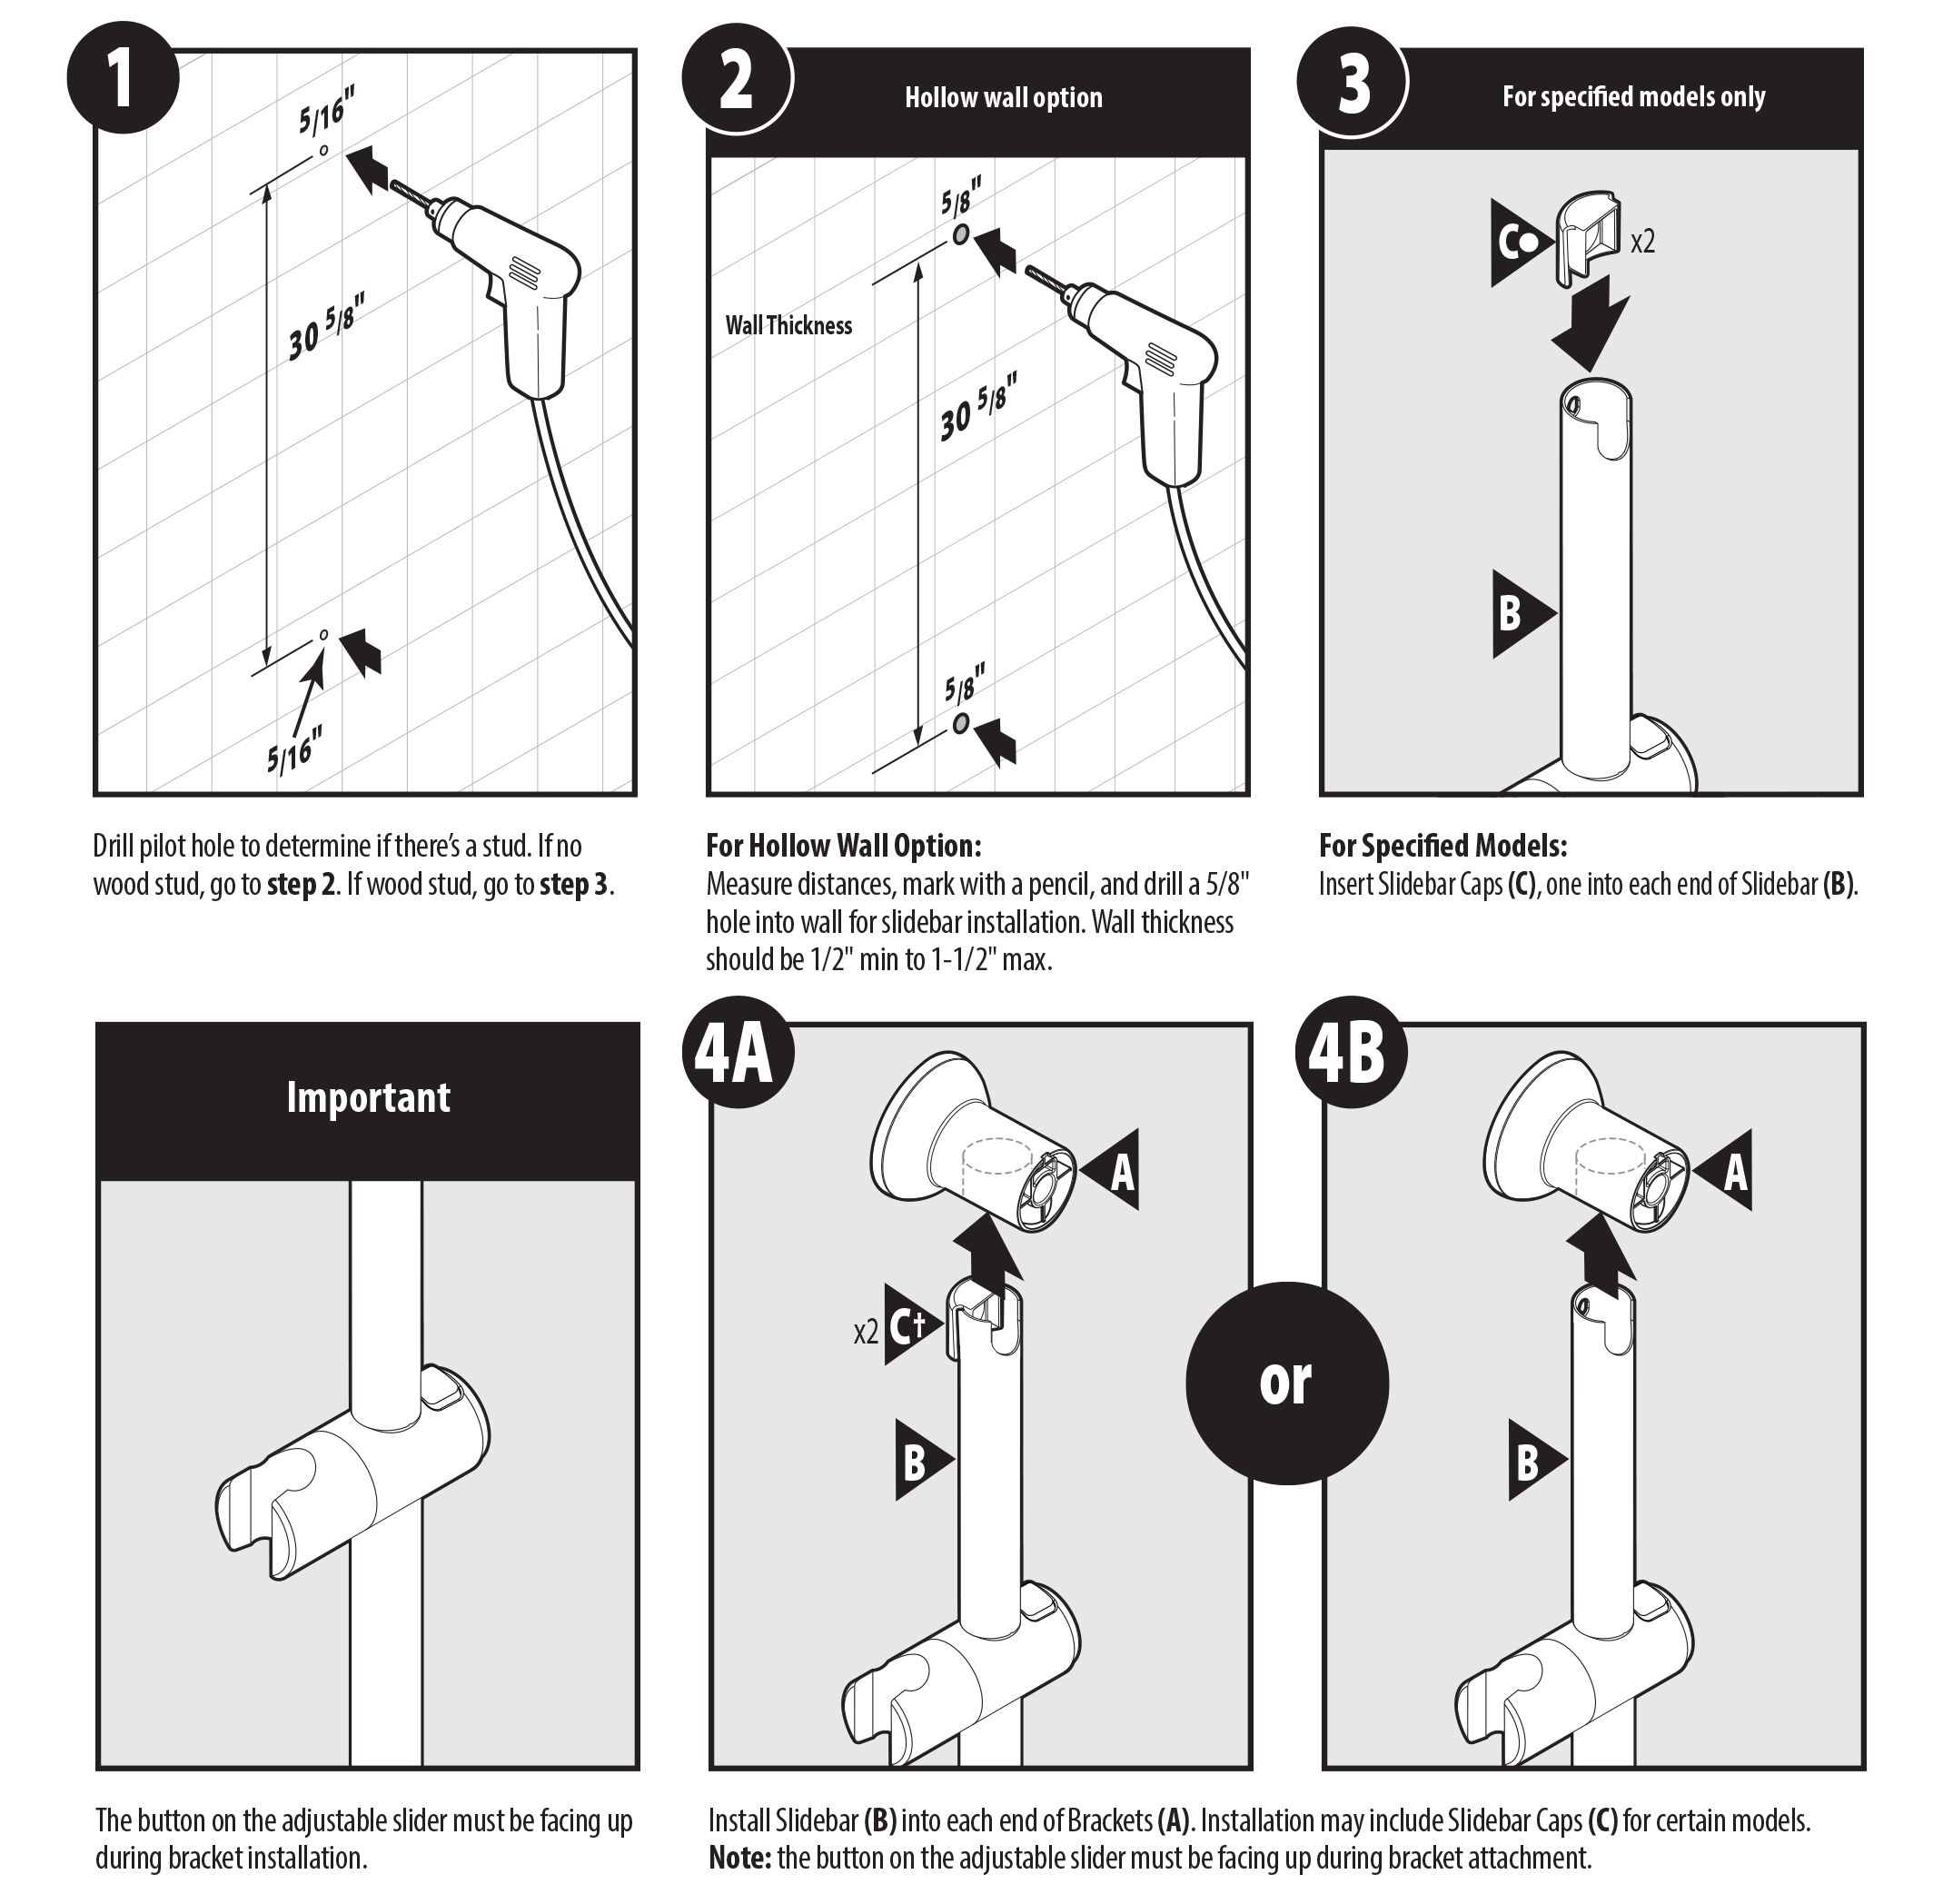 Step 1 - Drill the pilot hole to determine if there's a stud. If there is no wood stud, go to step 2. If wood stud, go to step 3. Step 1 - Drill the pilot hole to determine if there's a stud. If there is no wood stud, go to step 2. If wood stud, go to step 3.
Step 2 - For Hollow Wall Option: Measure distances, mark with a pencil, and drill a 5/8" hole into the wall for sidebar installation. Wall thickness should be 1/2" min to 1-1/2" max.
Step 3 - For Specified Models: Insert Sidebar Caps (C), one into each end of Sidebar (B).
Important - The button on the adjustable slider must be facing up during bracket installation.
Step 4 - Install Sidebar (B) into each end of Brackets (A). Installation may include Sidebar Caps (C) for certain models.
Note: the button on the adjustable slider must be facing up during bracket attachment.
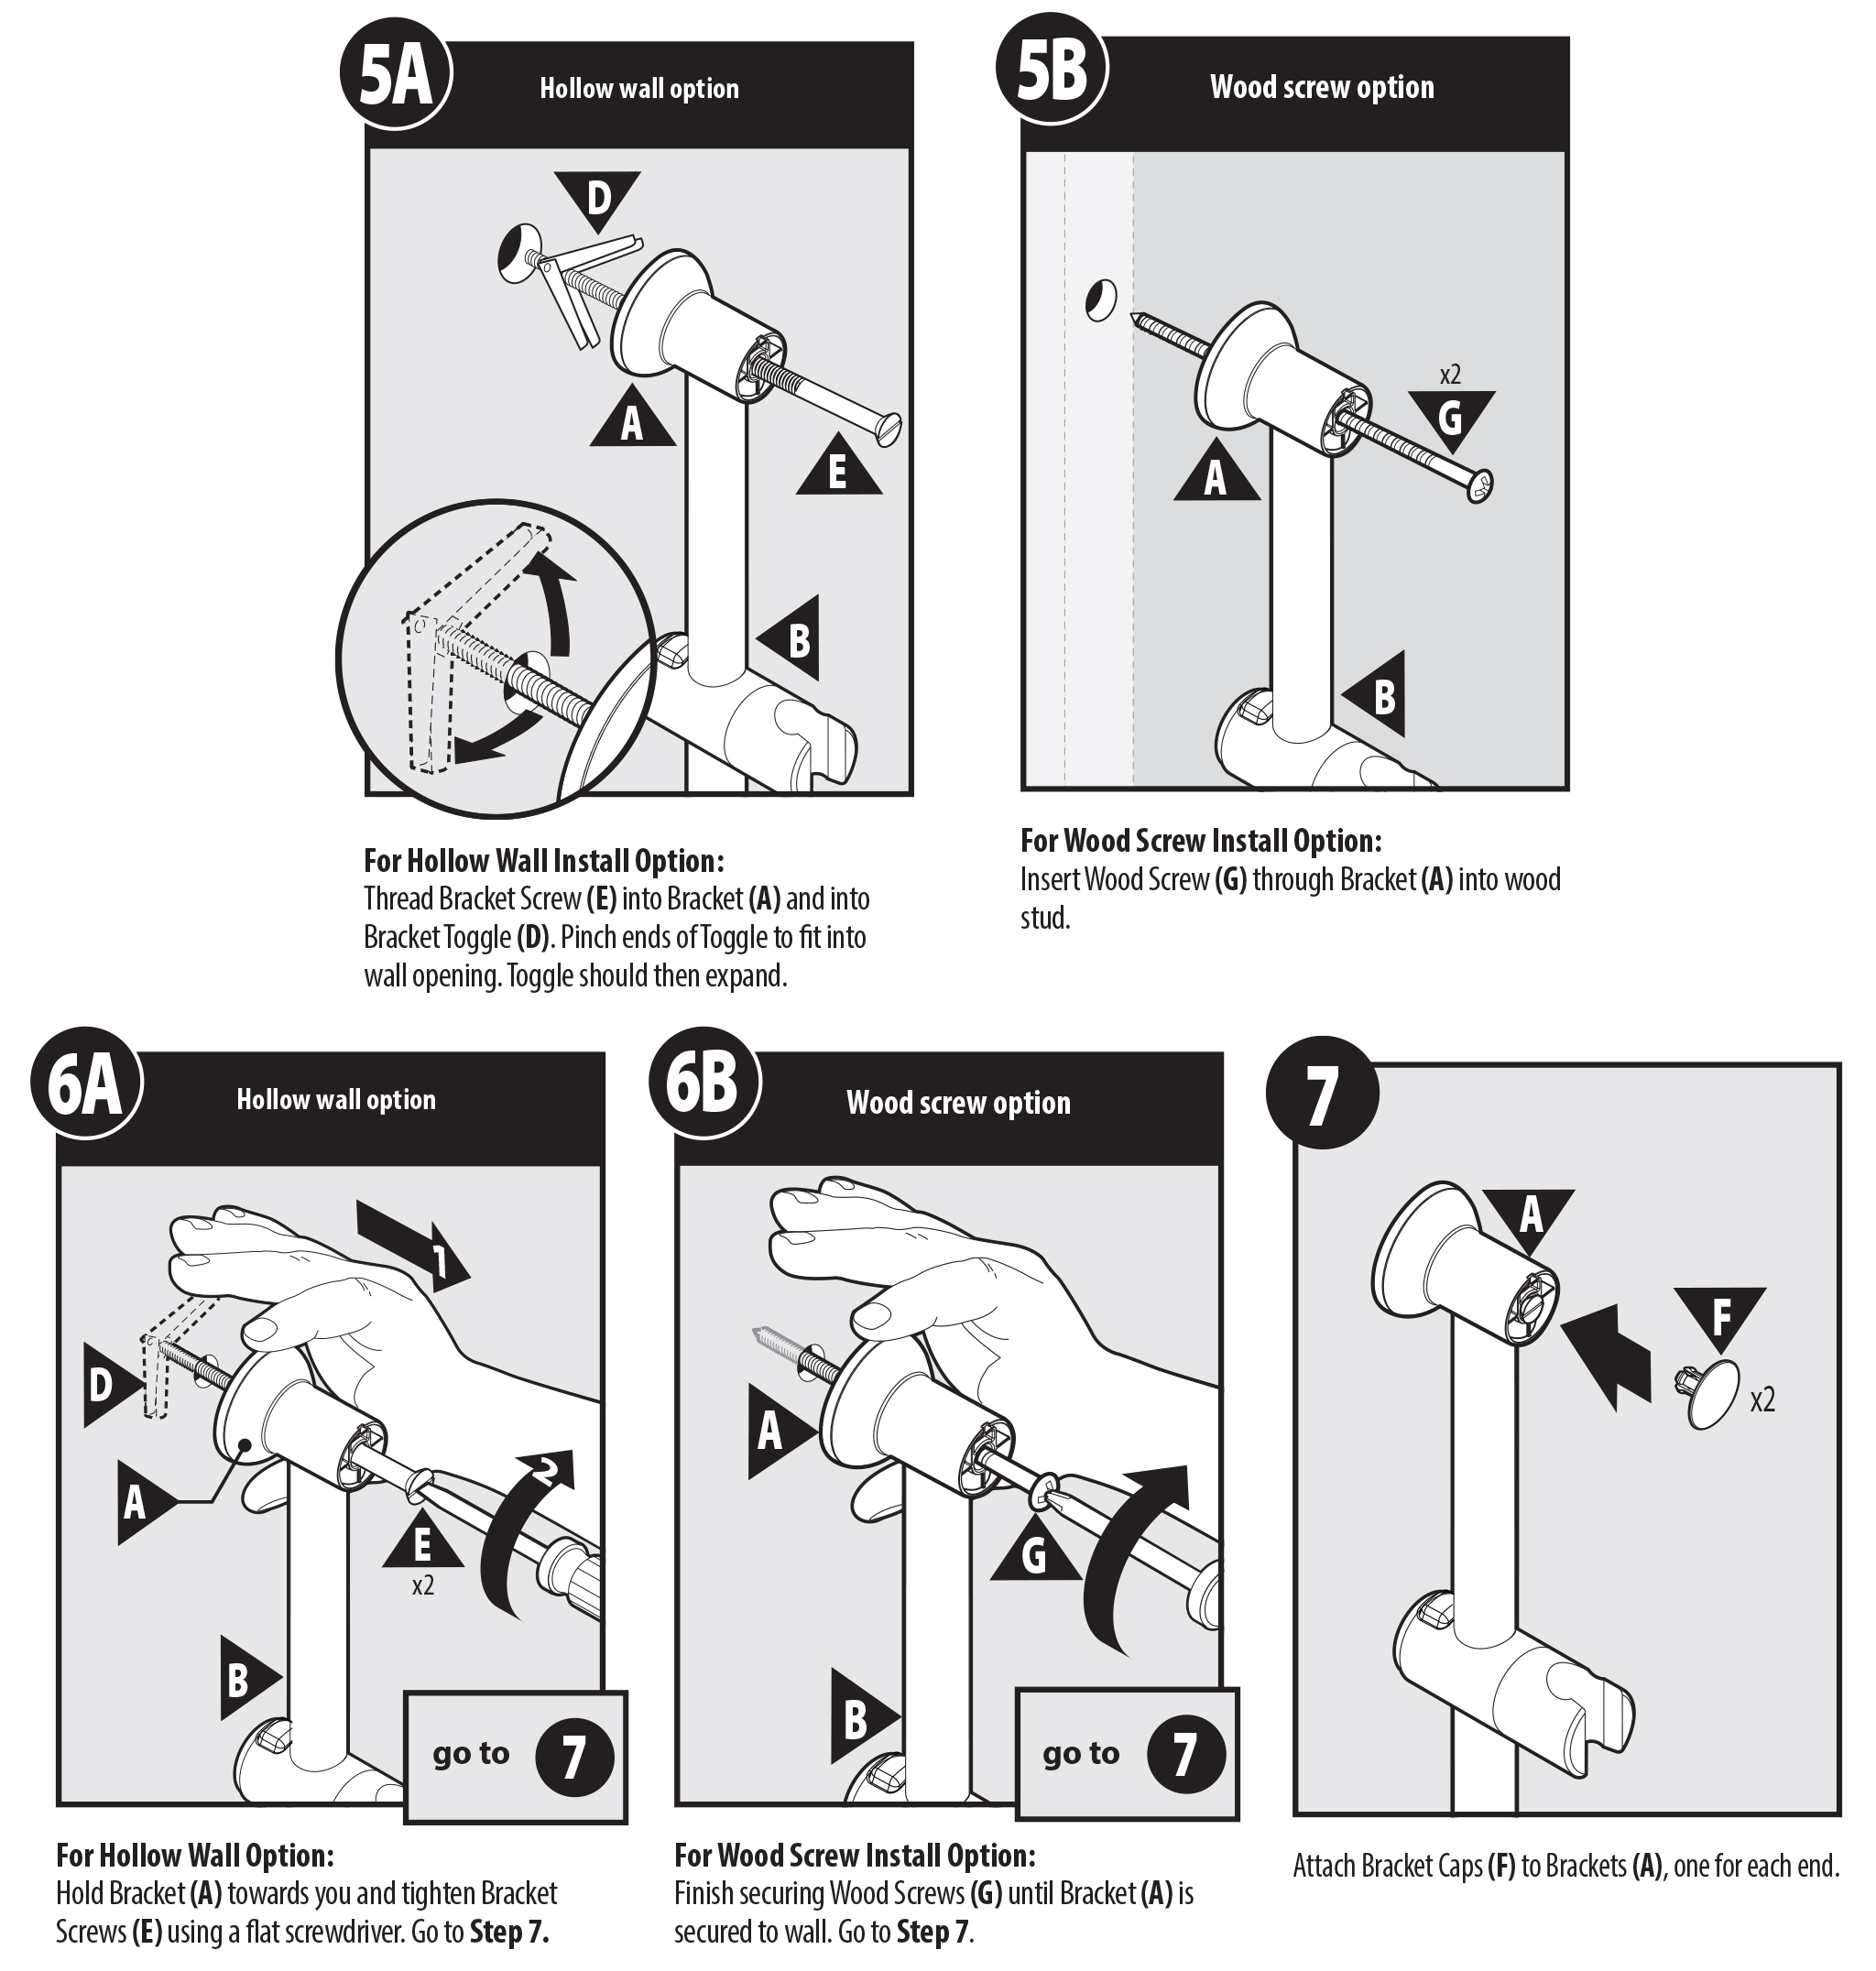
Step 5 - For Hollow Wall Install Option: Thread Bracket Screw (E) into Bracket (A) and into Bracket Toggle (D). Pinch the ends of the Toggle to fit into the wall opening. The toggle should then expand.
Step 5B - For Wood Screw Install Option: Insert Wood Screw (G) through Bracket (A) into the wood stud.
Step 6A - For Hollow Wall Option: Hold Bracket (A) towards you and tighten Bracket Screws (E) using a flat screwdriver. Go to Step 7.
Step 6B - For Wood Screw Install Option: Finish securing Wood Screws (G) until Bracket (A) is secured to the wall. Go to Step 7.
Step 7 - Attach Bracket Caps (F) to Brackets (A), one for each end.
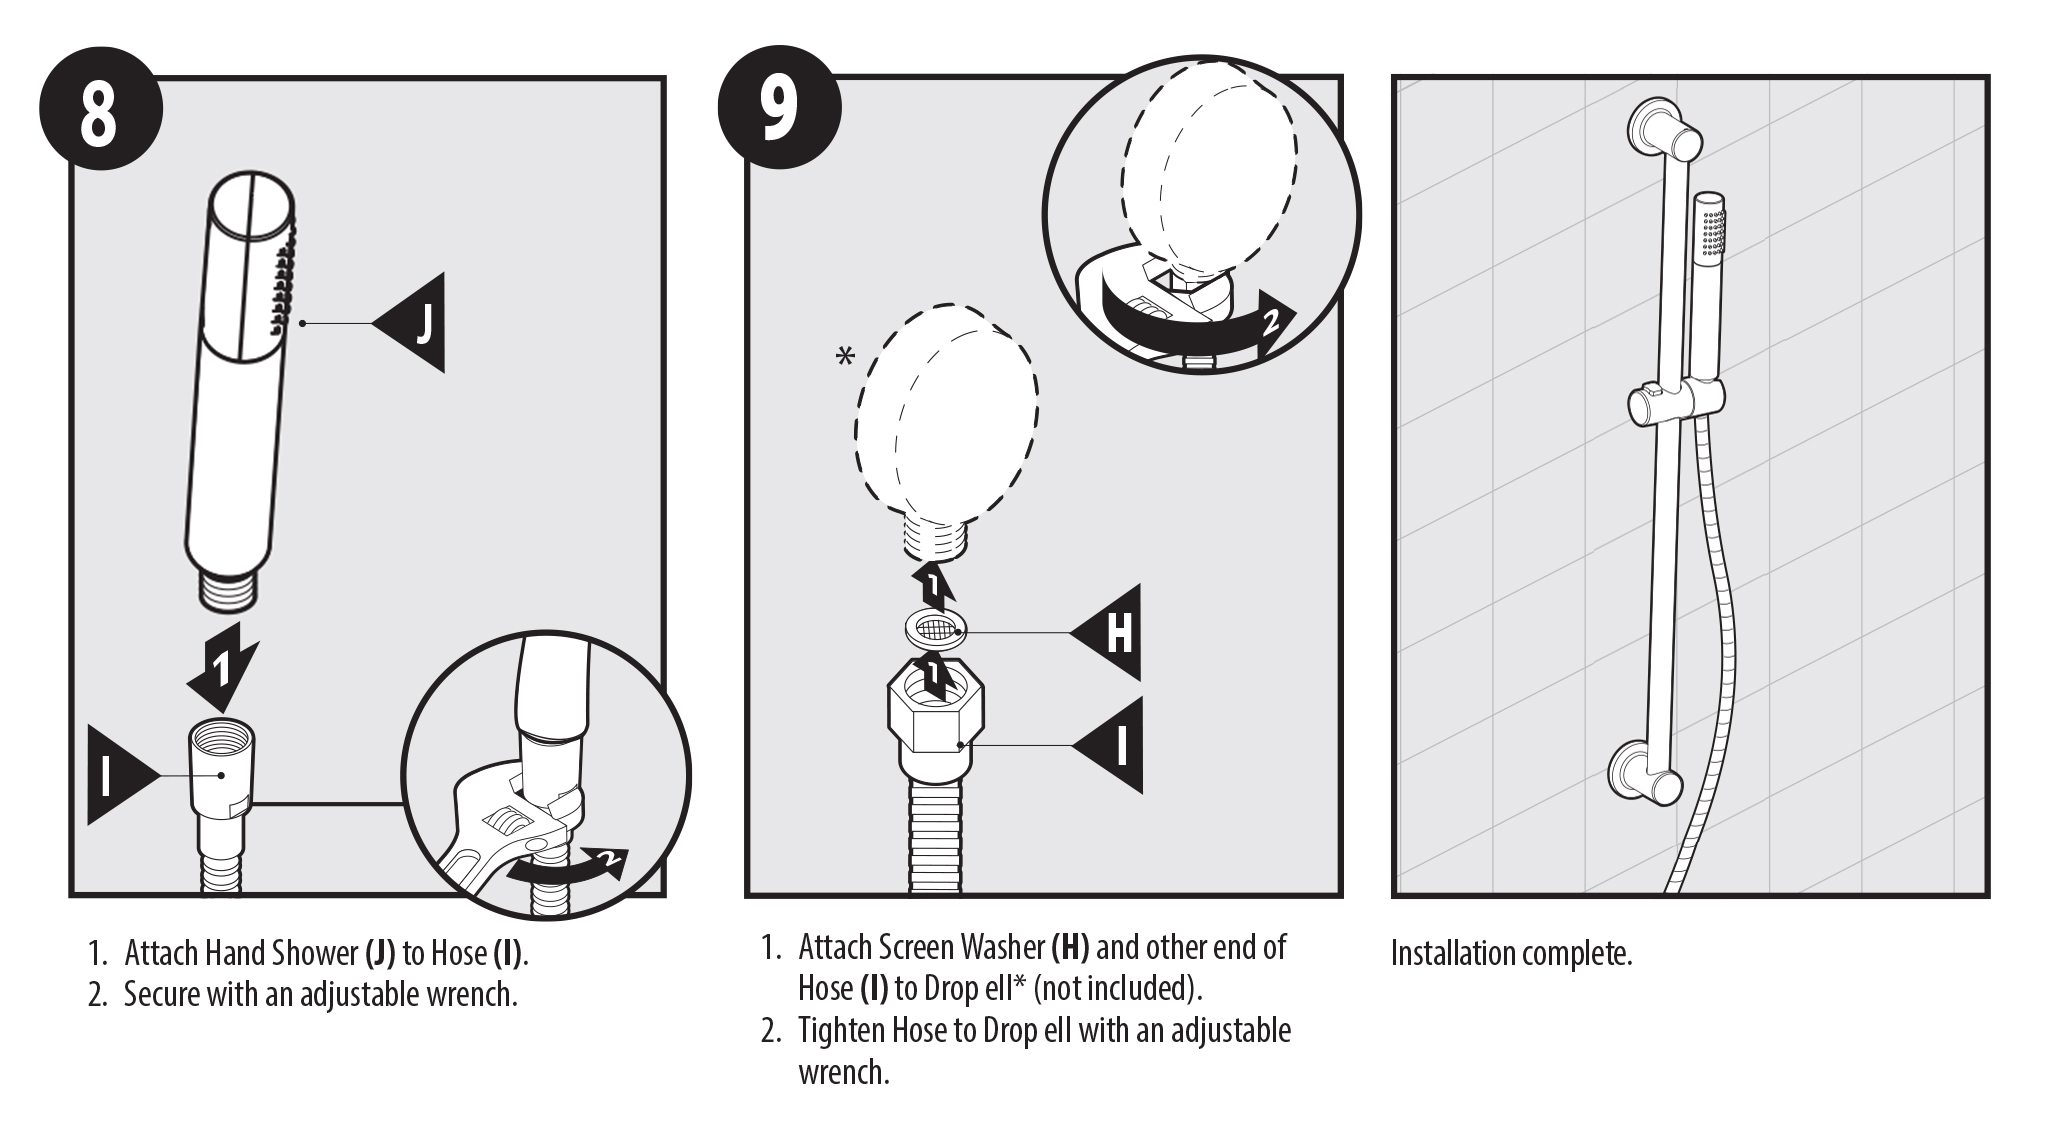
Step 8 -
1. Attach Hand Shower (J) to Hose (I).
2. Secure with an adjustable wrench.
Step 9 -
1. Attach Screen Washer (H) and another end of Hose (I) to Drop ell* (not included).
2. Tighten the Hose to Drop all with an adjustable wrench.
Installation complete.
|


.png)


