
|
Saint-Denis is a
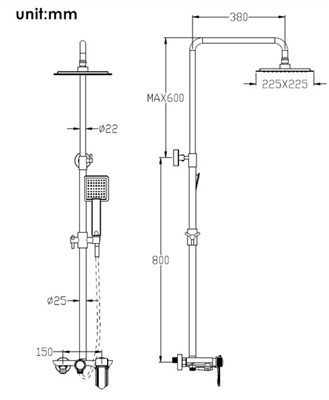
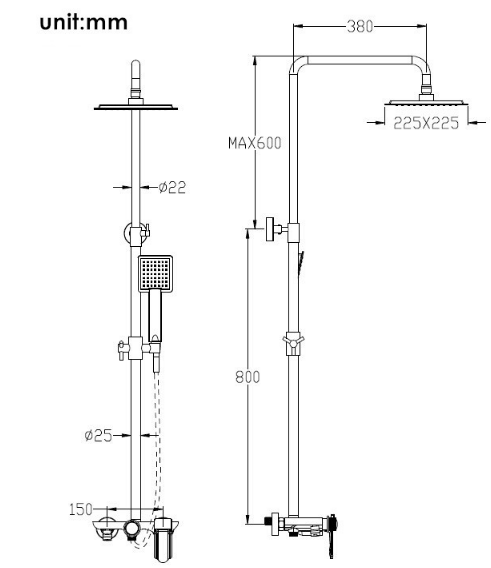
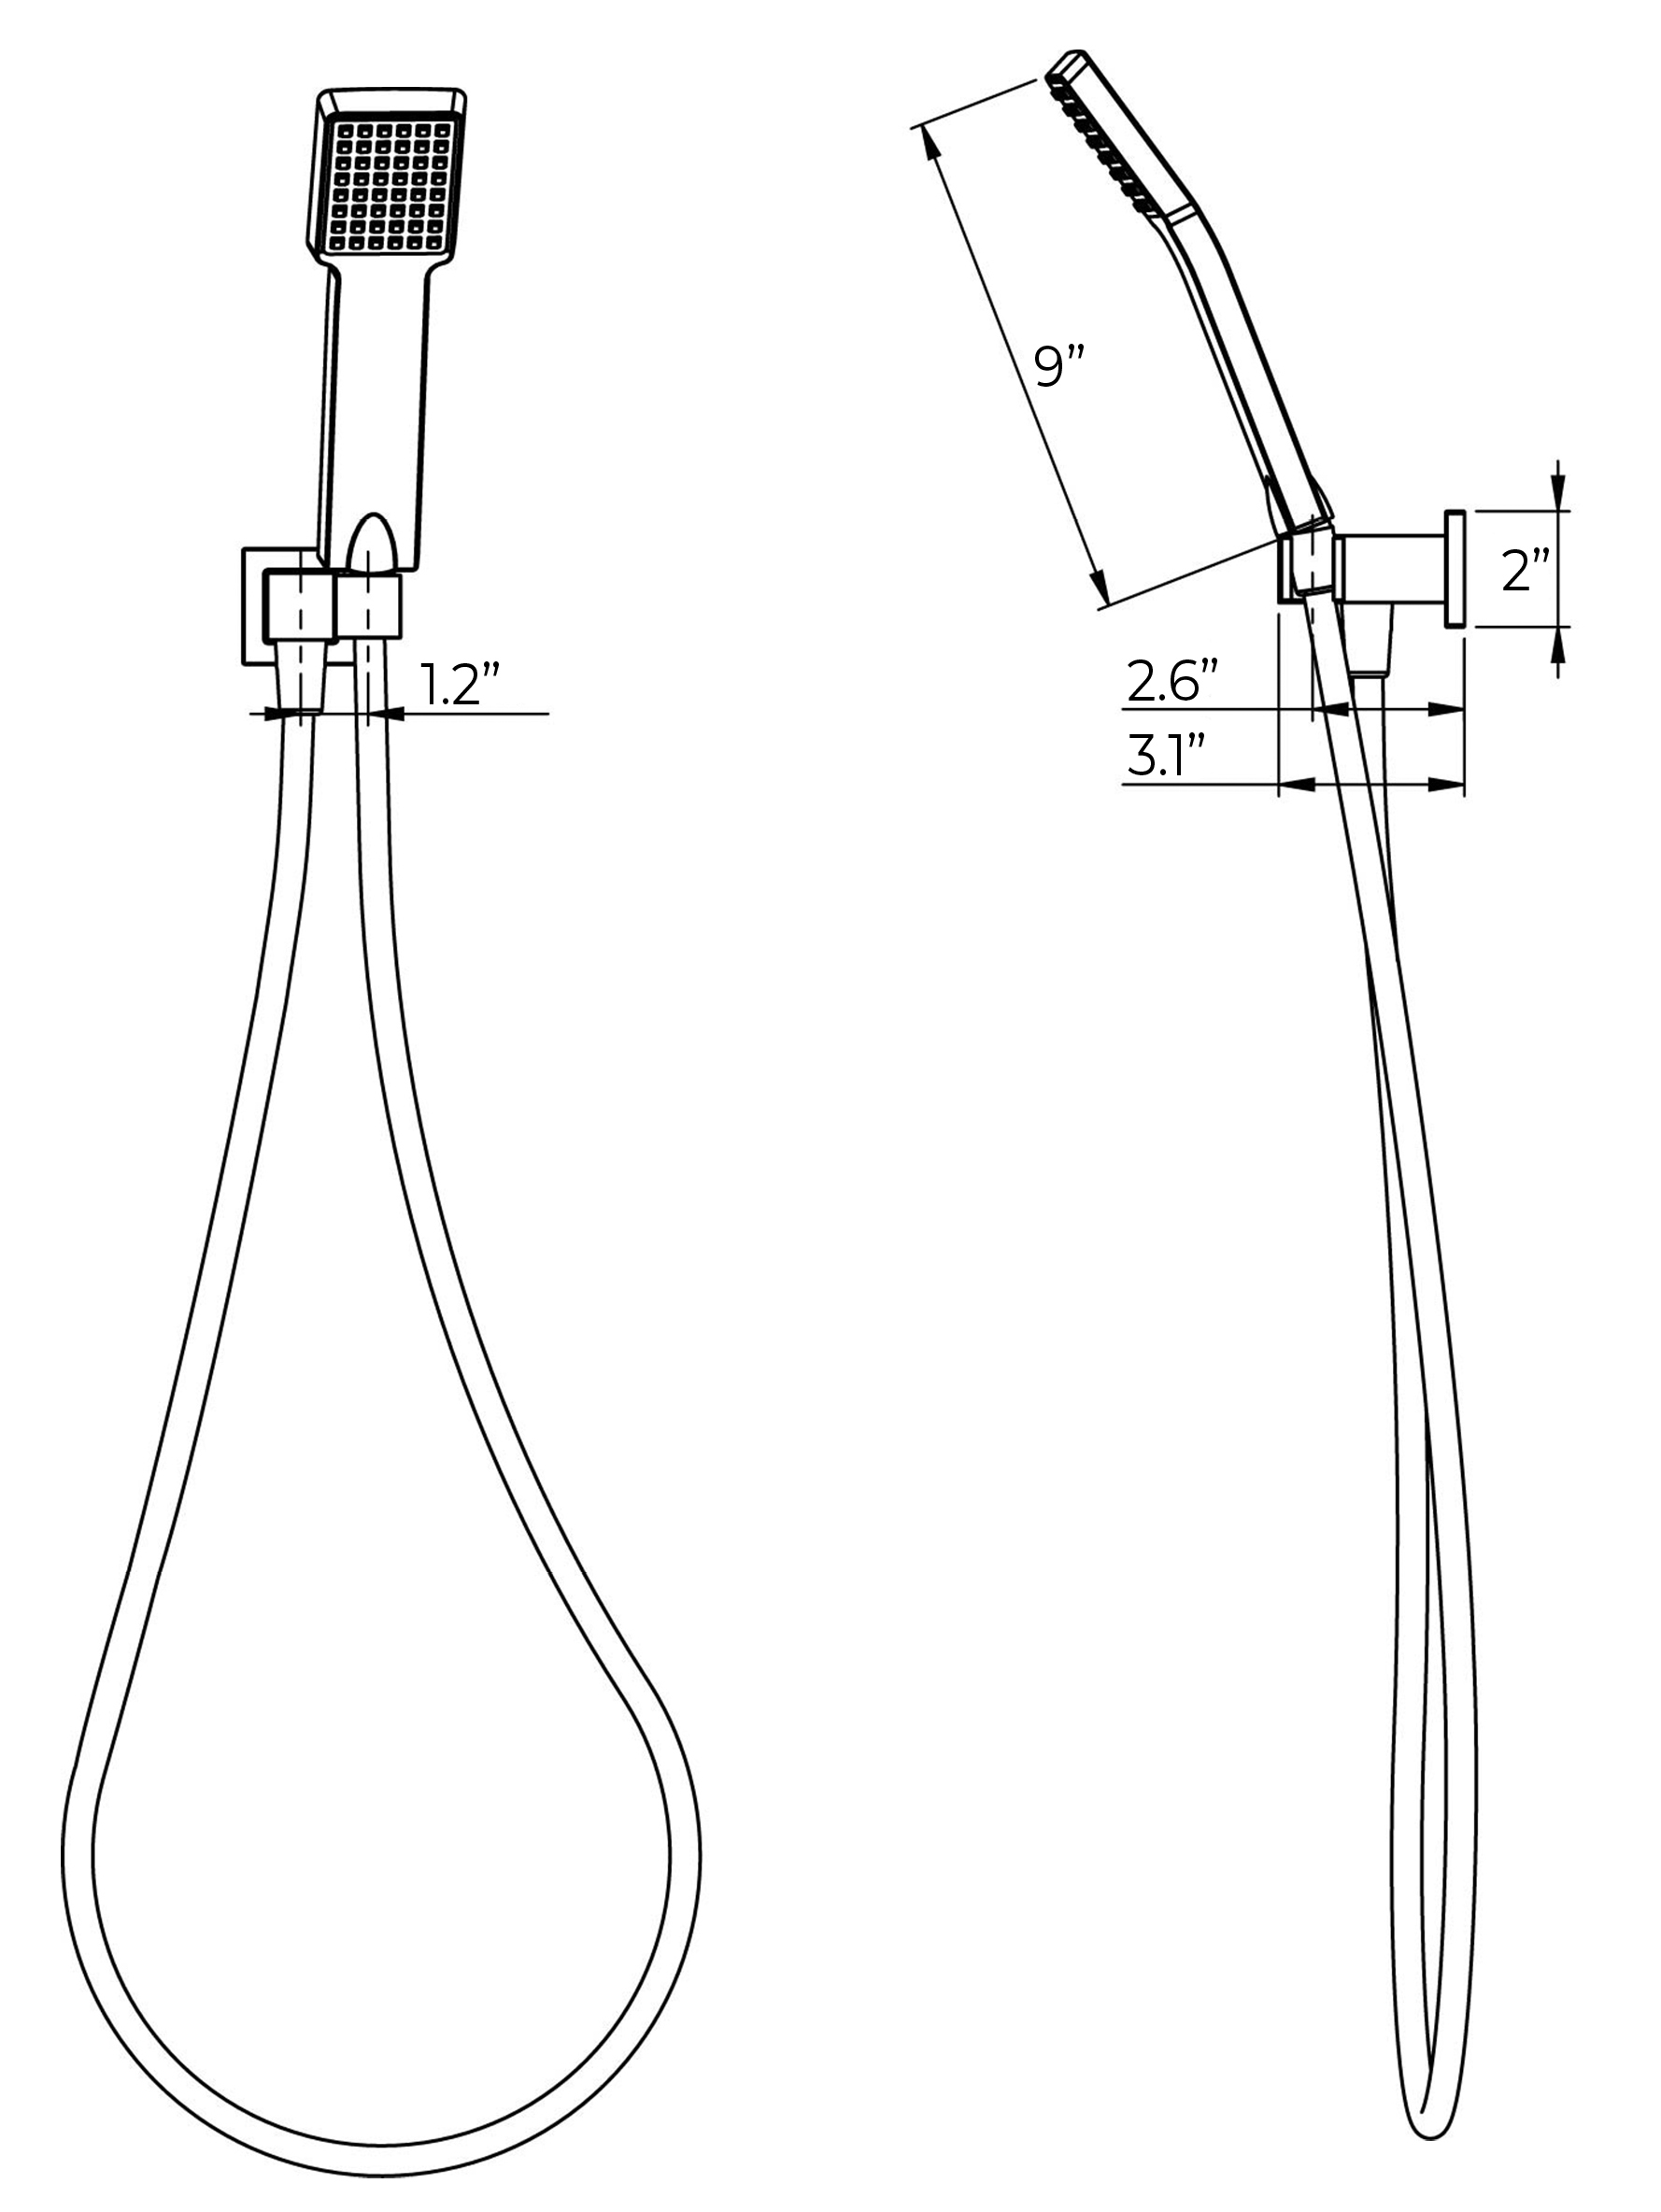
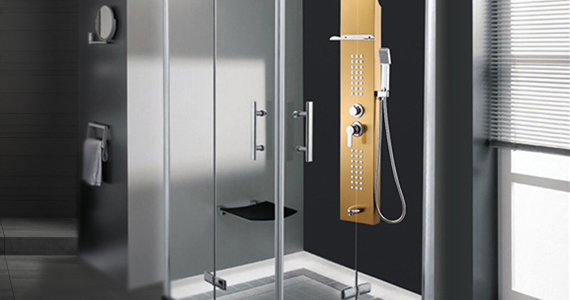
wall-mount shower set in an exquisite white and gold finish. It comes with two shower heads, an above-head rain shower, and a regular handheld shower. It has a built-in hot and cold water mixer with thermostatic control. Only the best quality materials have been used the body is made of solid brass, while the valve core material is ceramic for long-lasting use. It comes complete with accessories and installation instructions. Our Saint-Dennis shower set is ideal for people who like luxury and diversity. It is a wall mount with an overhead rain shower, a handheld shower, and a faucet included. The finish is an eye-catching combination of gold and white, harmoniously blending into any contemporary bathroom design. This is one of the simplest products we offer, yet indispensable when it comes to installing a brand new shower.
BathSelect® Manufacturer Warranty Information
- Before you begin, please read the installation instructions below. Observe all local building and safety codes.
- Unpack and inspect the product for any shipping damages. If you find damages, do not install them.
- Please note all showers must be installed by a professional and certified plumber otherwise, the warranty might be voided
|
|
1. Brass Adapter
2. Faucet body
3. Washers
4. Diverter
5. Shower bar
6. Hand shower holder
7. Shower bar bracket
8. Shower bar
9. Mounting base
10. Decoration cover
11. Rain shower head
12. Handheld shower
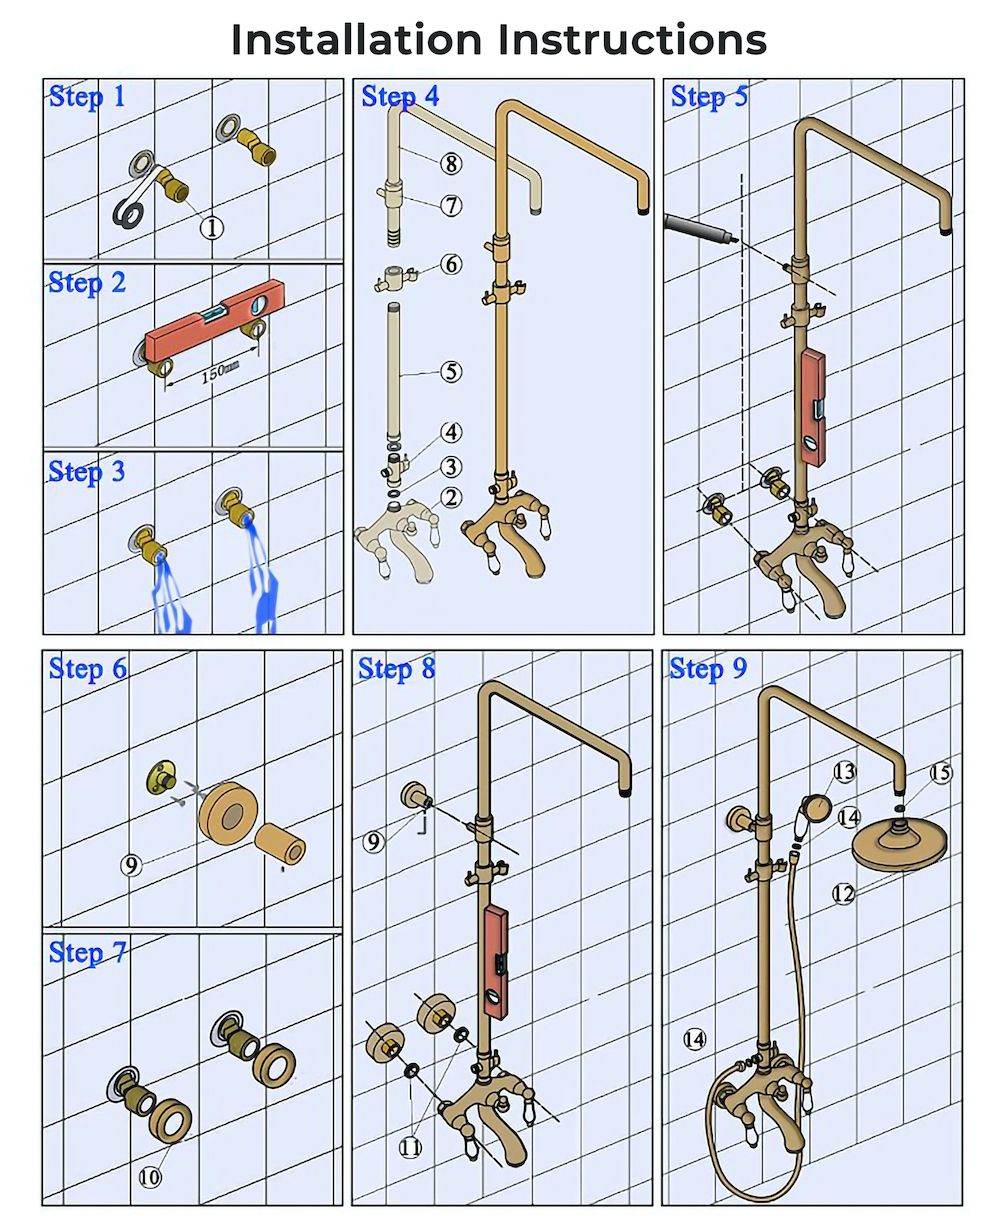
Step 1: Connect the brass adapter provided to the water supply line.
Step 2: Adjust the lever and distance to fit the faucet body.
Step 3: Turn the water valve on for a while to let the dust and impurities out.
Step 4: Assemble the shower set.
Step 5: Place a pre-assembled shower in the wall to find the proper position and then mark the mounting hole that needs to be drilled.
Step 6: Drill a hole in the upper part shower bar bracket, and screw it.
Step 7: Place the decoration cover on the brass adapters.
Step 8: Install the pre-assembled shower to the connections.
Step 9: Connect the shower hose, handheld shower, and rain shower head.
|


.png)


