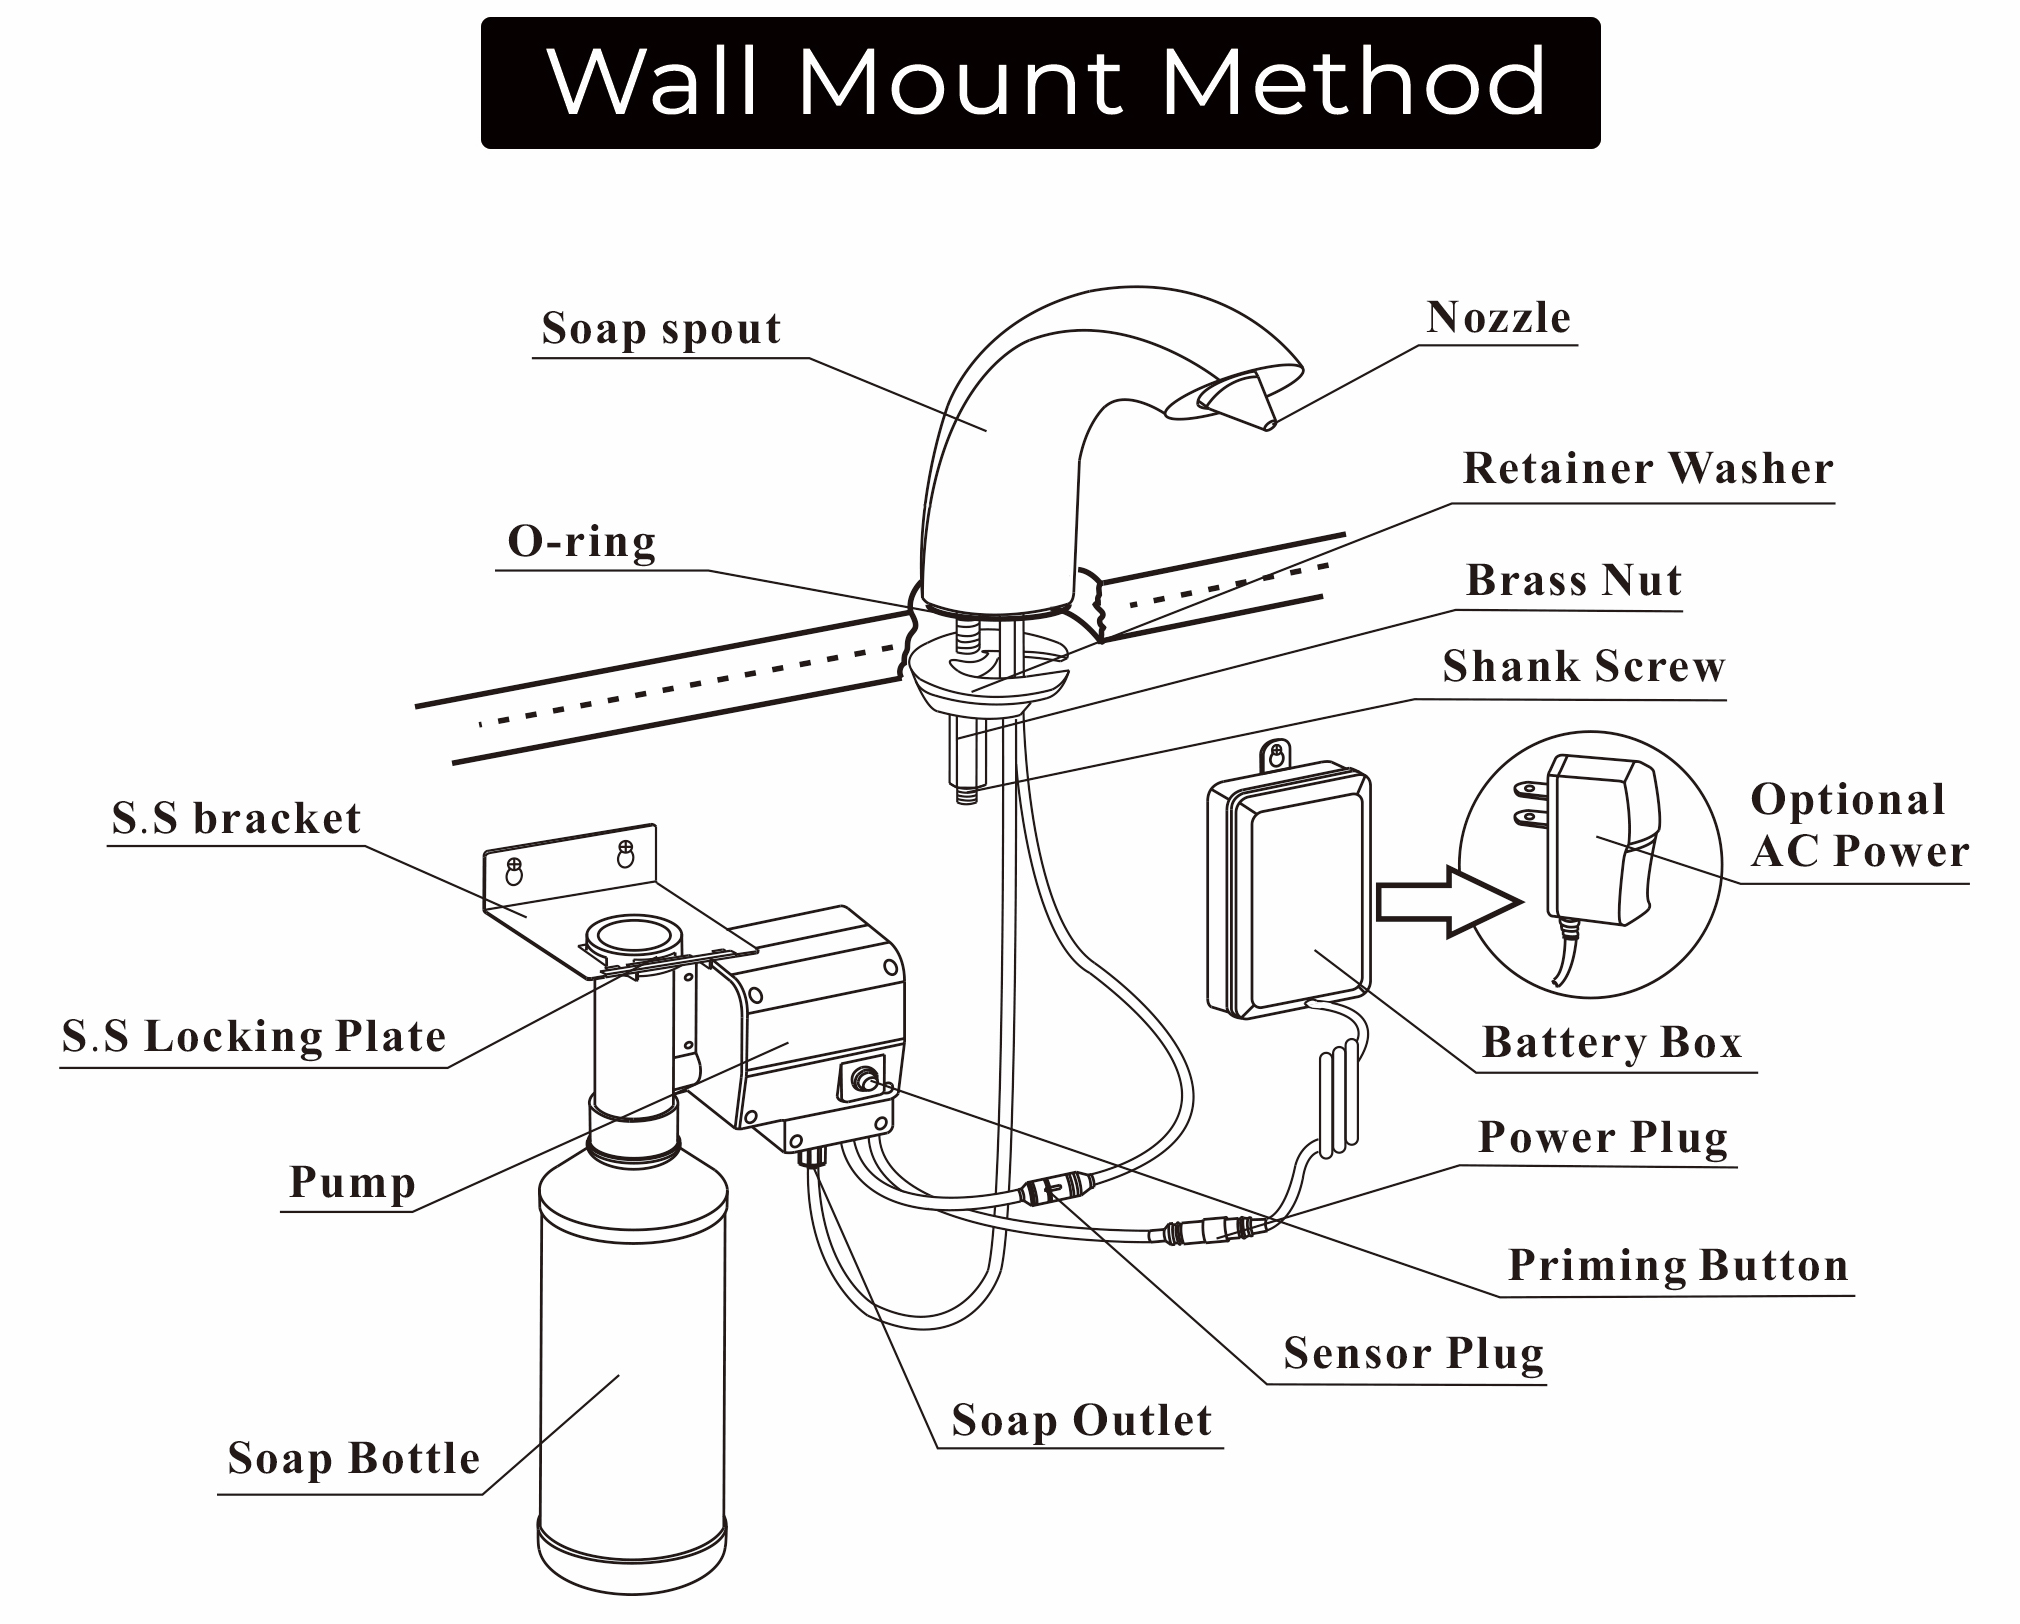
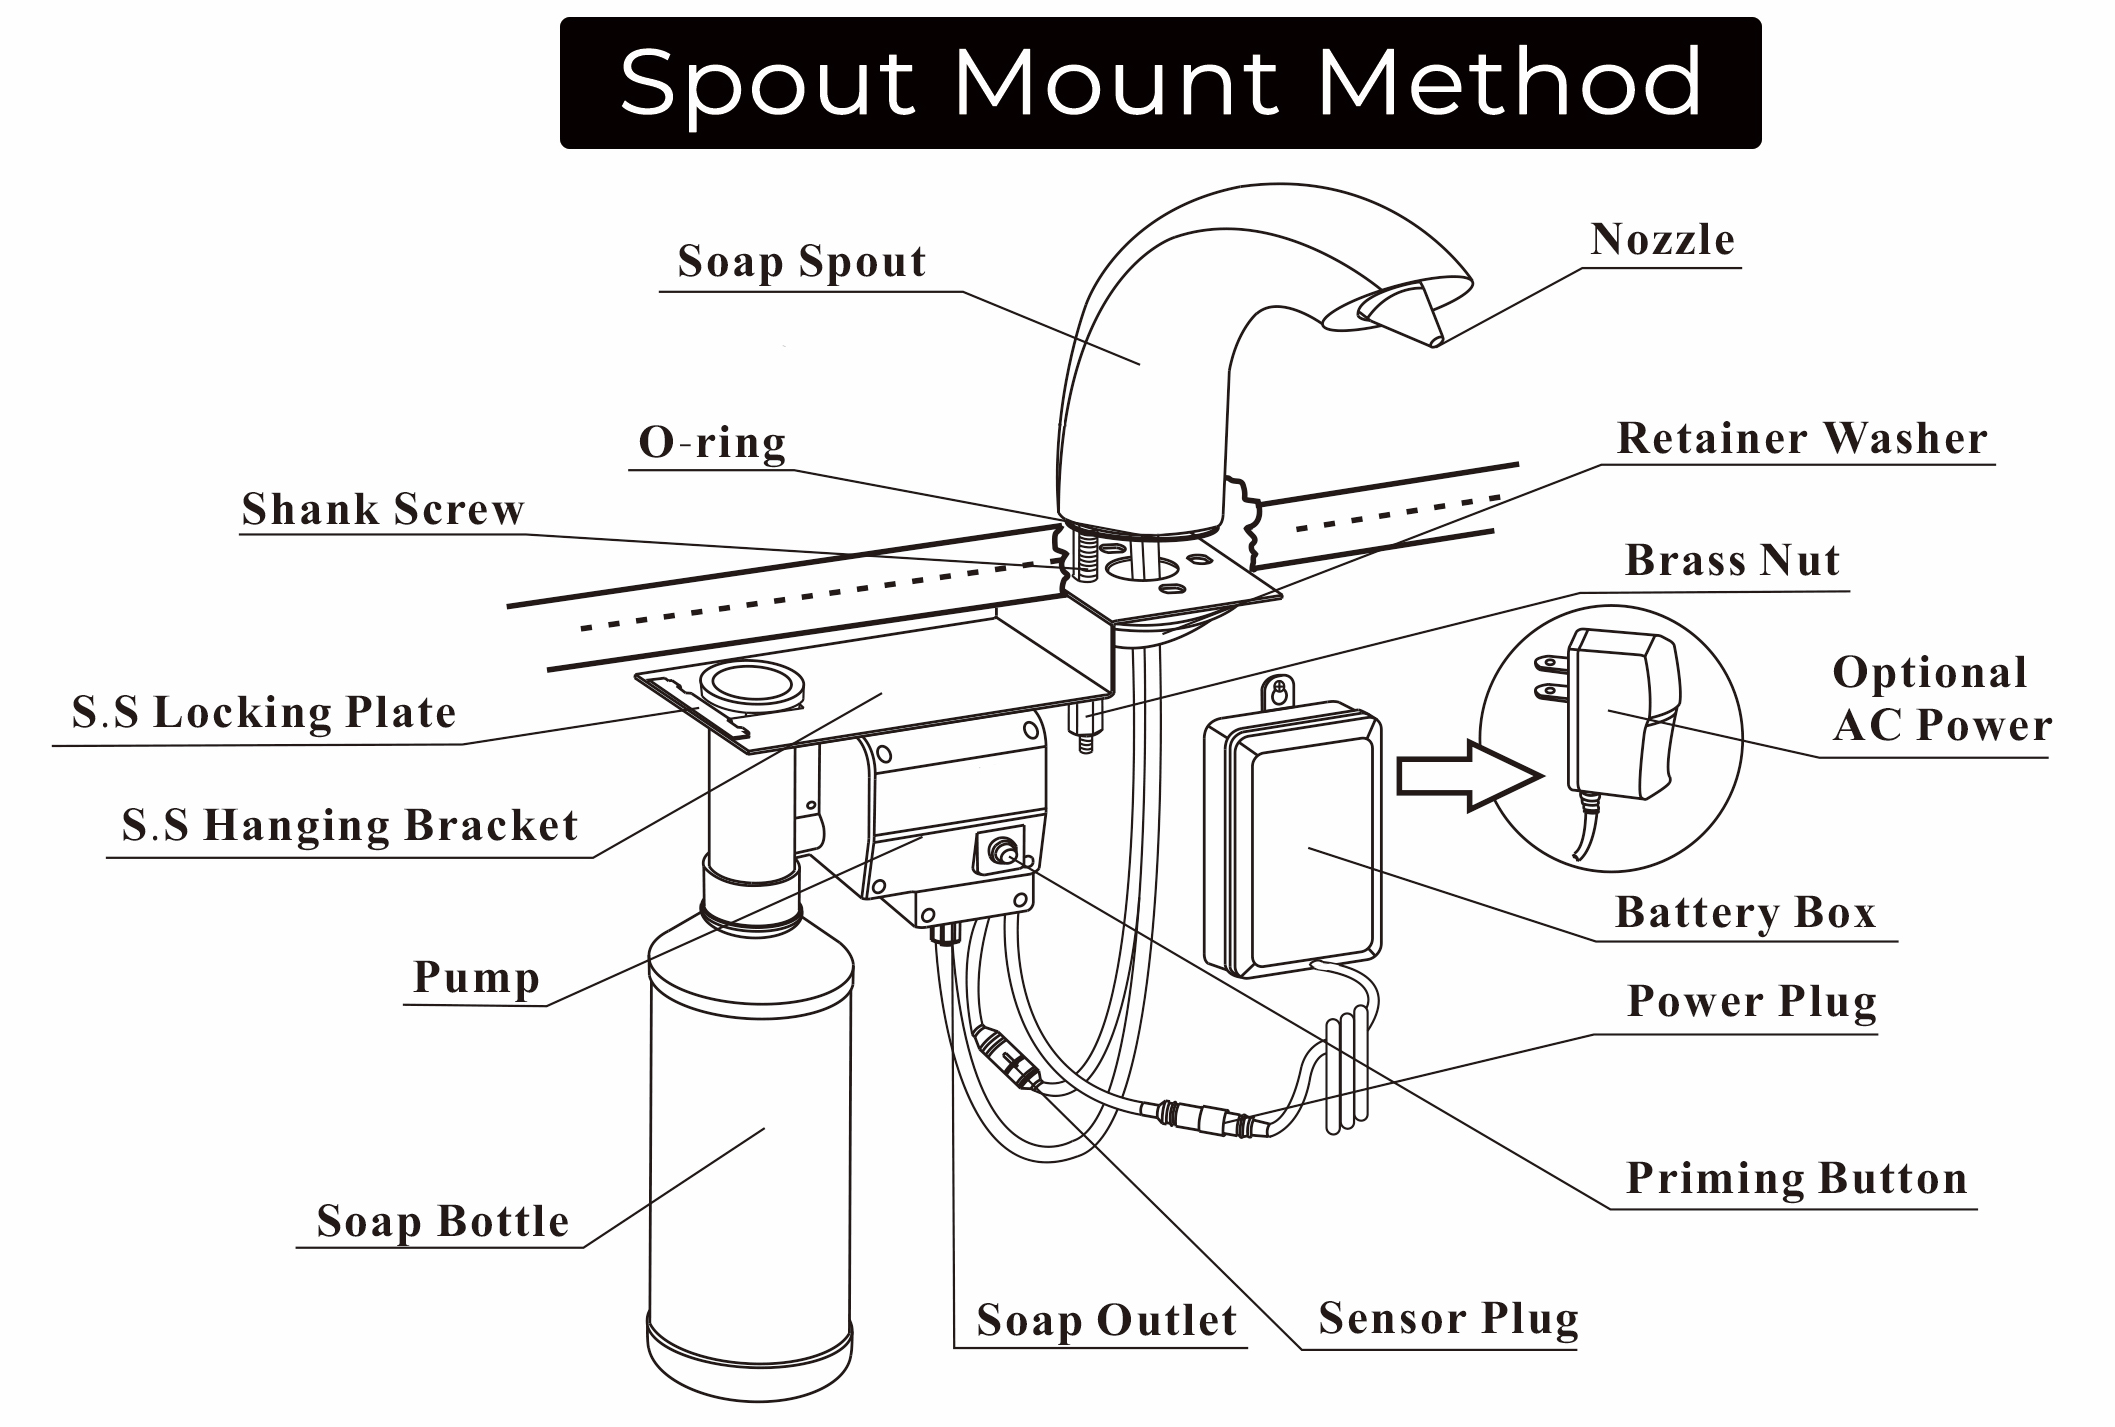
Installation Instructions

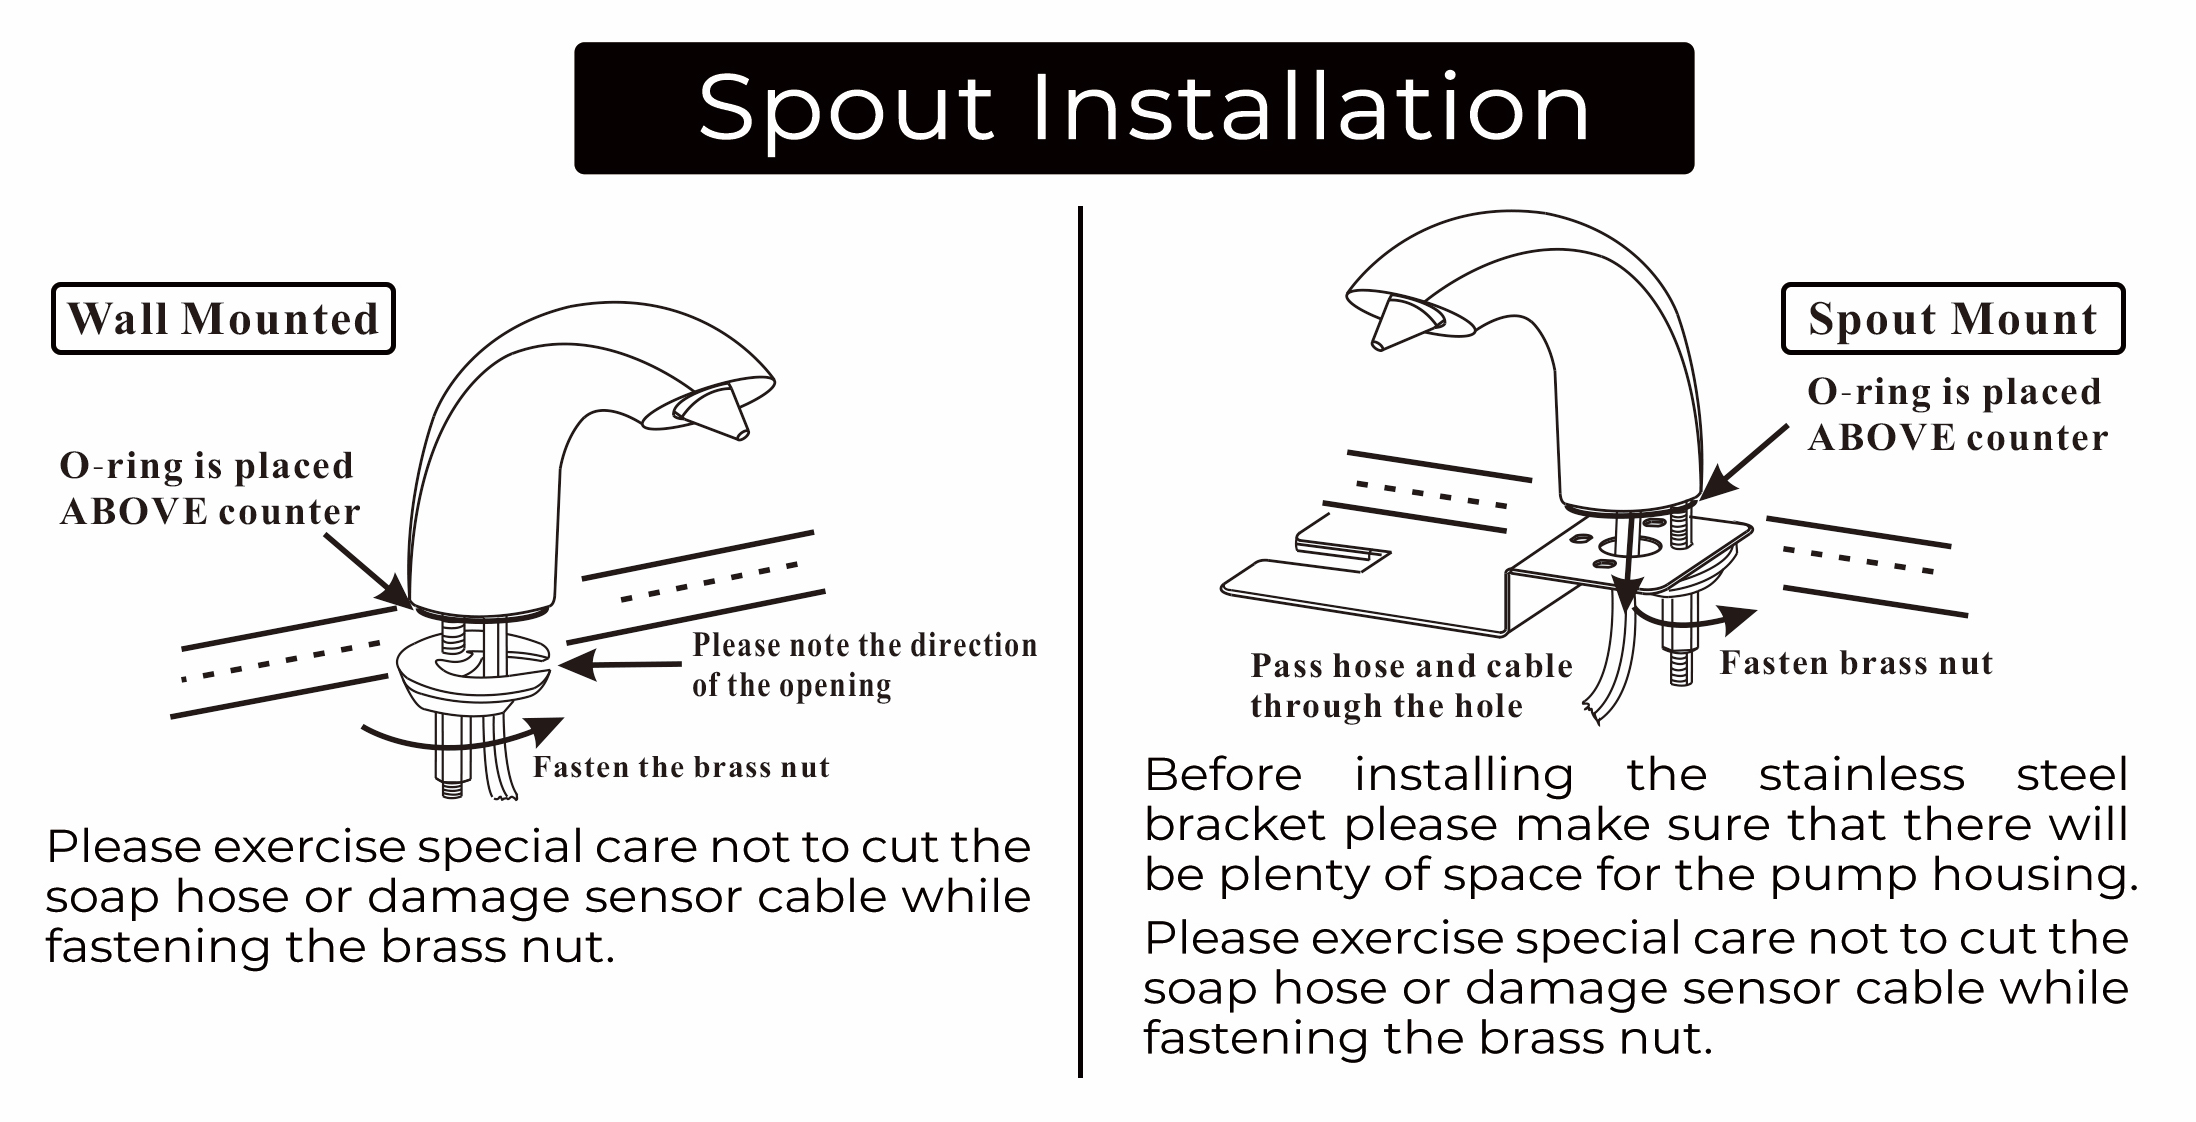
Spout Installation
Wall Mounted
Please
exercise special care not to cut the soap hose or damage sensor cable while
fastening the brass nut.
Spout Mount
Before
installing the stainless steel bracket please make sure that there will be
plenty of space for the pump housing. Please exercise special care not to cut
the soap hose or damage sensor cable while fastening the brass nut.

Pump Installation
Wall-Mounted Method
1.
Mount the S.S bracket on the wall.
2.
Insert the pump onto S.S bracket.
3.
Insert the locking plate into S.S bracket.
Spout Mounted Method
1.
Insert the pump onto S.S bracket.
2.
Insert the locking plate into S.S bracket.
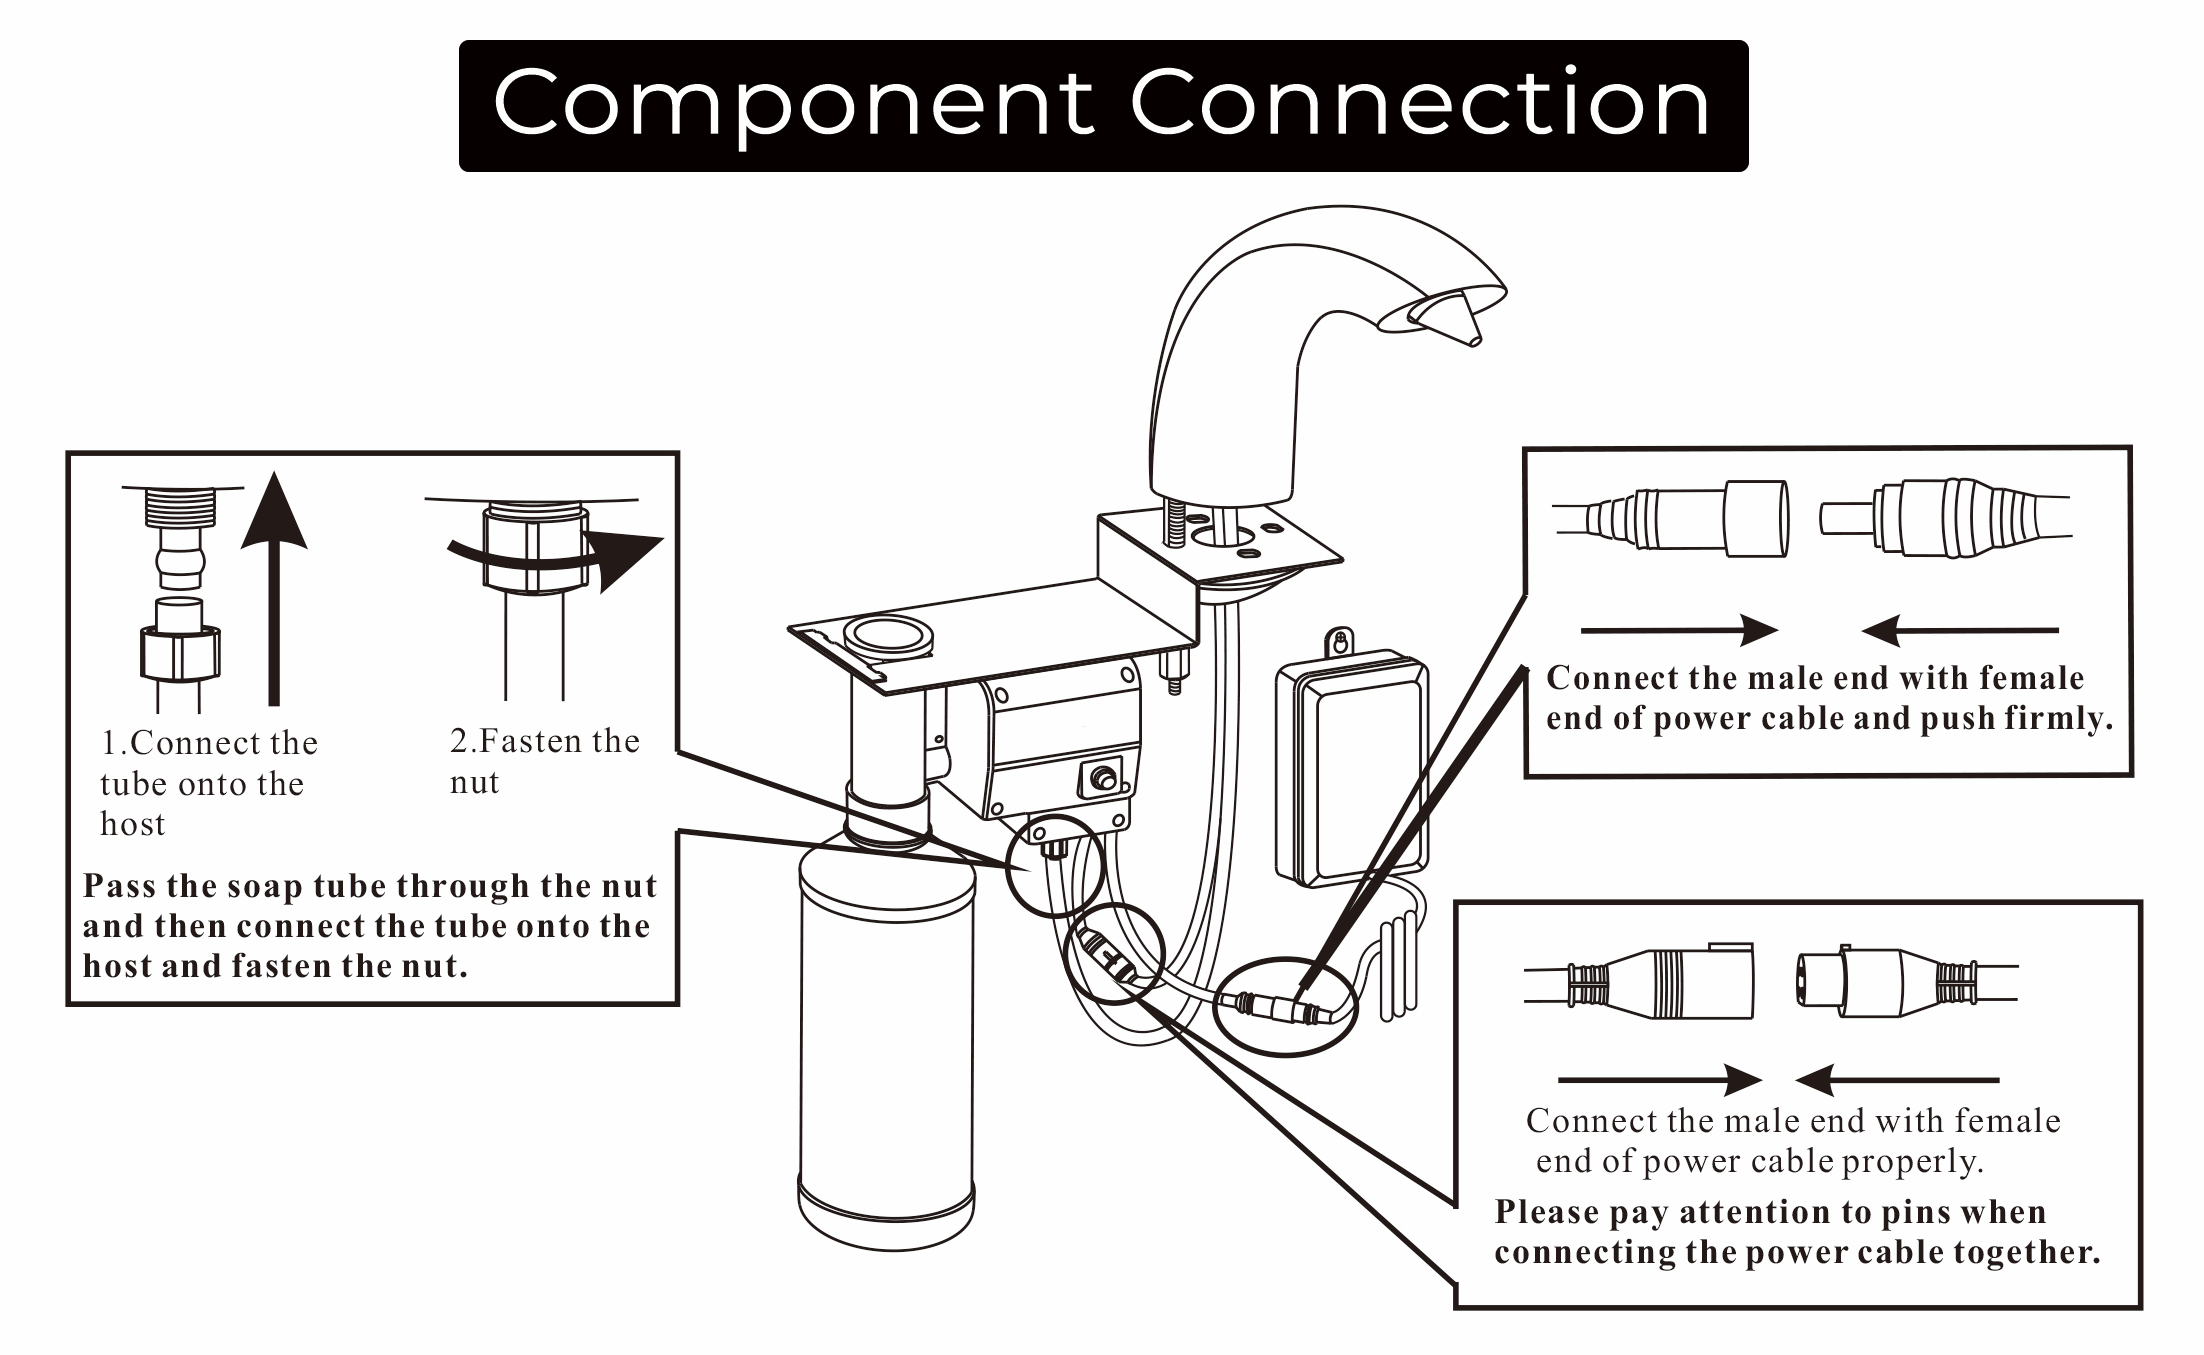
Component Connection
1.
Connect
the tube onto the host.
2.
Fasten
the nut.
Pass
the soap tube through the nut and then connect the tube onto the host and
fasten the nut.
Connect
the male end with female end of power cable and push firmly.
Connect
the male end with female end of power cable properly.
Please
pay attention to pins when connecting the power cable together.

Soap Replacement
Wall Mounted
1.
Unscrew
the empty bottle.
2.
Add
soap into the empty bottle.
3.
Affix
the bottle with full soap onto the pump, and do not over tighten..
Spout Mounted
1.
Unscrew
the empty bottle.
2.
Add
soap into the empty bottle.
3.
Affix
the bottle with full soap onto the pump, and do not over tighten..

Use
1.
Place
hands immediately under soap spout.
2.
Predetermined amount of soap will dispense.
3.
If
more soap is needed, please remove hands & repeat.
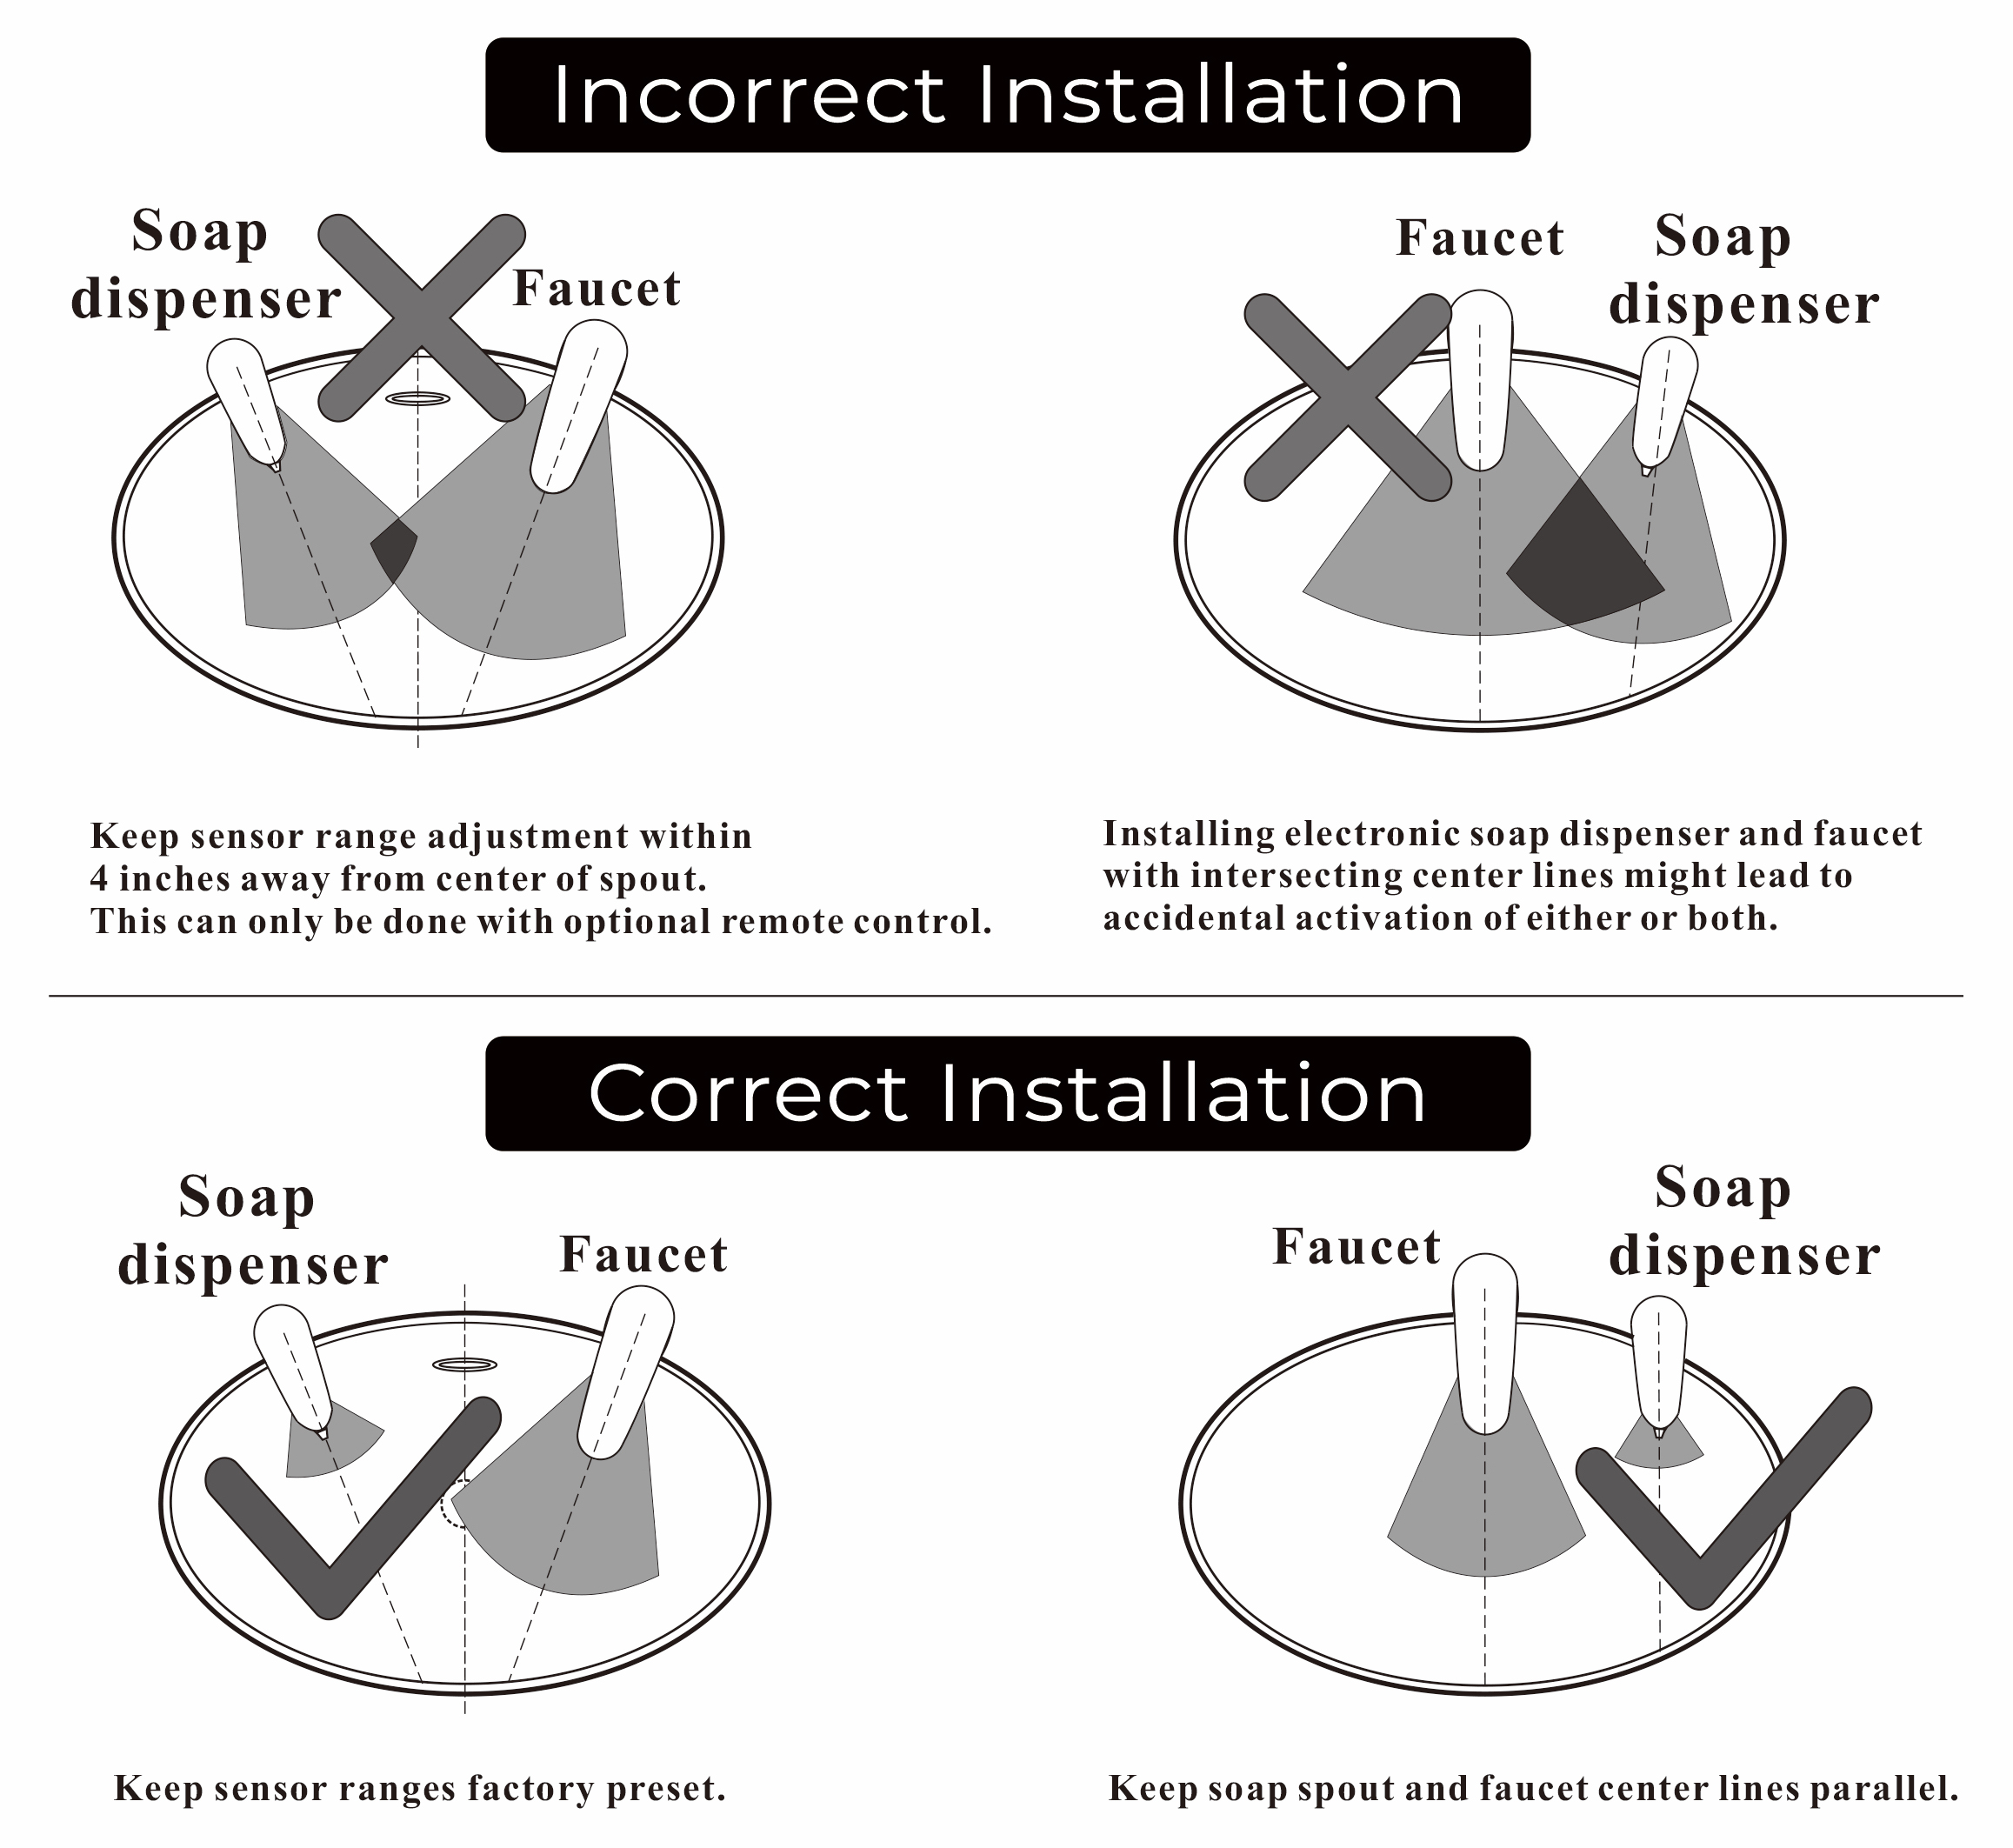
Incorrect Installation
Keep
sensor range adjustment within 4 inches away from centre of spout. This can
only be done with optional remote control.
Installing
electronic soap dispenser and faucet with intersecting centre lines might lead
to accidental activation of either or both.
Correct Installation
Keep
sensor ranges factory preset.
Keep
soap spout and faucet centre lines parallel.
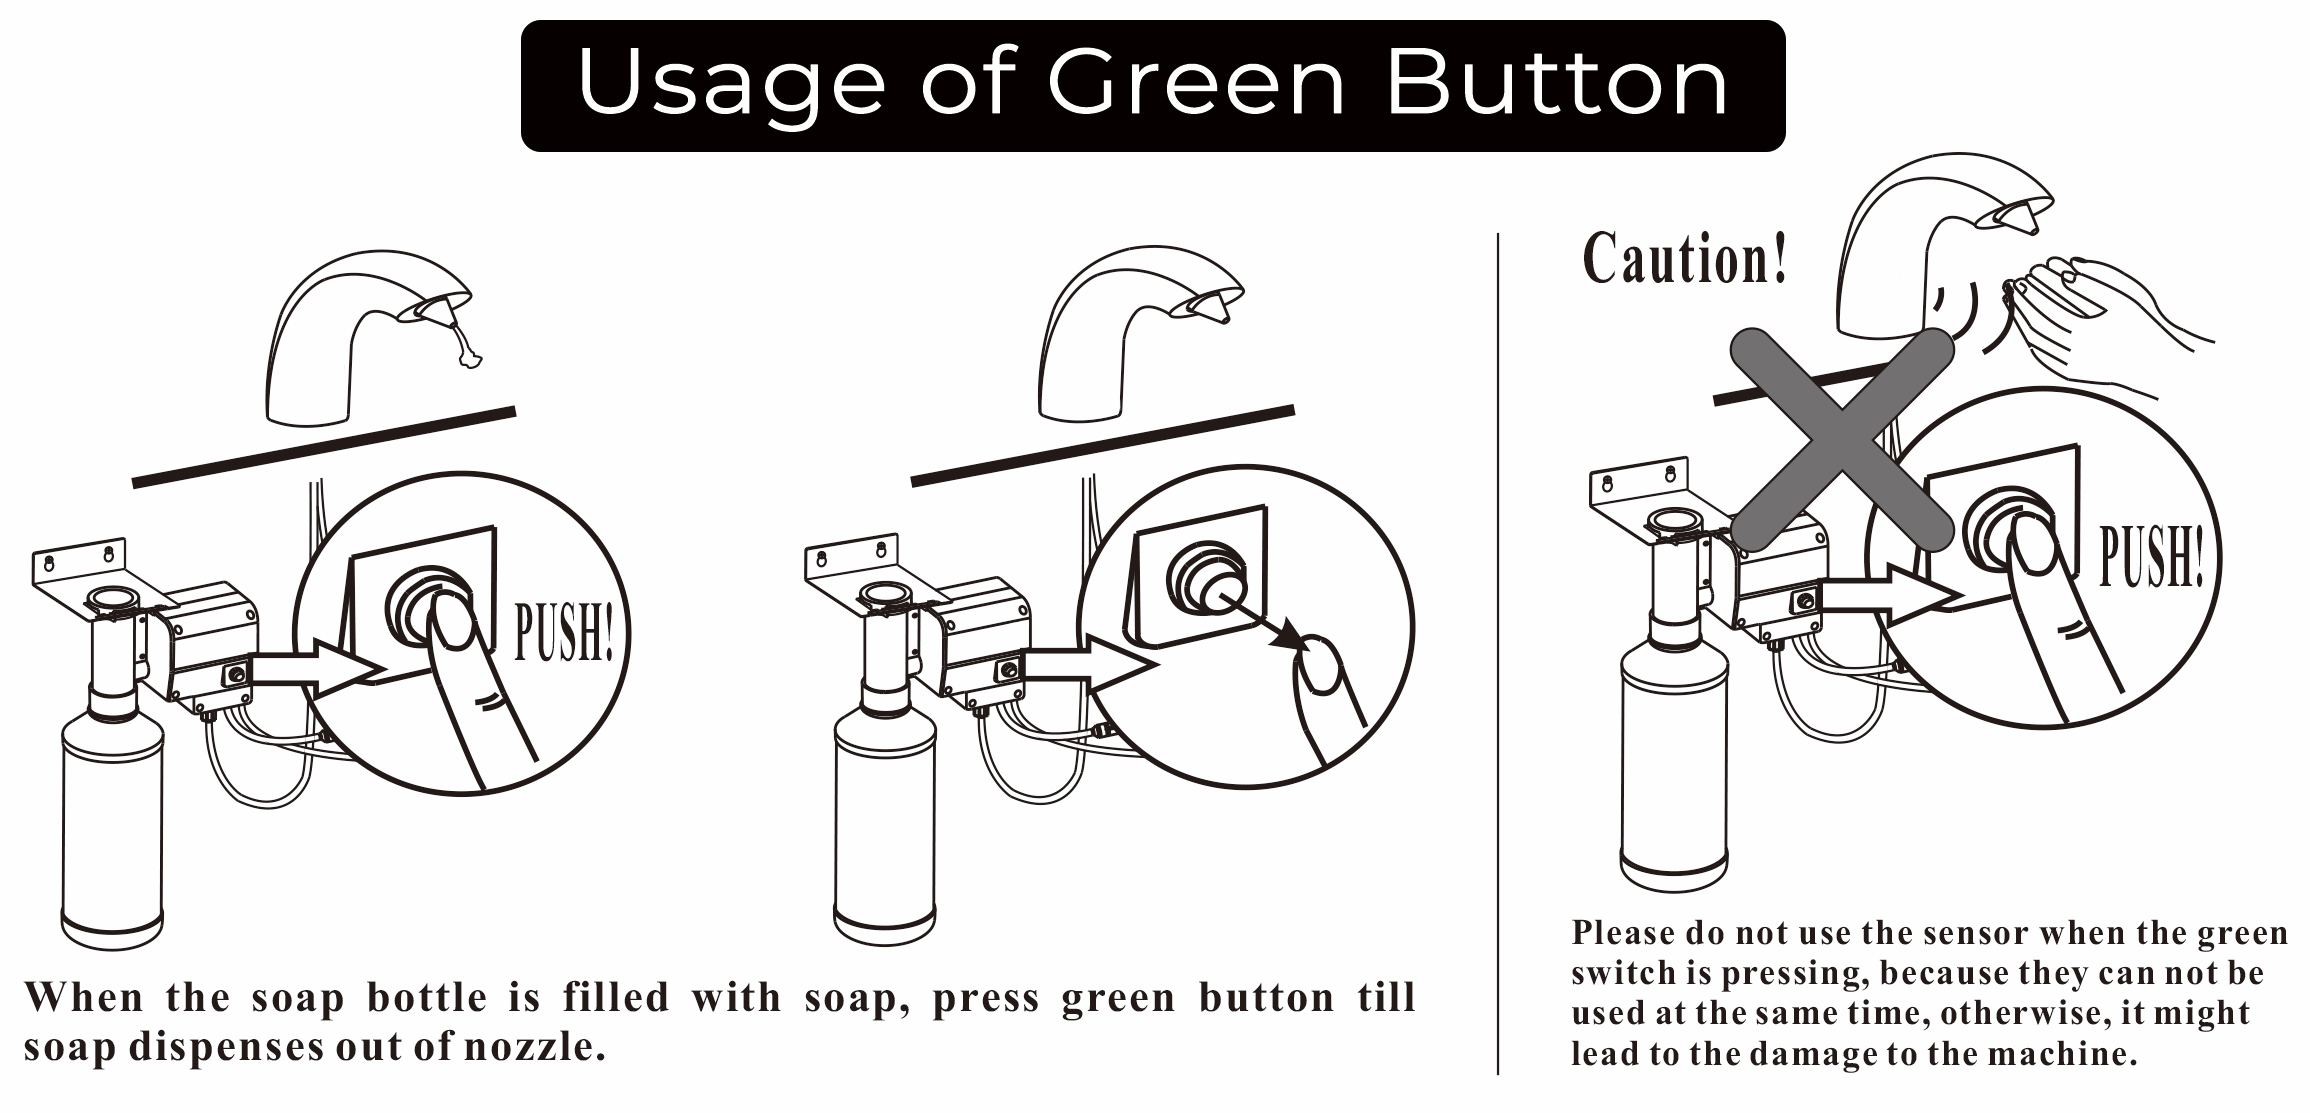
Usage of Green Button
When
the soap bottle is filled with soap, press green button till soap dispenses out
of nozzle.
Please
do not use the sensor when the green switch is pressing, because they cannot be
used at the same time, otherwise, it might lead to the damage to the machine.
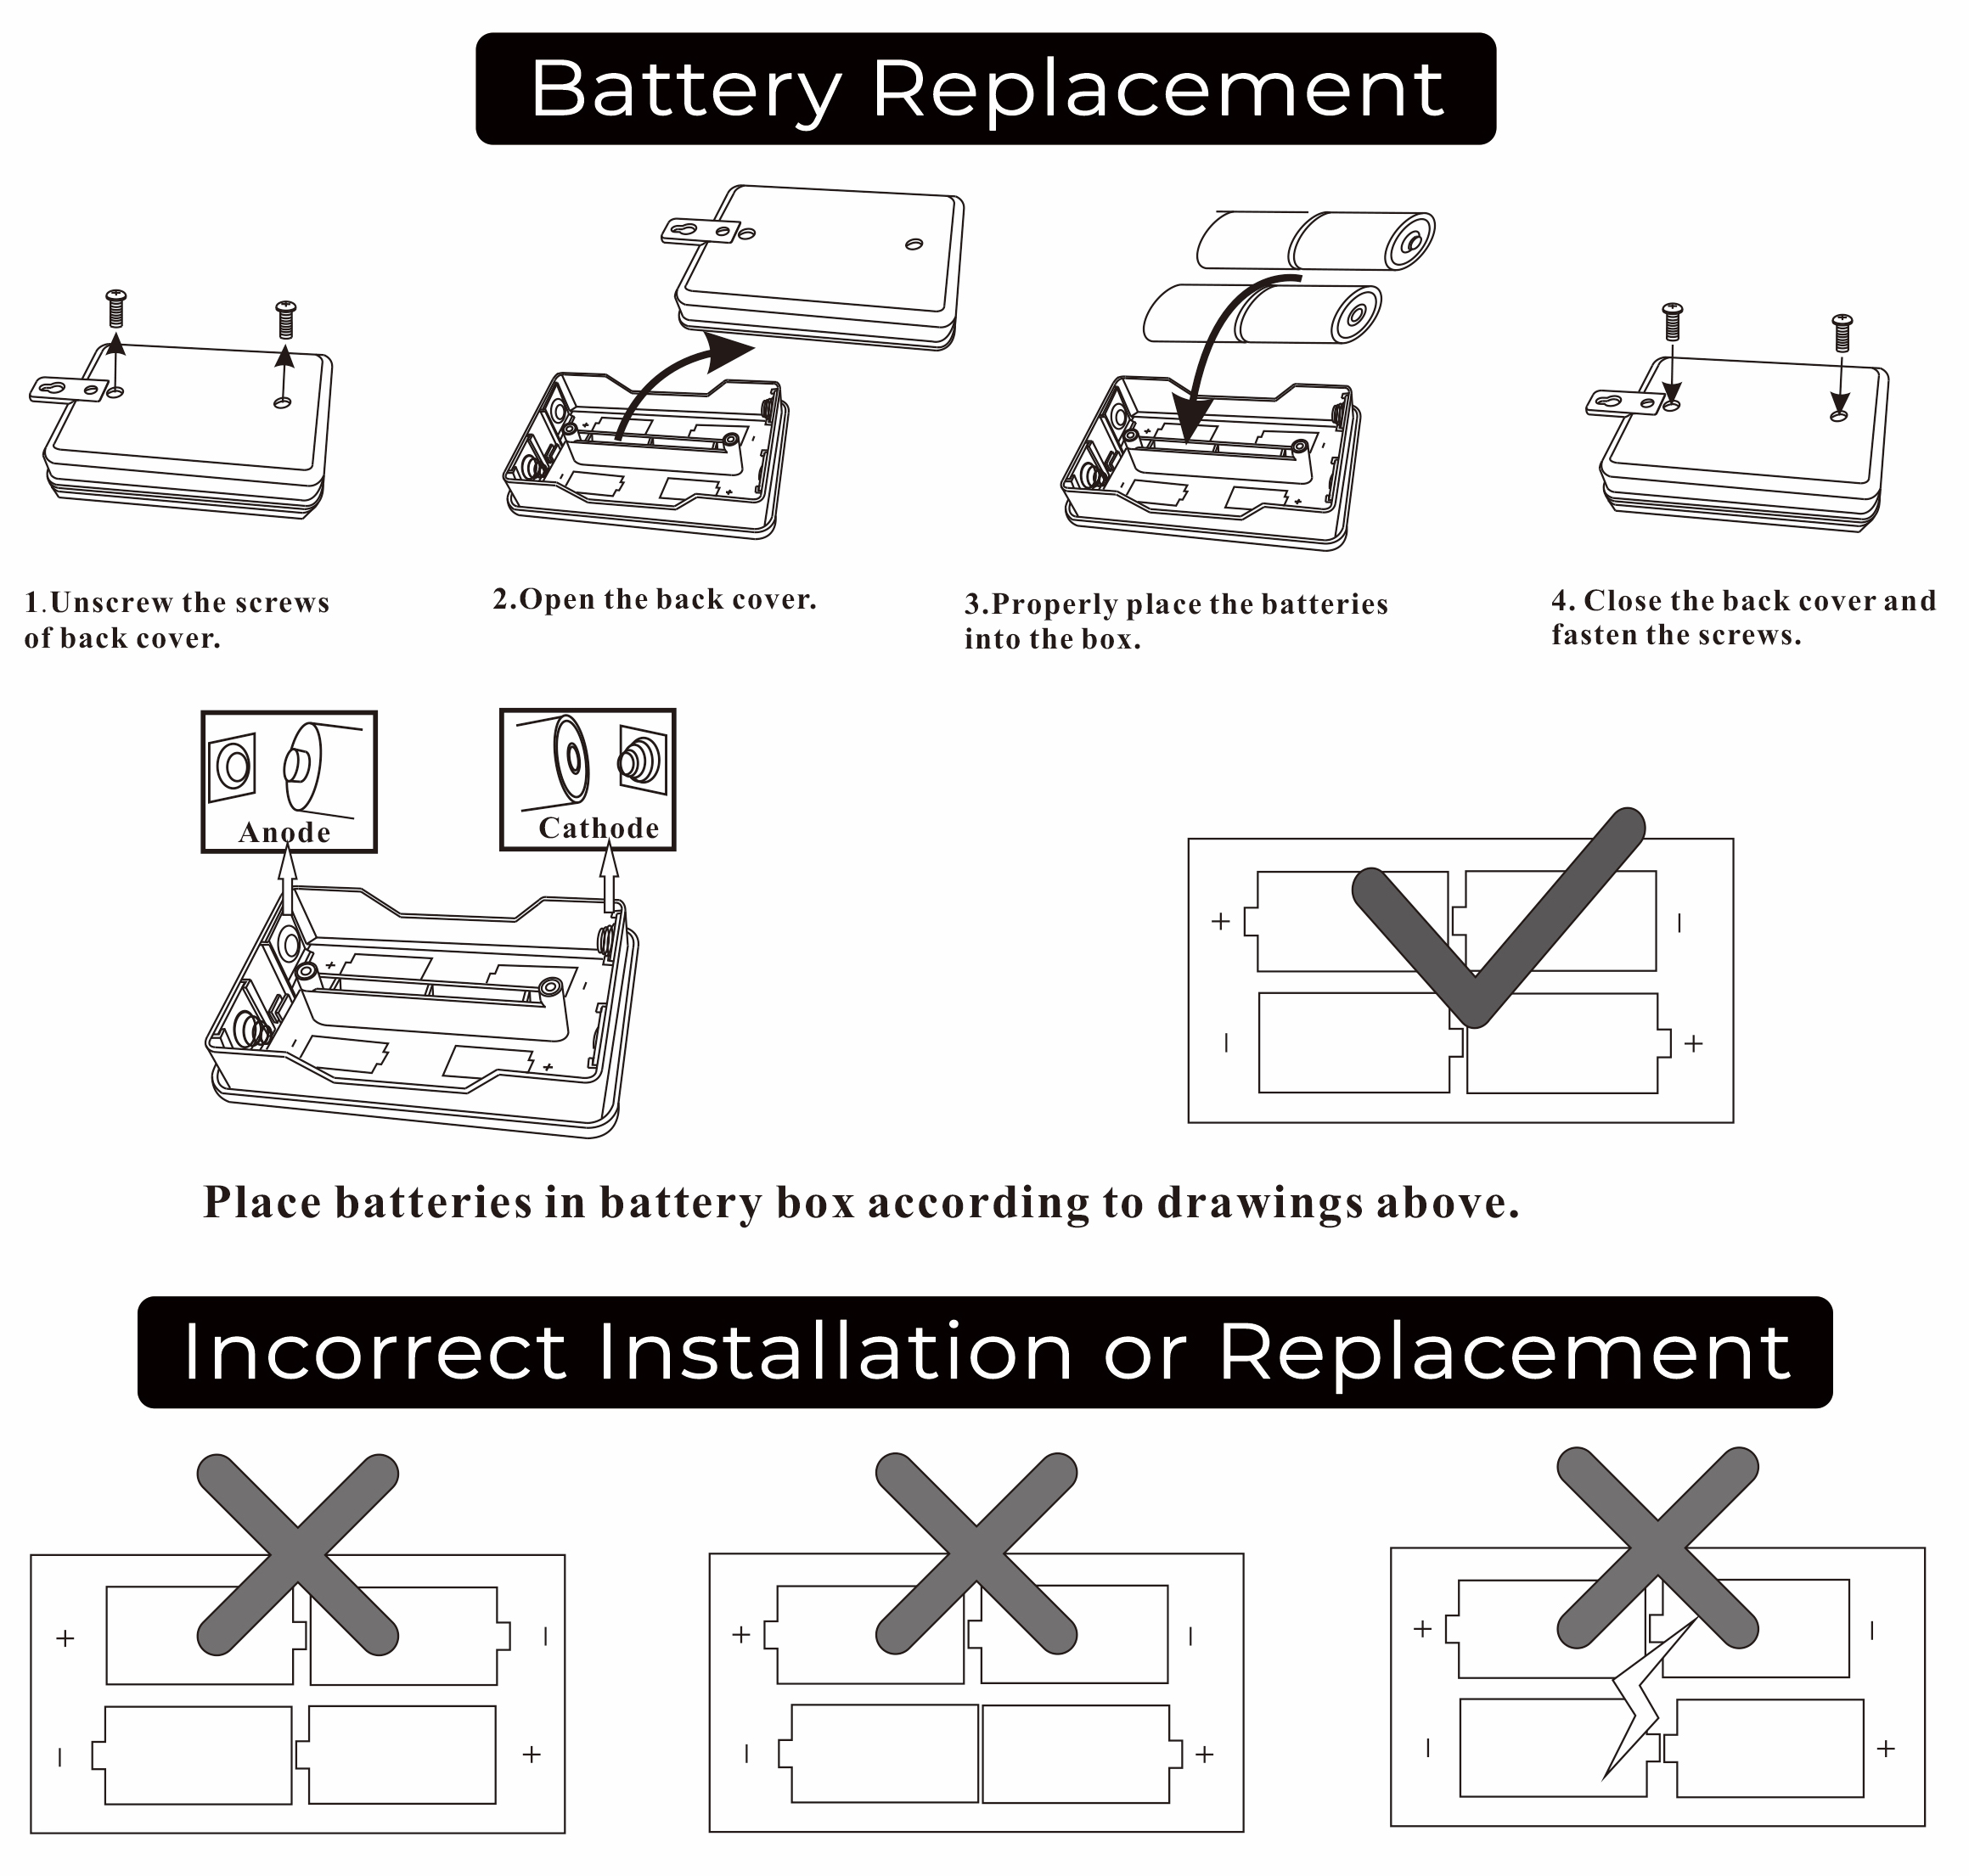
Battery Replacement
1.
Unscrew the screws of back cover.
2.
Open the back cover.
3.
Properly place the batteries into the box.
4.
Close the back cover and fasten the screws.
Place
batteries in battery box according to drawings above.
|