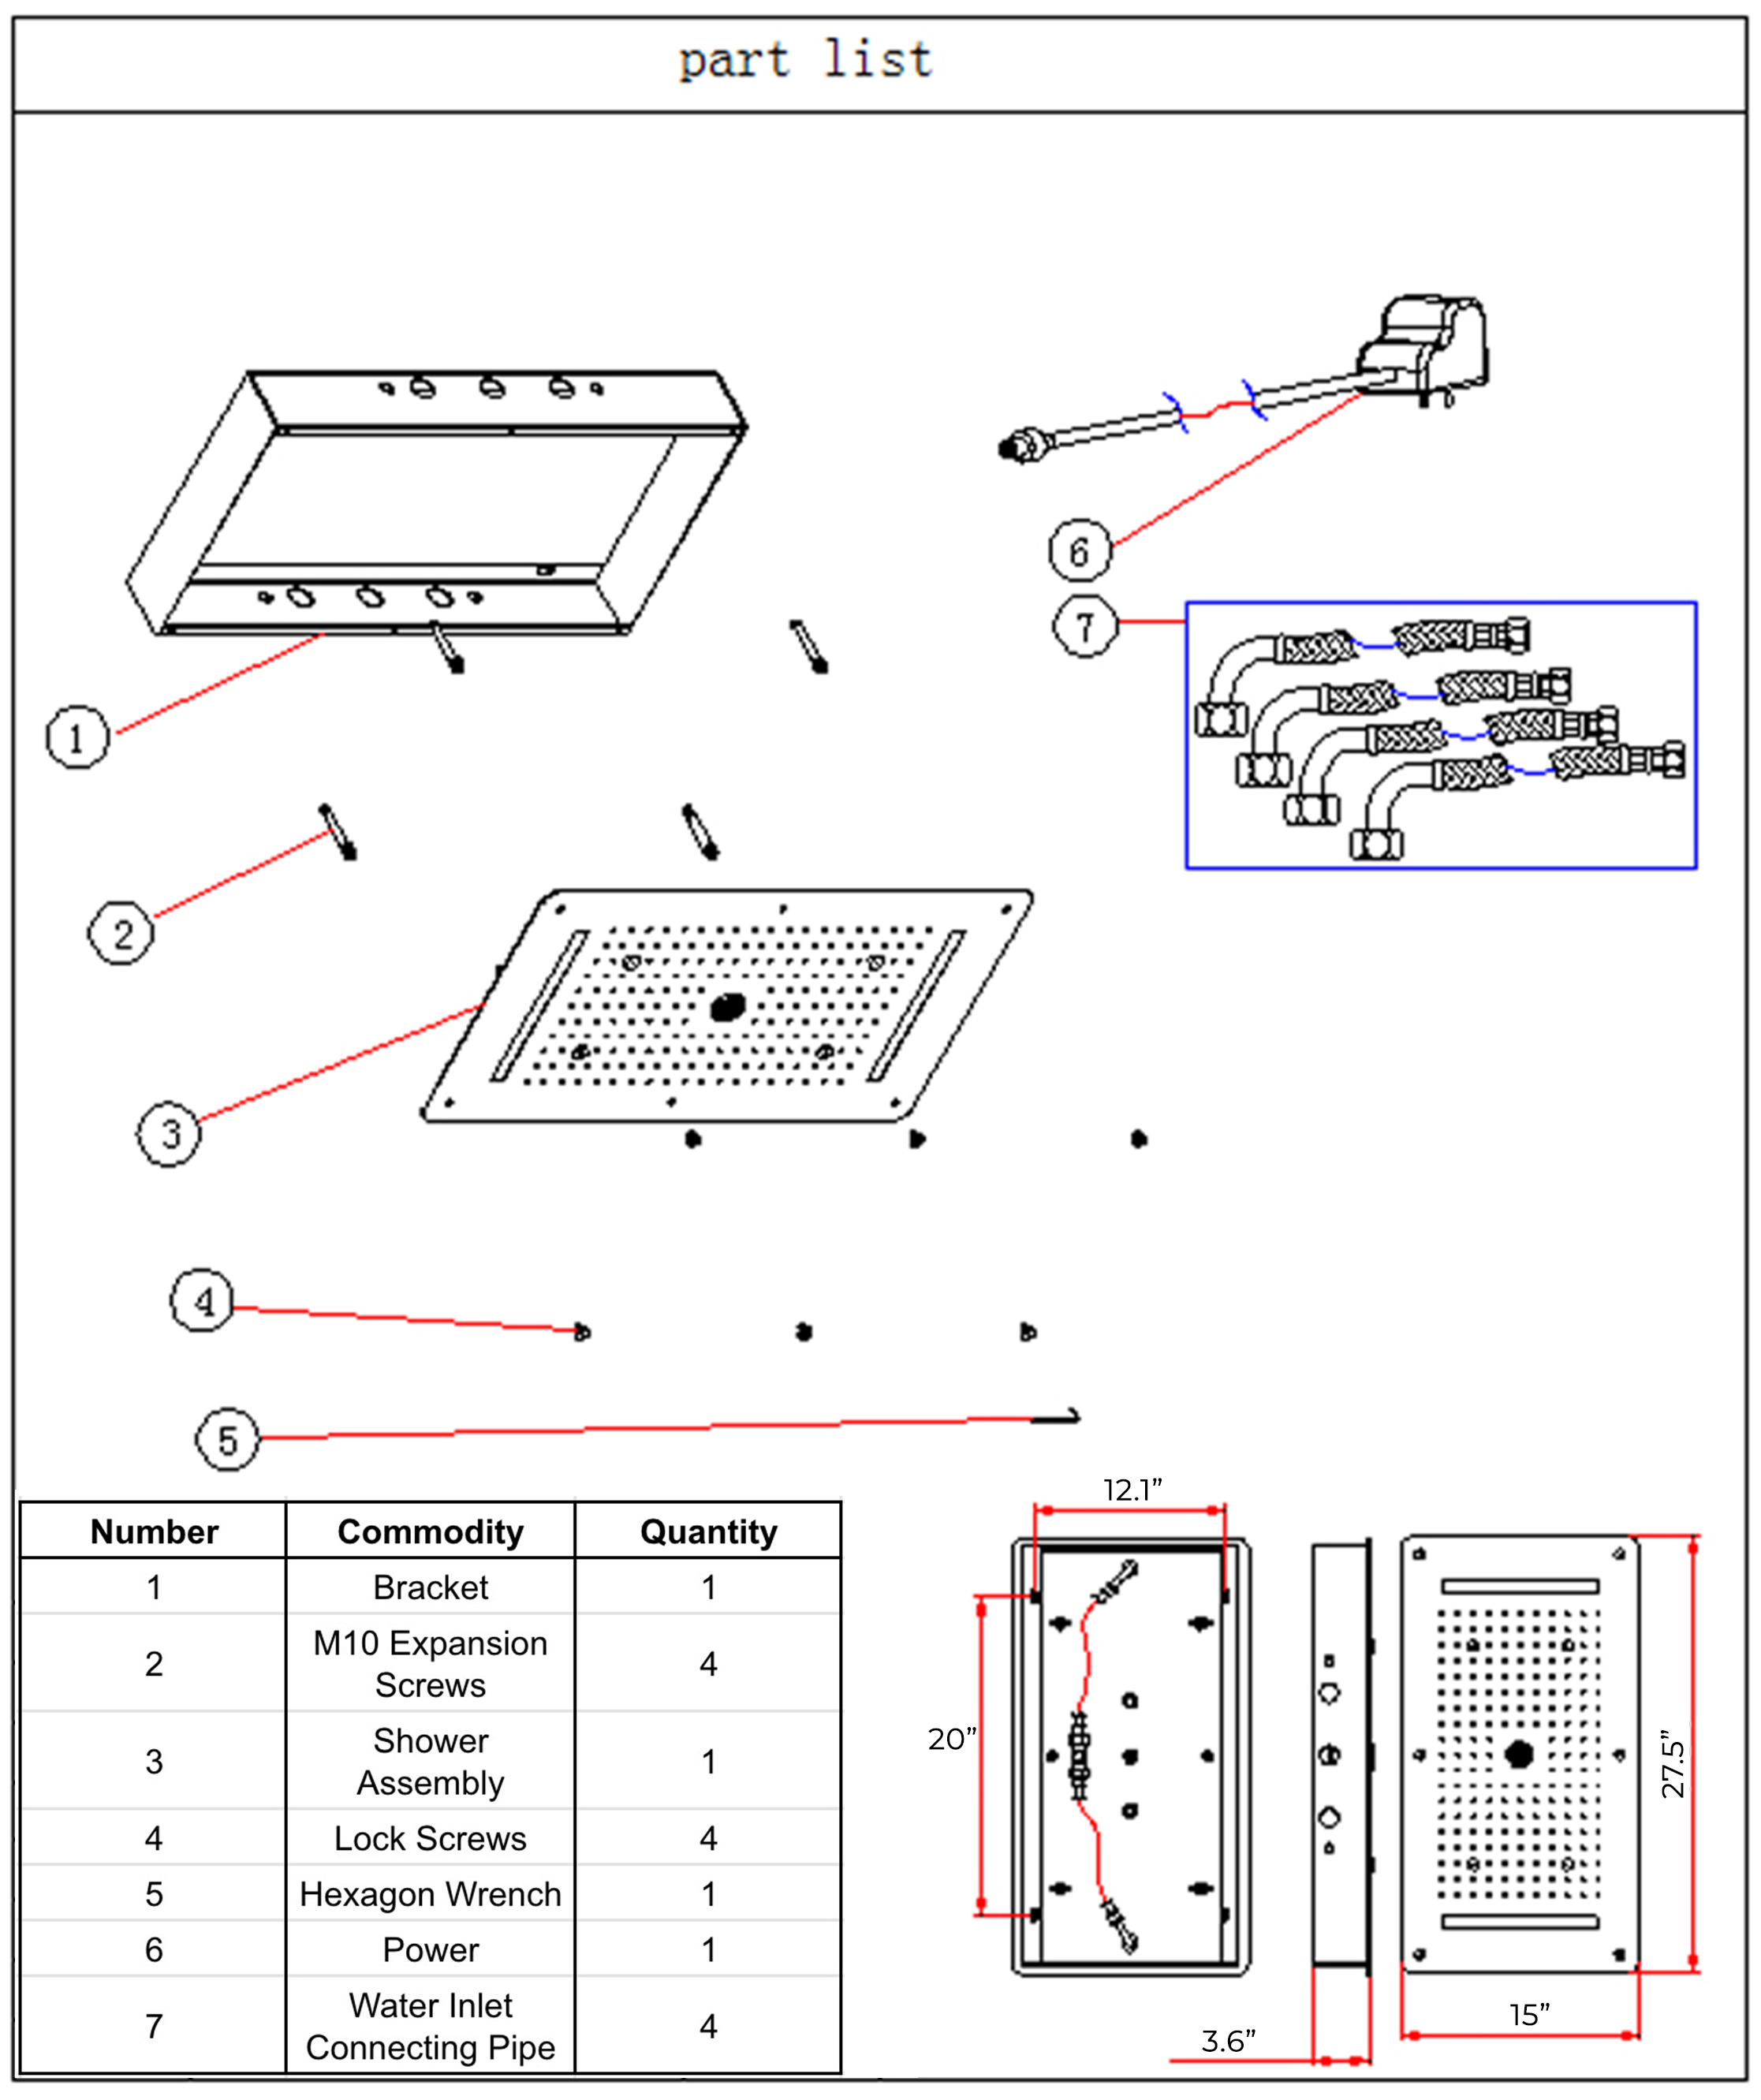
Installation Instructions
Shower
|
No.
|
Name
|
Quantity
|
No.
|
Name
|
Quantity
|
|
1.
|
Bracket
|
1
|
5.
|
Hexagon Wrench
|
1
|
|
2.
|
M10 Explosion
Screw
|
4
|
6.
|
Power
|
1
|
|
3.
|
Shower
Assembly
|
1
|
7.
|
Water Inlet
Connecting Pipe
|
4
|
|
4.
|
Lock Screws
|
4
|
|
|
|
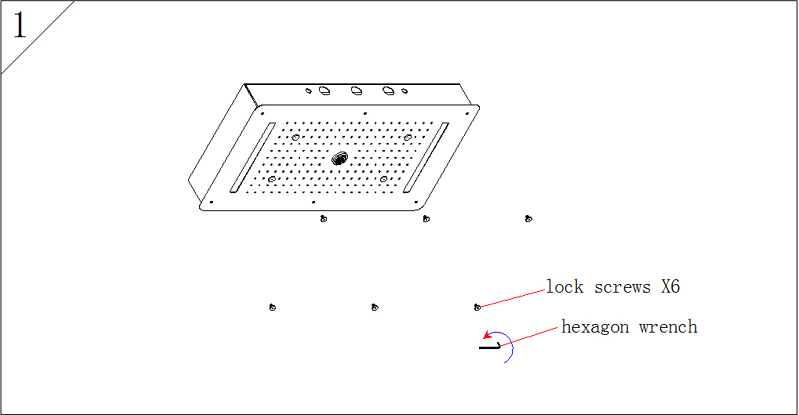
1. Use a hexagon wrench to lose the lock screws then separate the showerhead assembly and bracket.
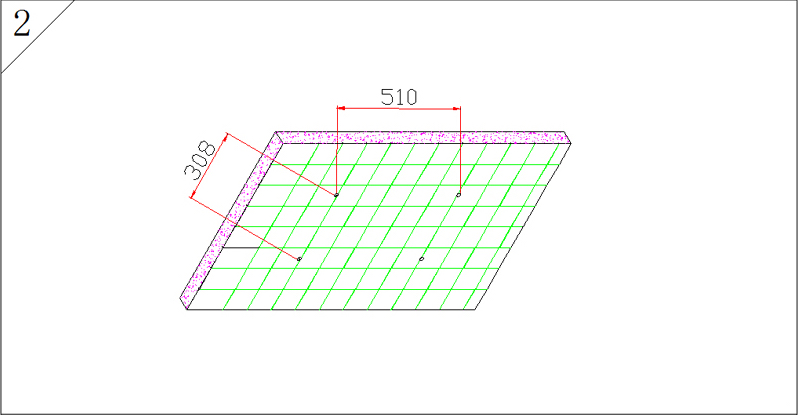
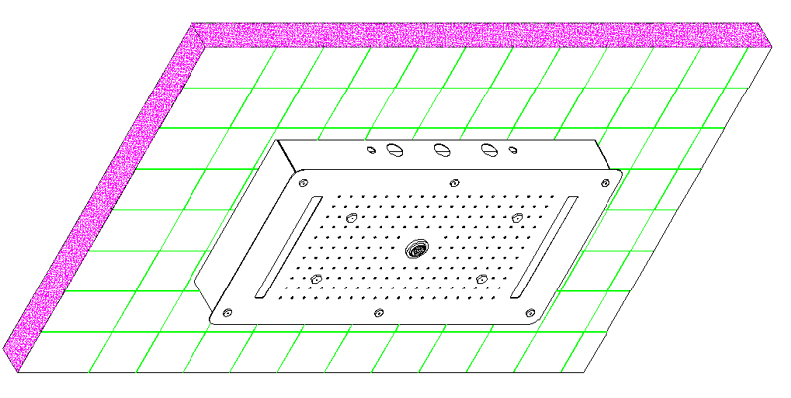
2. Dig 4 Ø10 holes on the ceiling according to the dimension of the screws.
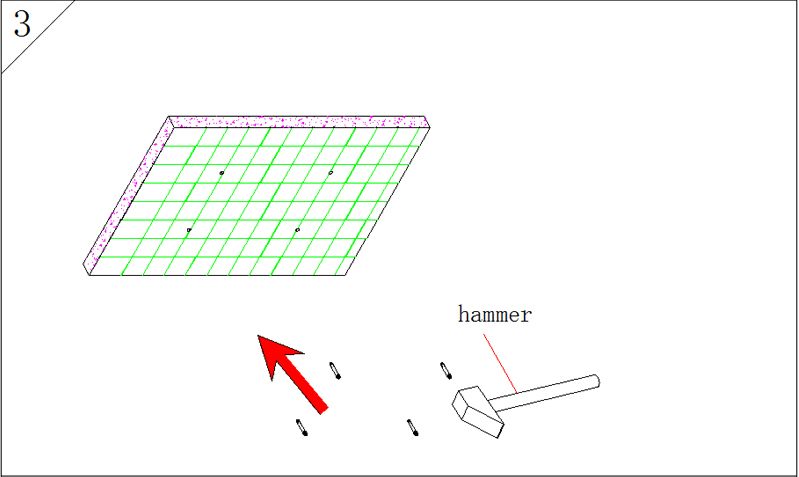
3. Use a hammer to thwack the 4 screws into 4 holes.
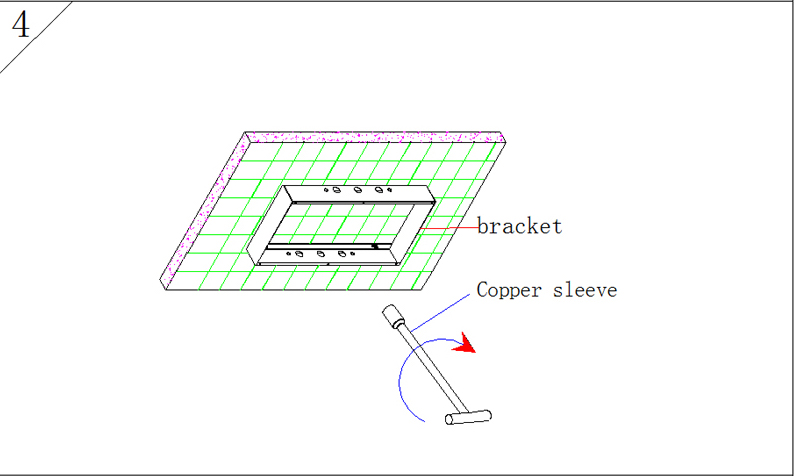
4. Install the bracket on the expansion screws then use copper sleeve wrench to lock 4 screws.
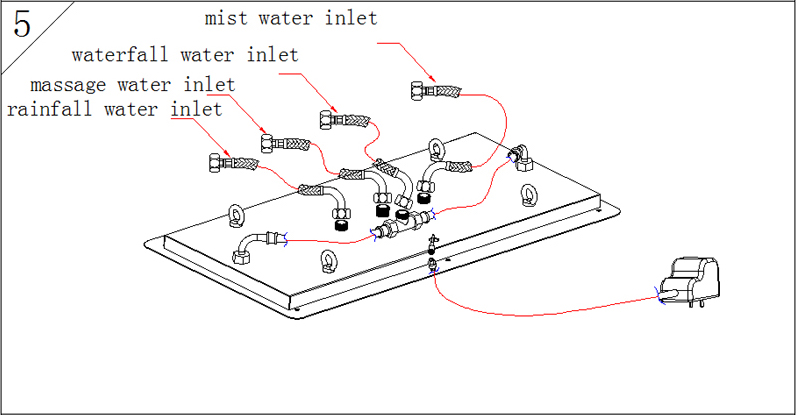
5. Make sure all the water inlet pipe connected well without leaking before insert the power plug into the socket.

6. Fix the shower assembly on the bracket by turn the locking bolt.
|