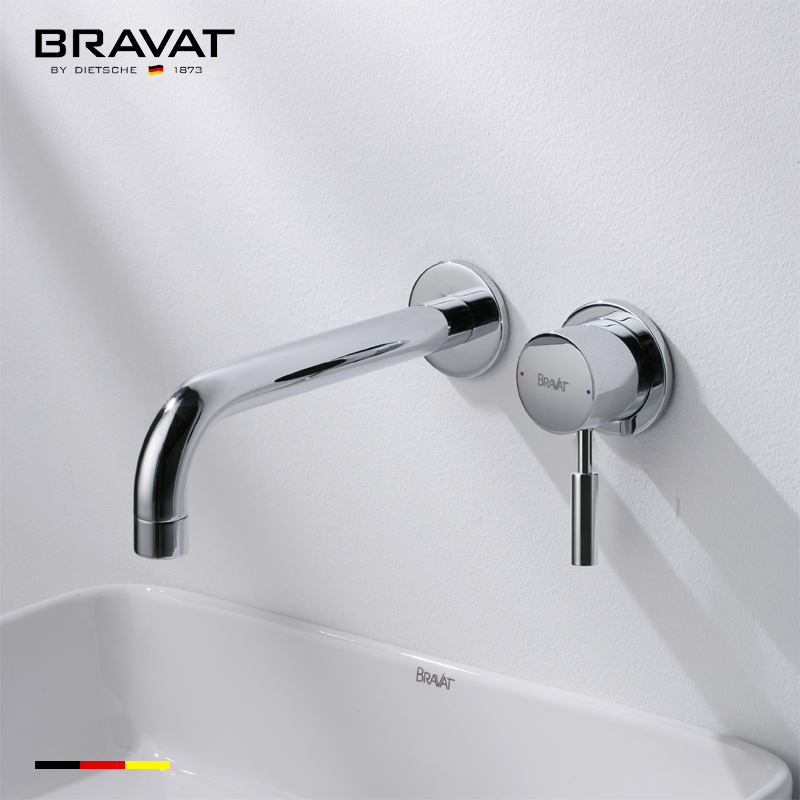
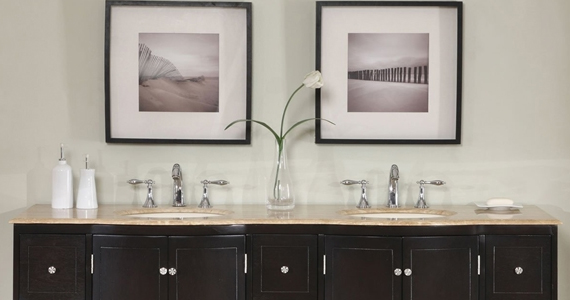
The Bravat Chrome Finish Wall Mount Faucet With Single Handle Installation
Bravat Chrome Finish Wall Mount Faucet With Single Handle
This Bravat faucet comes in Chrome finish with Single handle.It is very easy to install and it can be installed as Wall Mount faucet.This Bravat faucet looks elegant and elevates the appeal of your decor,made to the highest quality and for great tastes.It comes with eaturing patented super seal technology inside, capable of delivering superior performance. It is drip free, leak free, & rust free and comes with a Five year product warranty. This amazing faucet combines the smooth-flow,neo-perl aerator water and air to create a foam flow; creates a voluminous effect without wasting a single drop of water.It embodies an illustrious look and outstanding quality with elegant cuts and a gleaming finish that take it a notch above the rest. Miles ahead with its exquisite design.It redefines your bathing space with its unique blend of design and everlasting quality.
Bravat Chrome Finish Wall Mount Faucet With Single Handle Features
- Brand Name : BRAVAT
- Surface Finish : Brass
- Surface Treatment : Bright Chrome
- Number of Handle : Single Handle
- Style : Contemporary
- Valve Core Material : Ceramic
- Feature : Wall Mount
- Material : Brass, 59% A+Brass
- Finish : Chrome Finish
- Installation Type : Wall Mount
- Plating Thickness: 10um
- Plating Technology: PVD
- Usage: Bathroom / Sink/ Kitchen
- Hot & Cold Water Mixer : Yes
- Fitting Thread : Standard G1/2''
- Air Technology : Air Mix Technology
|

|
BathSelect® Manufacturer Warranty Information
|
|
Installation Instruction
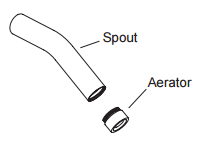
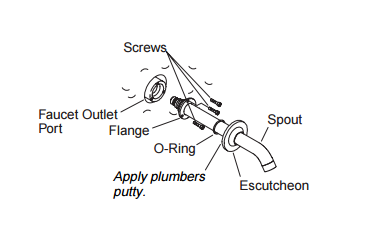
1. Install the Spout
IMPORTANT! Use care when installing the spout to avoid scratching the finish.
- Thread the spout into the spout shank until it is snug. If needed, adjust the spout slightly to position it so it points straight down.
- Secure the spout in place by tightening the flange with the screws provided. Confirm that the O-ring is inside the escutcheon.
- Apply plumbers putty or other sealant to the back surface of the spout escutcheon according to the putty manufacturers instructions.
- Carefully slide the spout escutcheon over the spout and press firmly against the finished wall.
- Remove any excess putty or sealant
2. Install the Handles
NOTE: If the finished wall is less than 5/8″ (1.6 cm) thick, no spline adapter will be used with the installation.
|
|
|