|
Step 1:
|
|
Step 2:
|
|

|
faucet
|

|

|
|
|
|
|
|
|
Step 3:
|
|
Step 4:
|
|

|
|

|
|
|
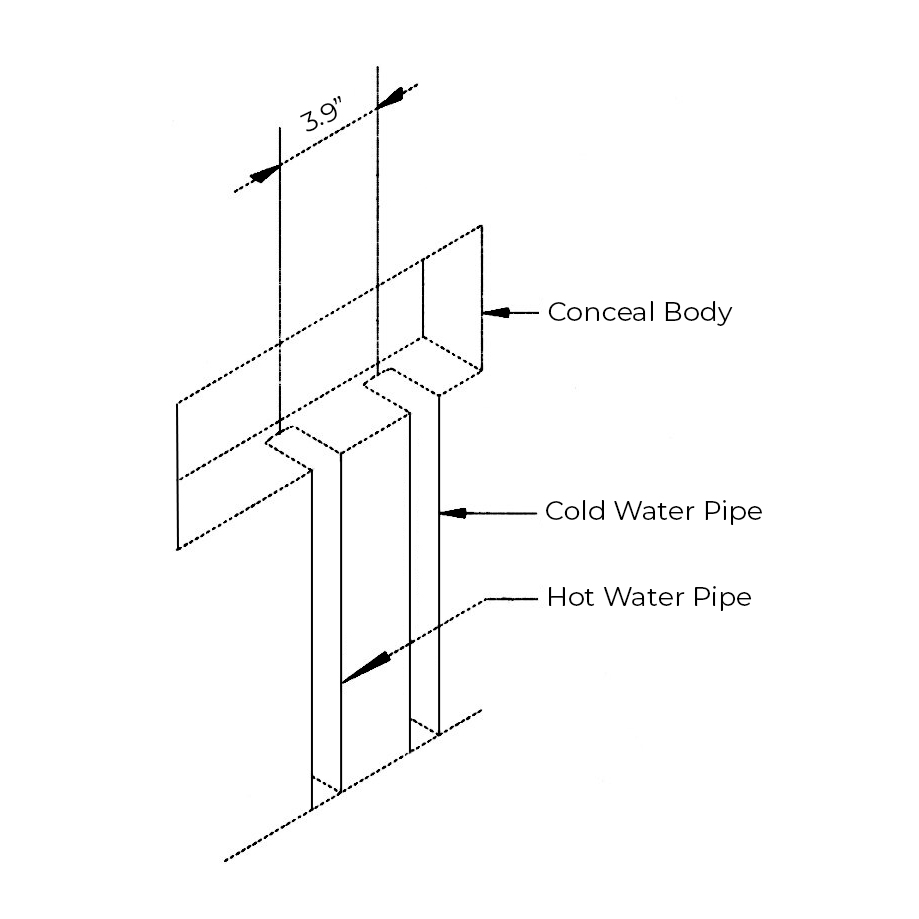
Drill the wall as the above drawing according to the dimensions of the faucet. They include the main body conceal the hole. Coldwater pipe, hot water pipe hole.
|
|
Fix the faucet body in the inner wall. Connect it with cold water and hot water pipe, and turn on the water supply to confirm its no leakage. After adjusting use azimuth, use the concrete close cover the pipeline.
|
|
|
|
|
|
|
Step 5:
|
|
Step 6:
|
|

|
|

|
|
|
Install the cover, and then install the handle to the faucet body.
|
|
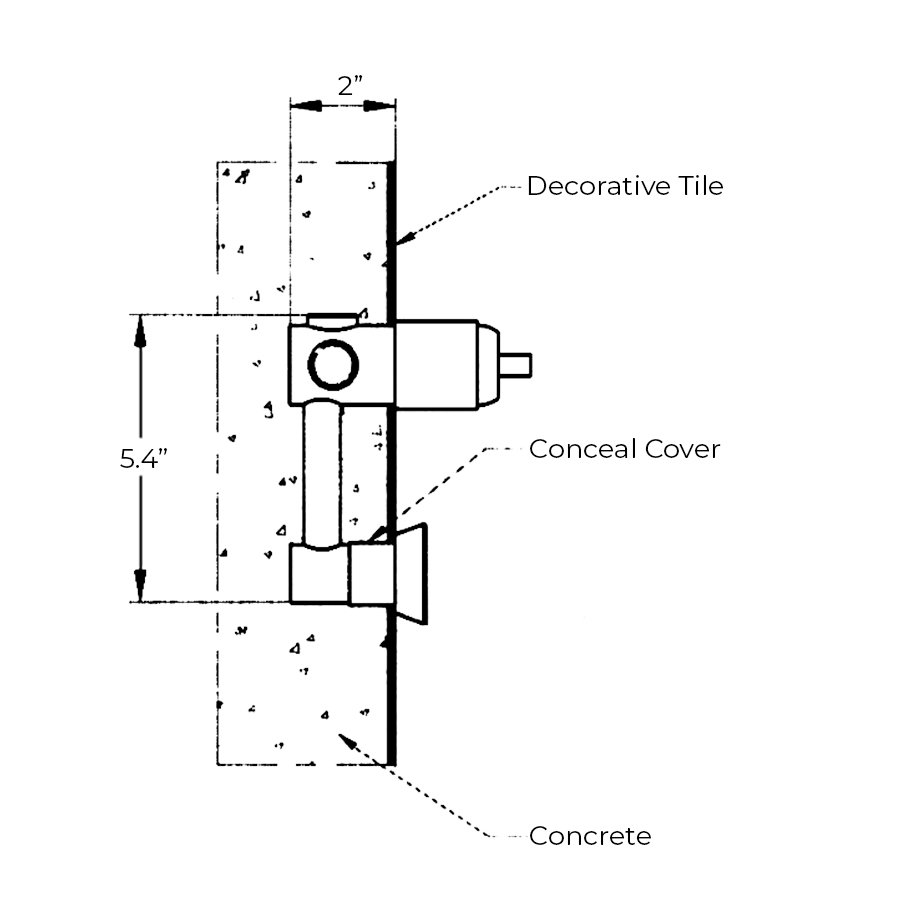
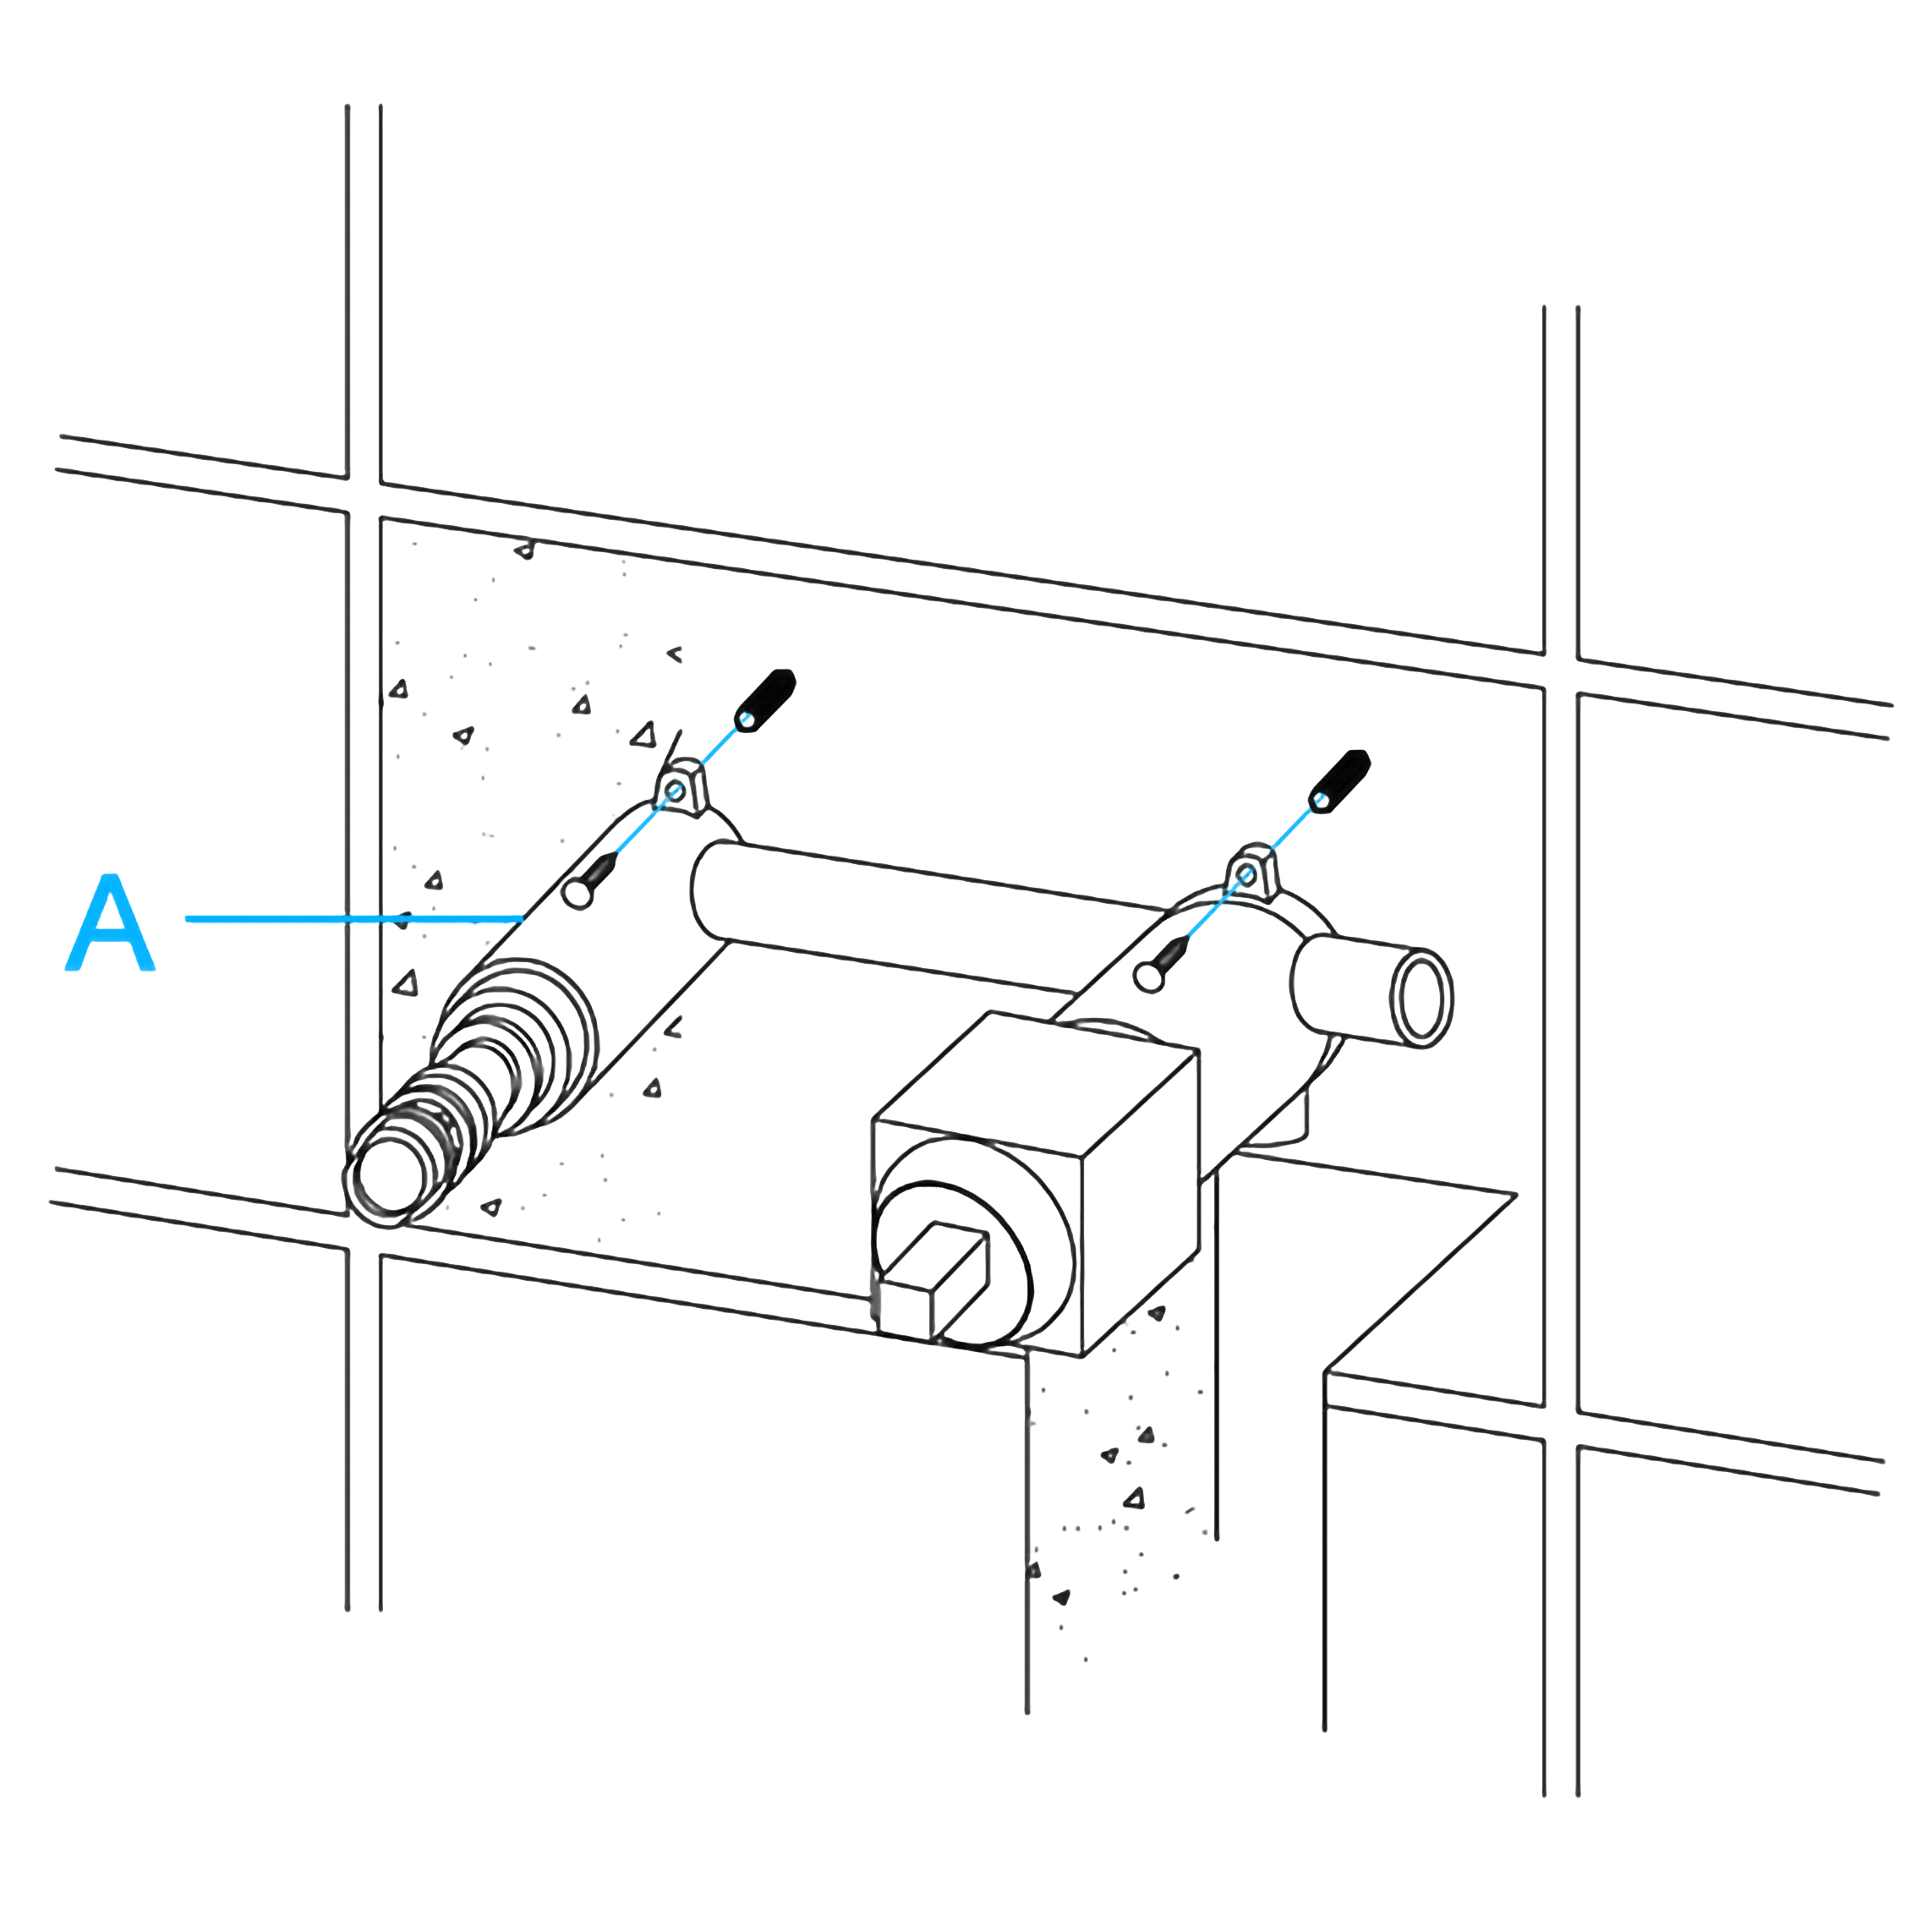
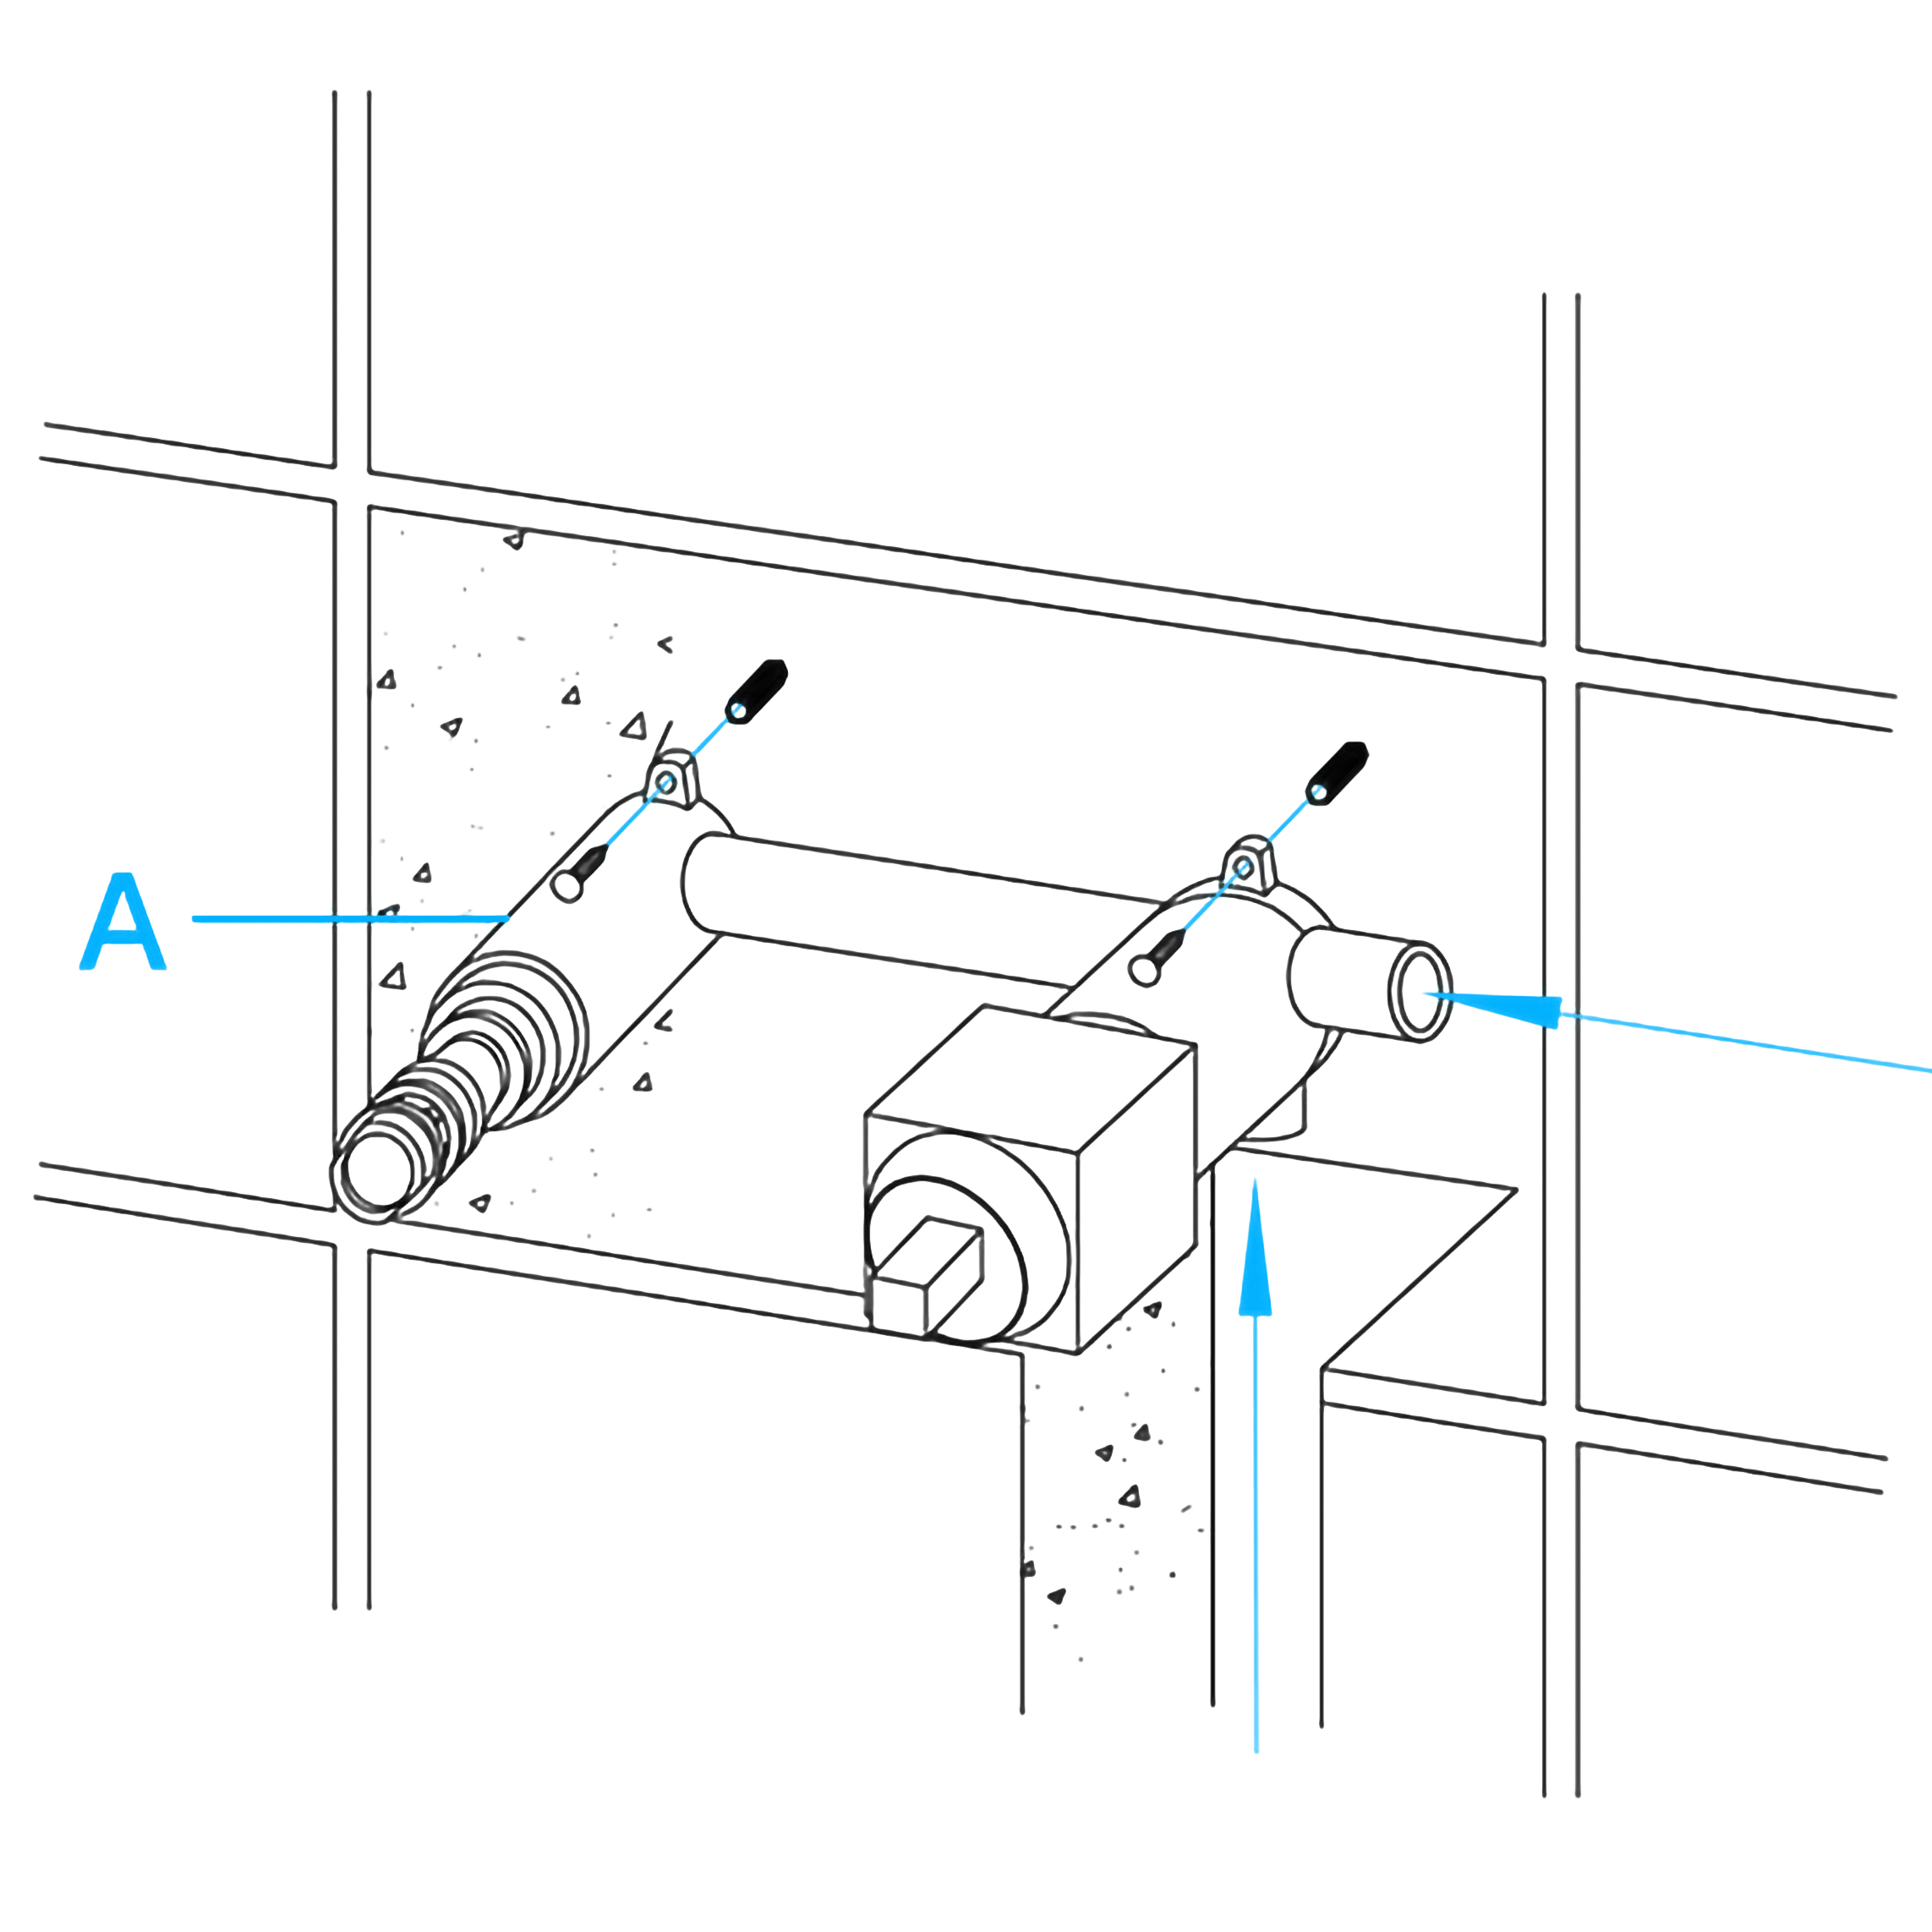
Position and fix the valve body (A) into the wall with screws. Make sure the valve body (A) is completely level.
|
|
|
|
|
|
|
Step 7:
|
|
Step 8:
|
|

|
|

|
|
|
Connect hot and cold water inlets of the valve body (A) to the main water supply. Turn on the water supply and open the cartridge to check for leaks. (Solid copper pipes are recommended for the connection.)
|
|
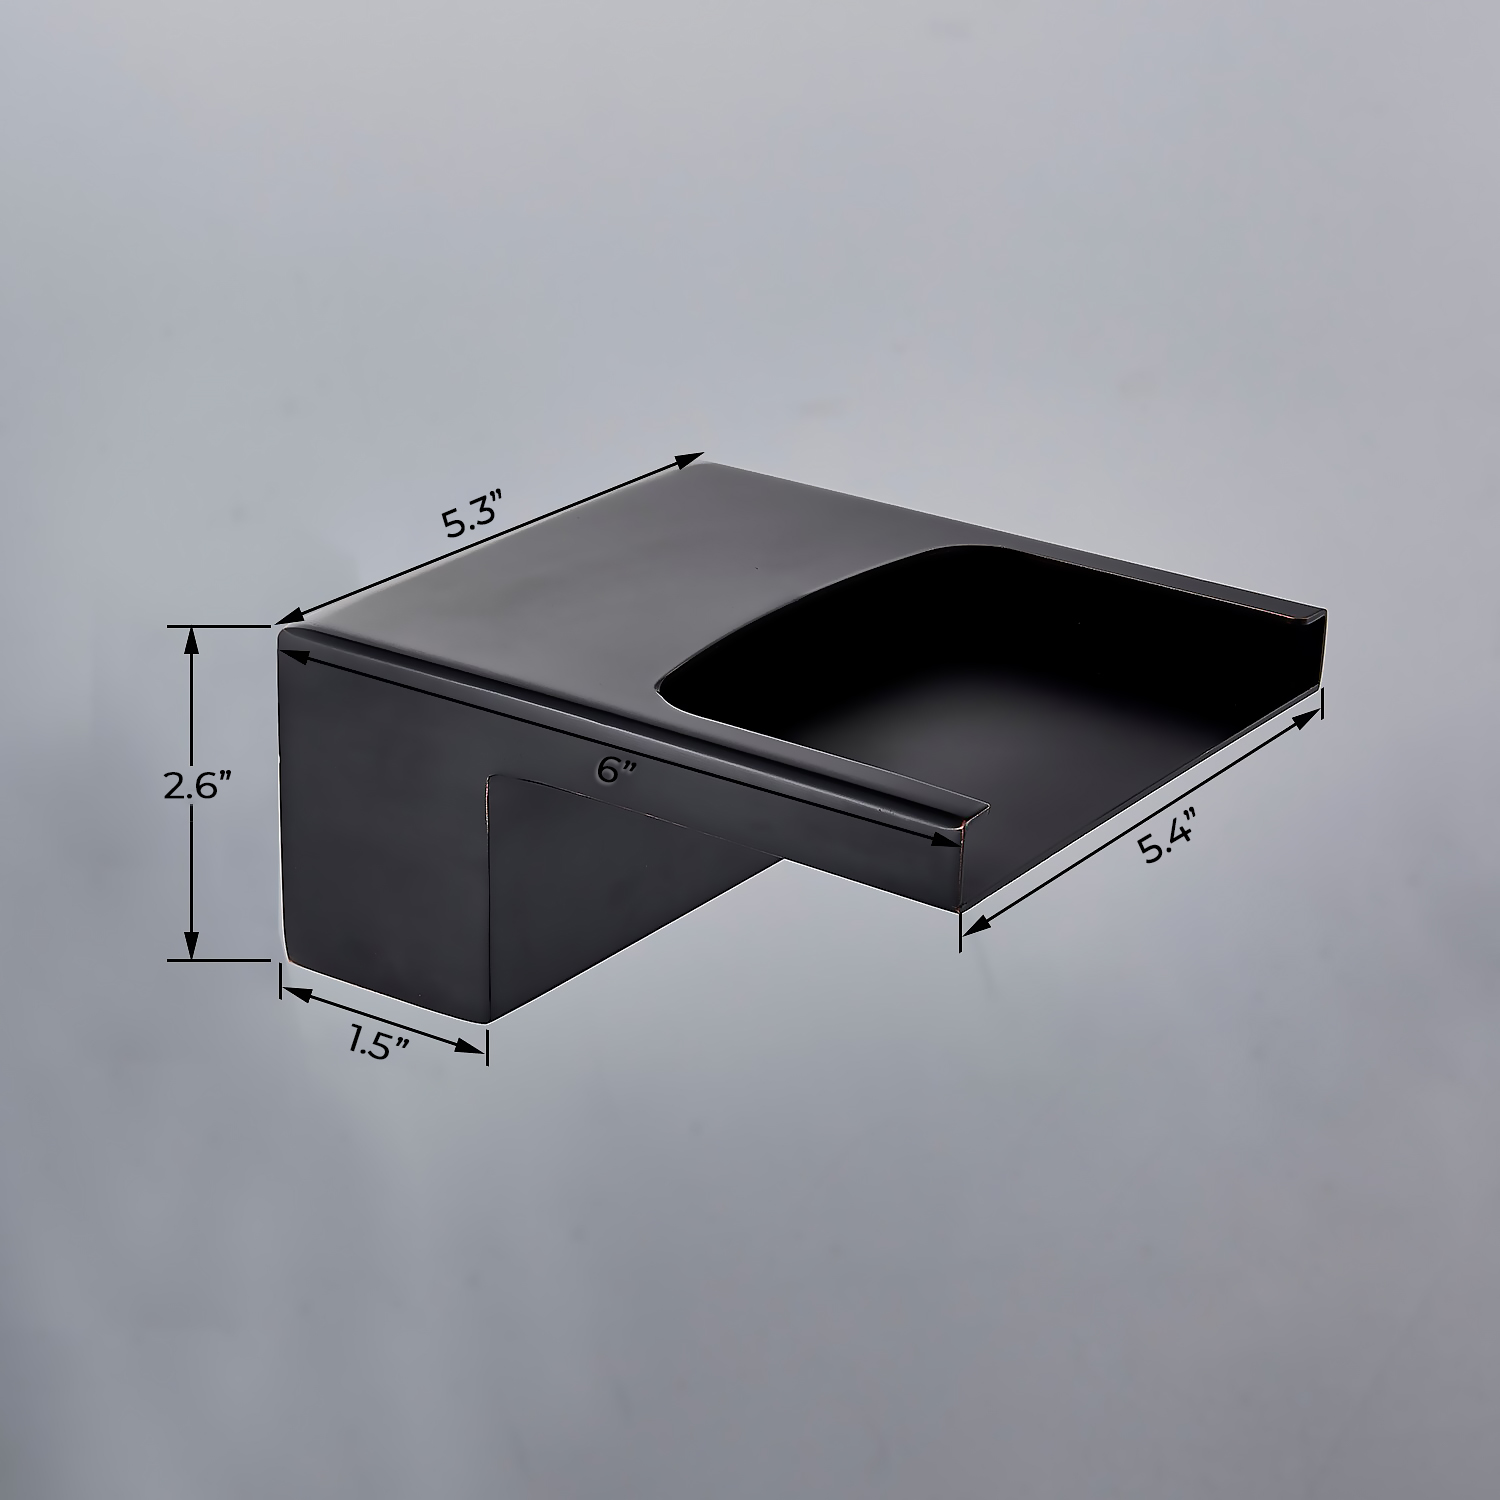
Attach the spout (B) to the valve.
|
|
|
|
|
|
|
Step 9:
|
|
|
|

|
|

|
|
|
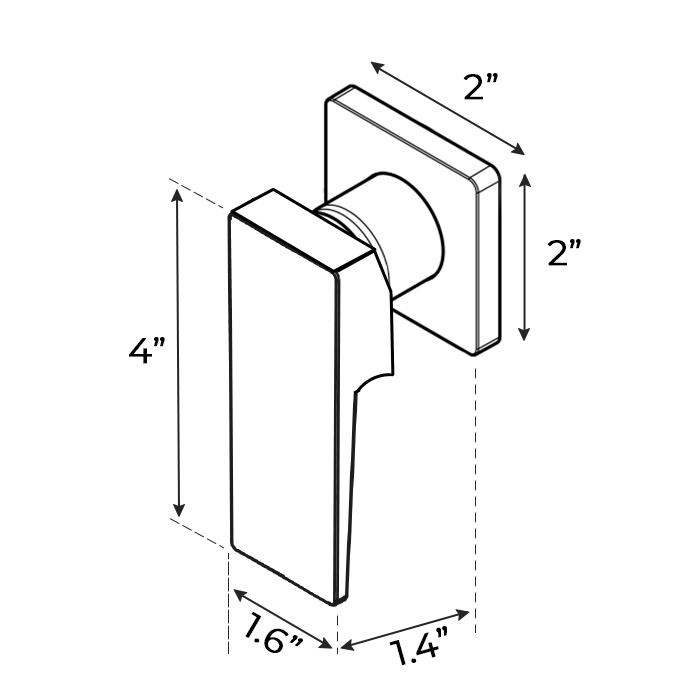
Place the handle (C) onto the valve and fix the set screw (D) with Allen key (E), then put on the indication button (G).
|
|
|
|
|
|
|
|