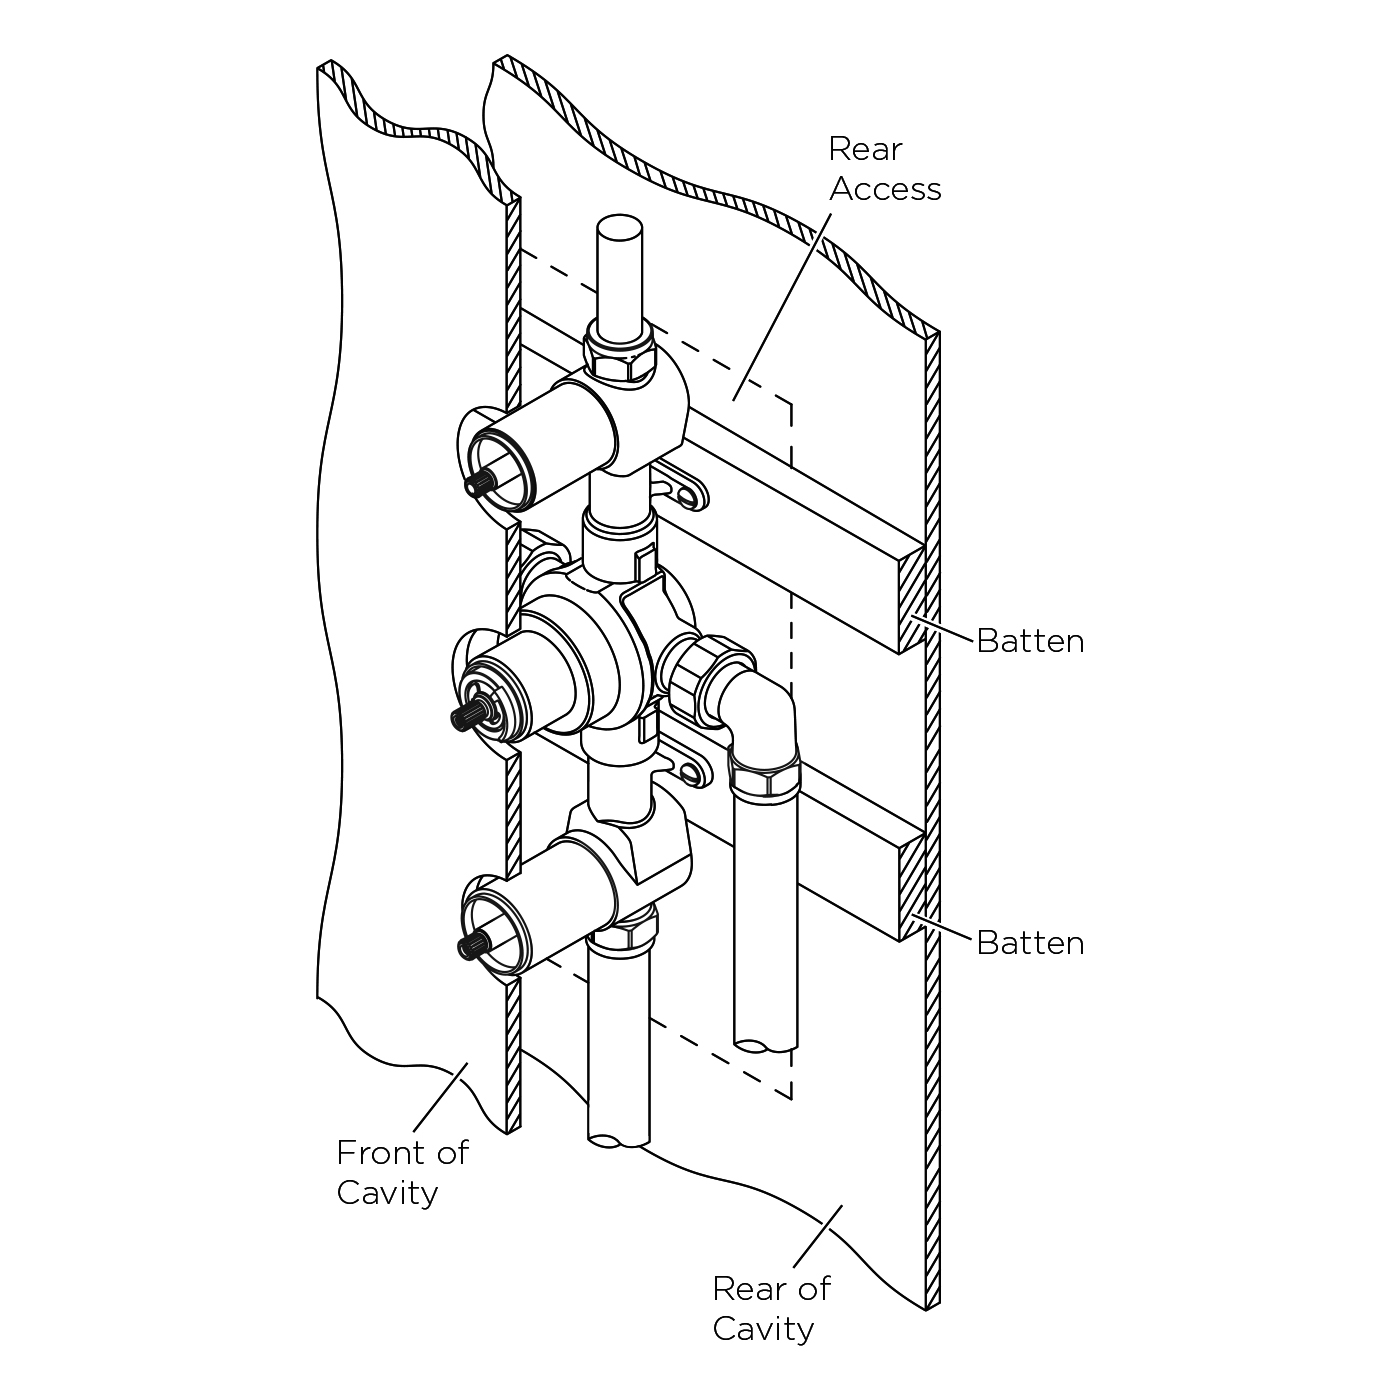
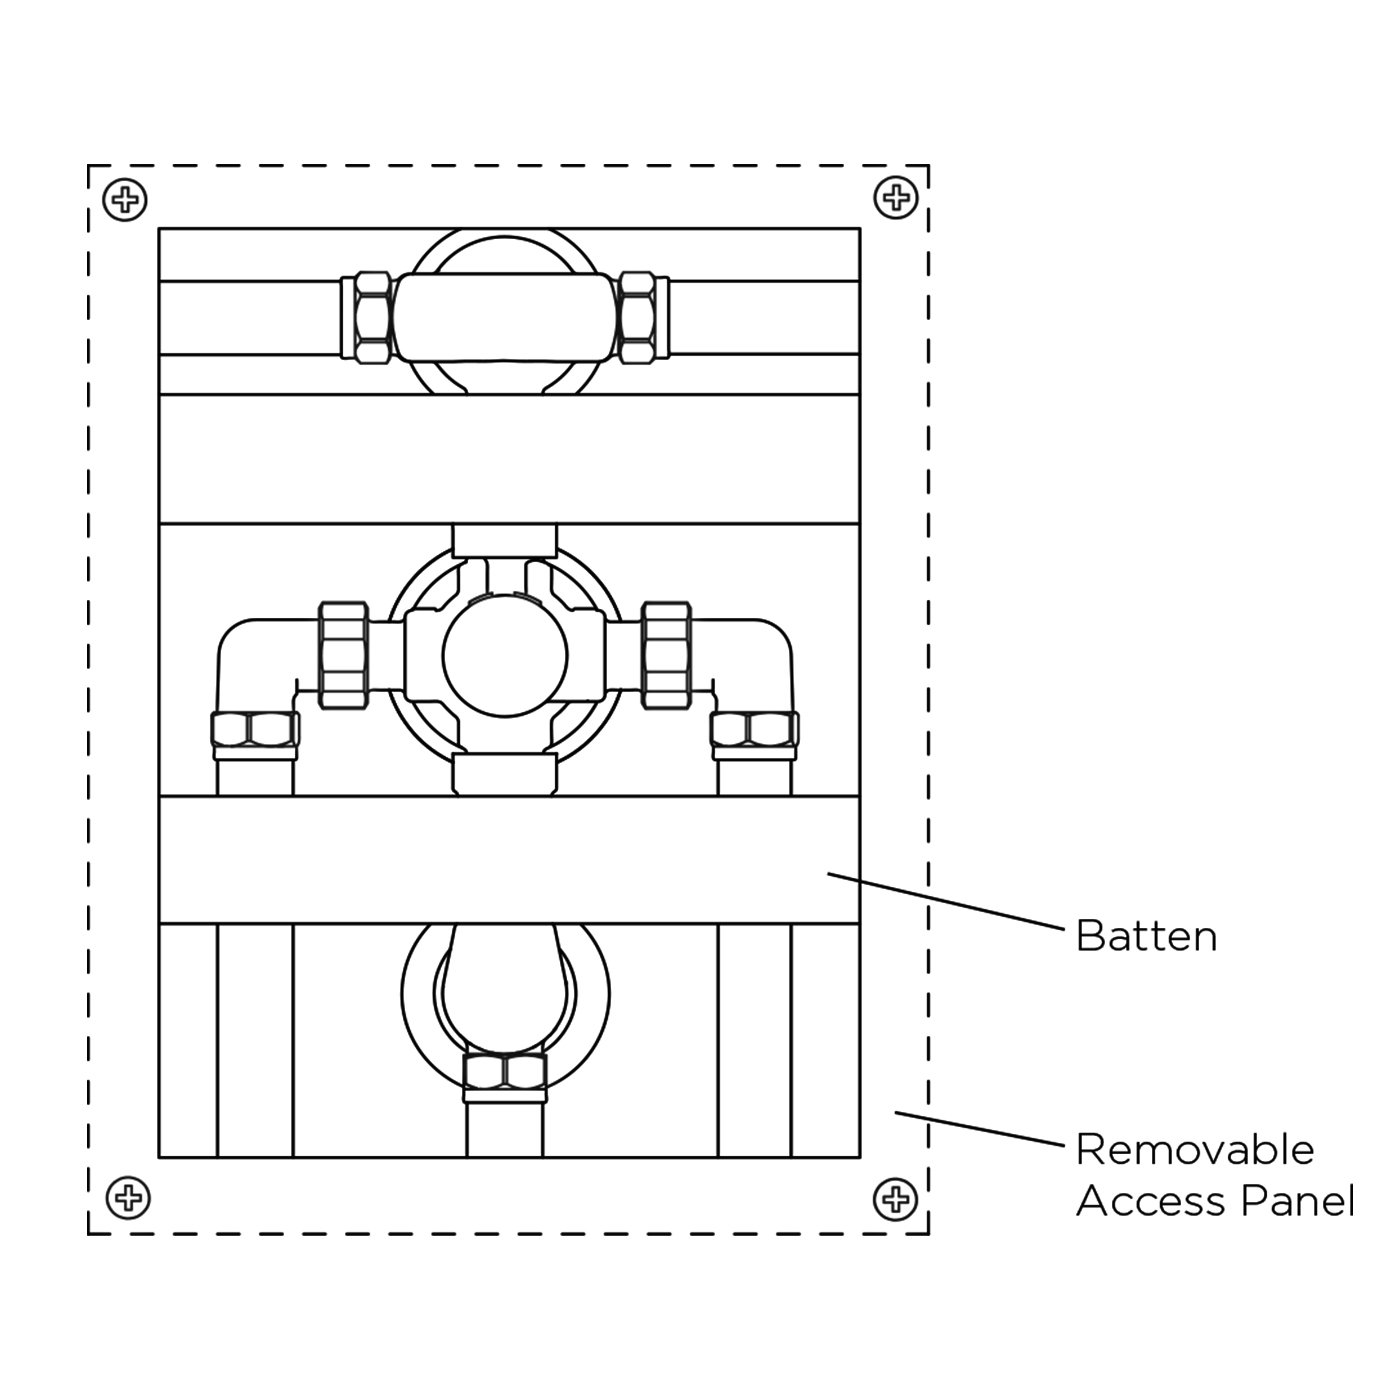
Once the shower valve has been installed the wall surface should be finished and tiled up-to the valve. Rear access is required to allow for future servicing and maintenance of the valve filters. The thermostatic cartridge is accessible from the front.
Before Installation
Flush through the pipework to ensure removal of any debris. Turn off the mains water supply and close any isolating valves.
1. Install shower valve
Install suitable battens (if required) onto the rear cavity wall. Place the shower valve in the required position and mark the fixing holes.
Drill suitable holes and insert the wall plugs (if necessary). Securely attach the shower valve to the wall/battens using the screws supplied.
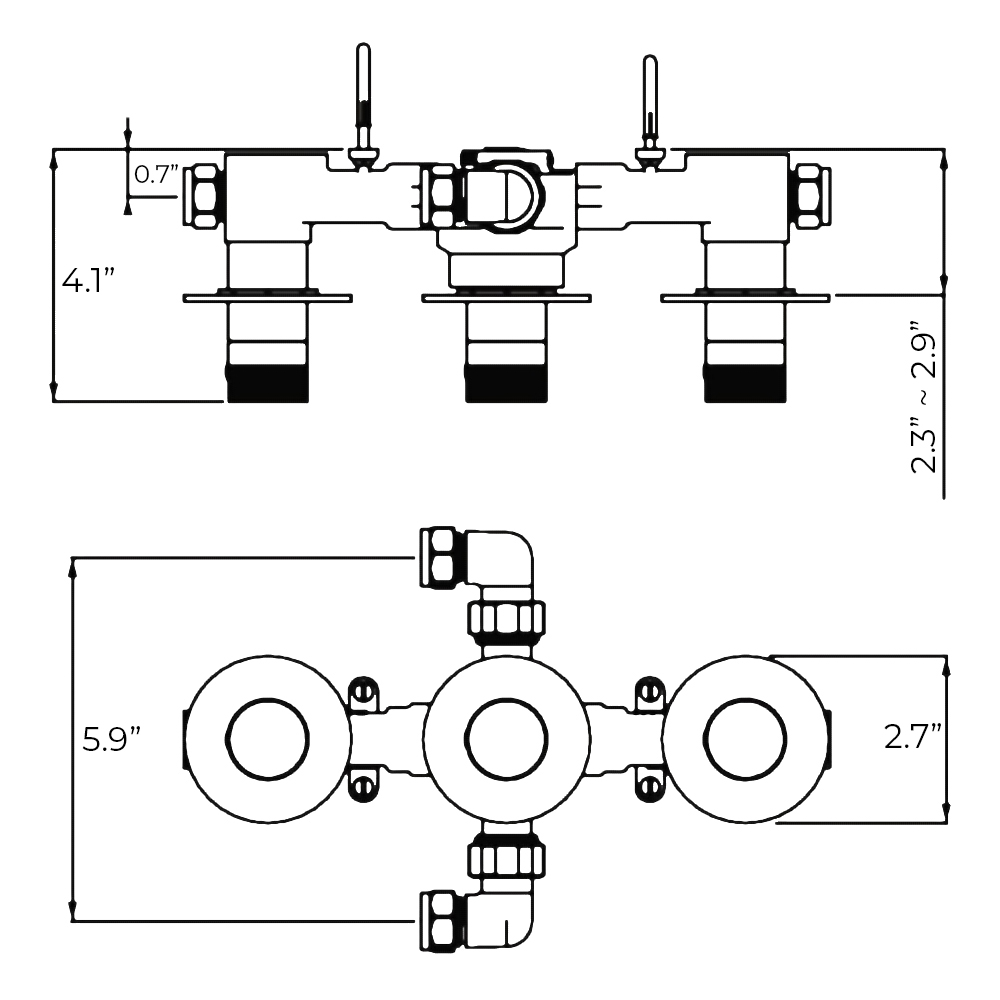
2. Connect water supply pipes
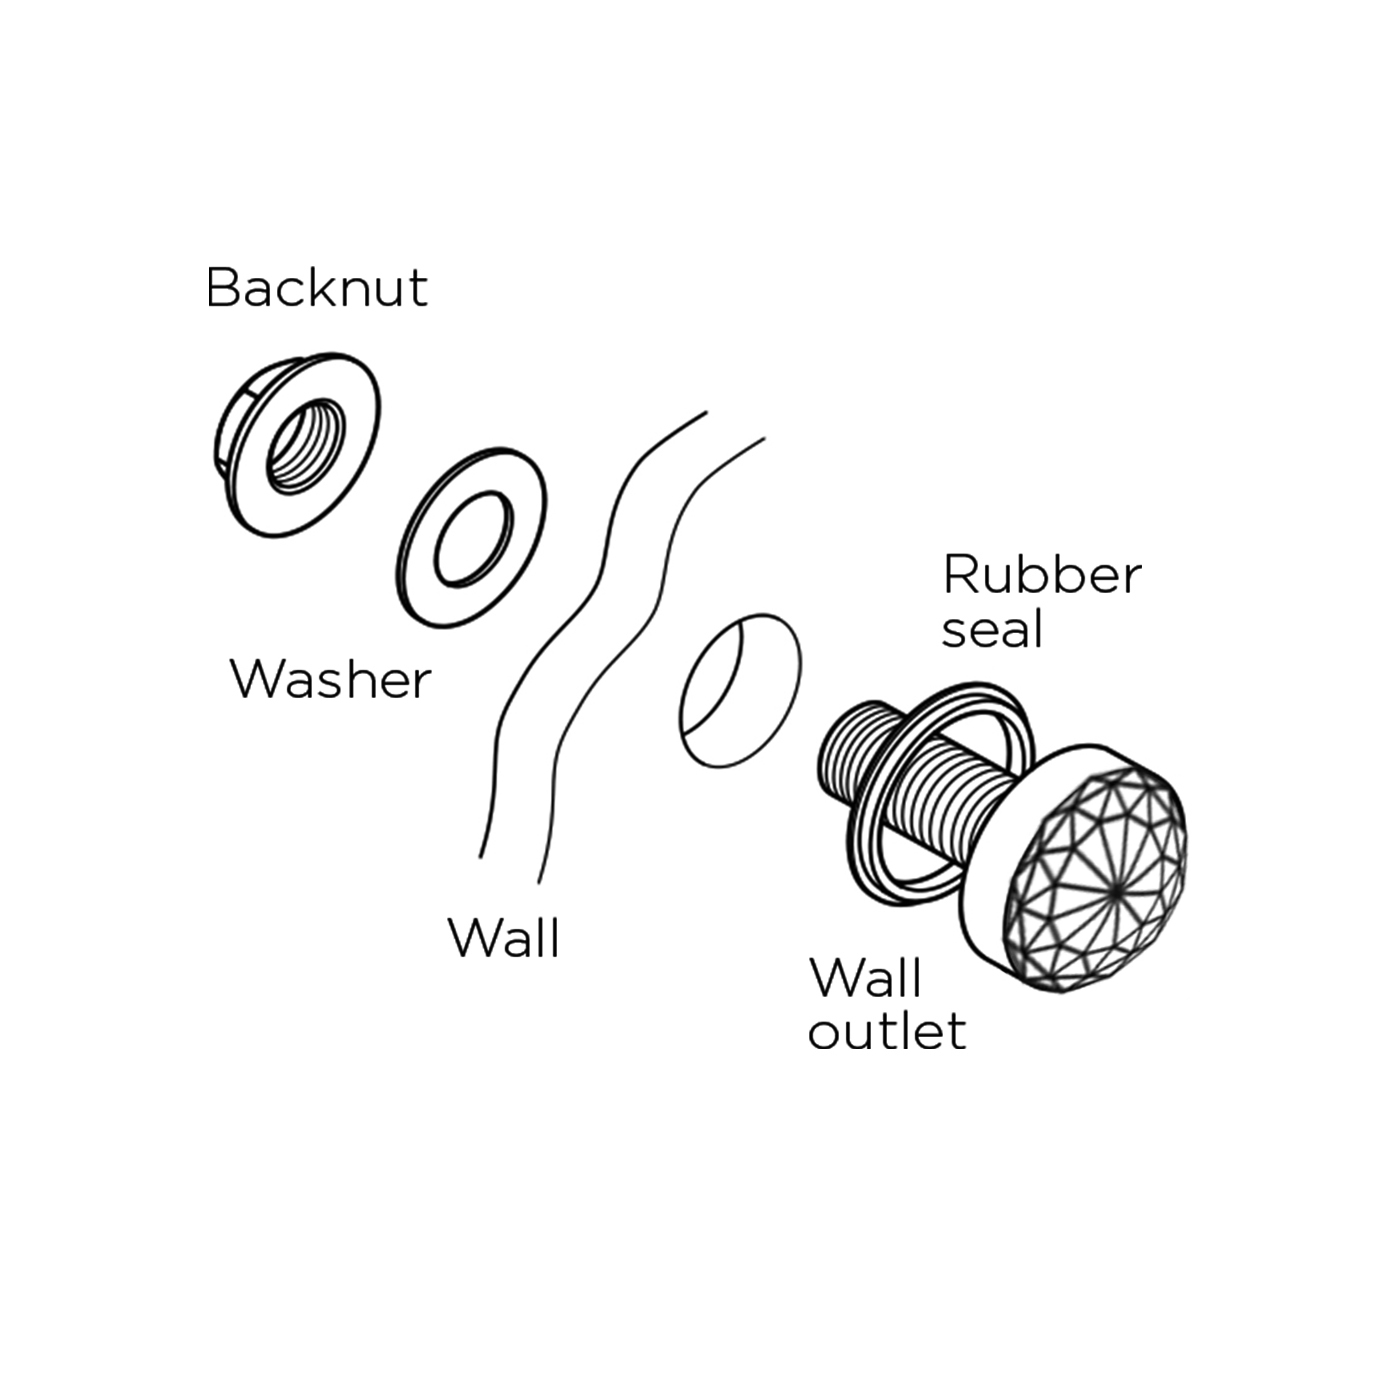
Insert 15mm hot and cold water supply pipes into the inlet connections and tighten nuts, ensuring the olives are fitted.
3. Plumb in outlets
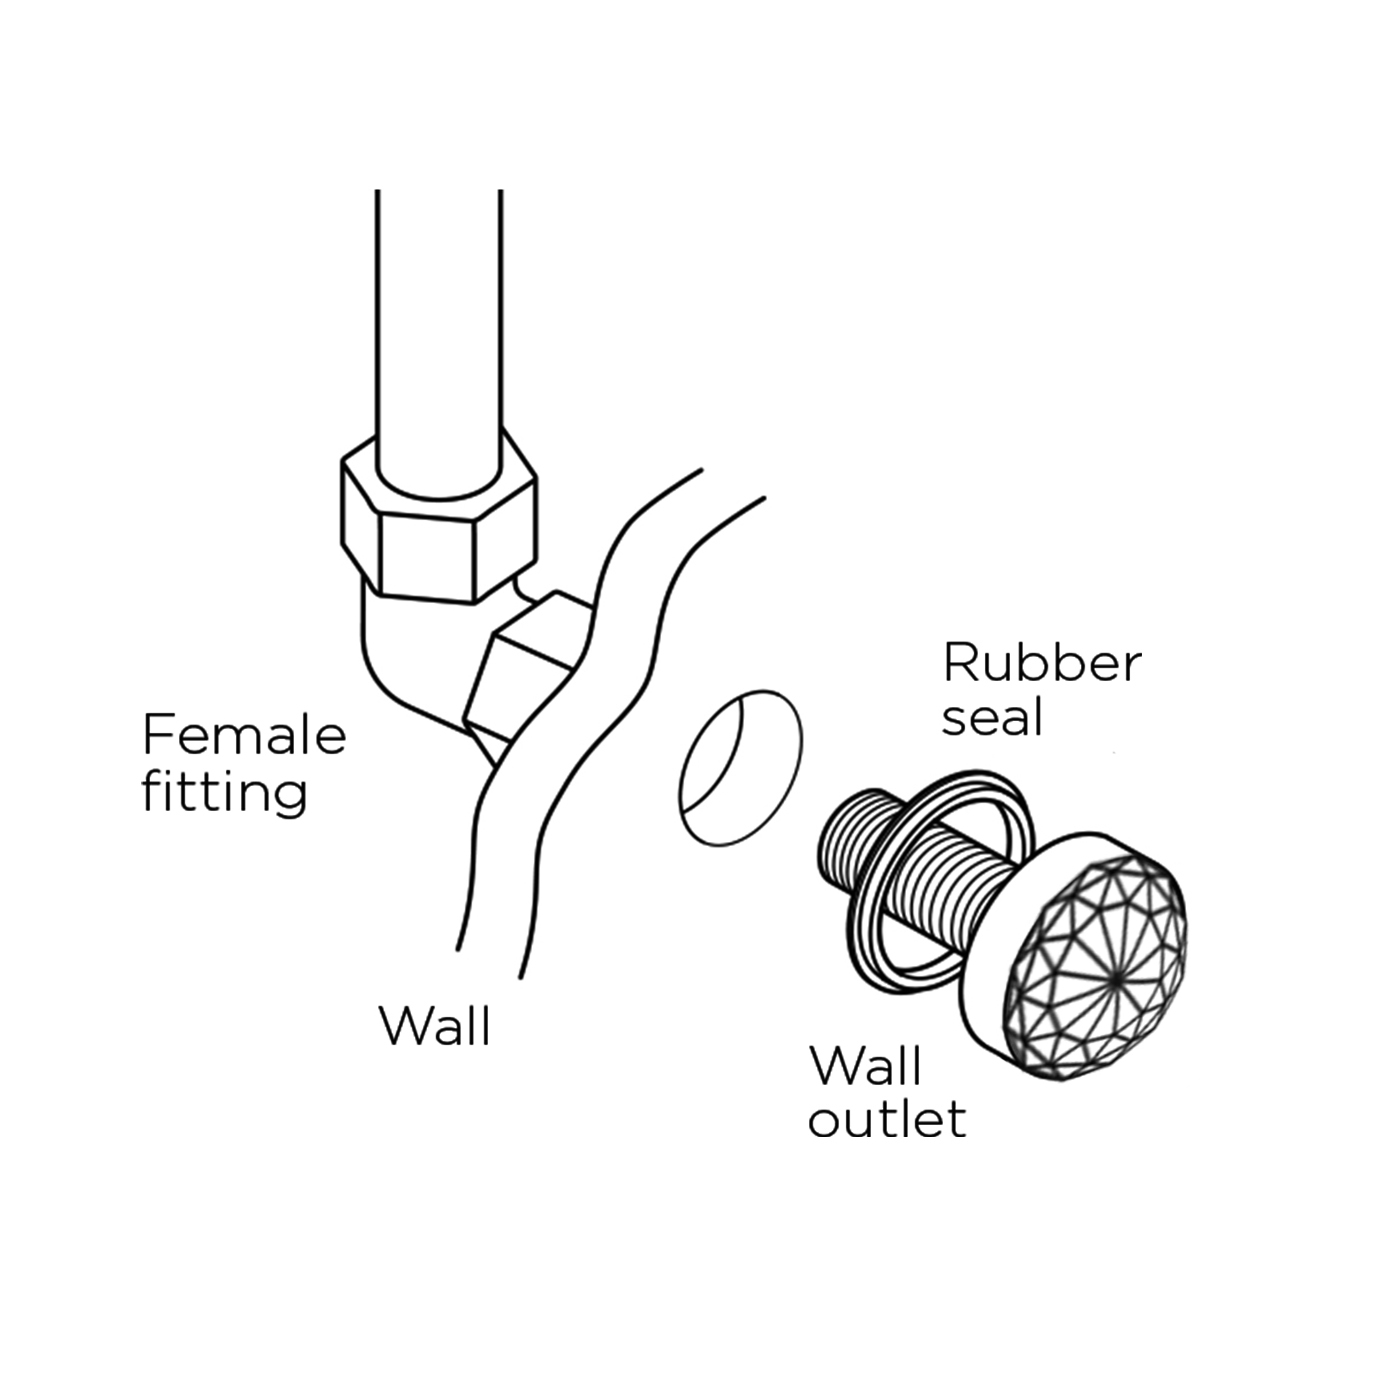
Insert 15mm pipework into the top and bottom outlets and plumb into the users chosen products. Ensure the olives are fitted when tightening the nuts.
4. Finish wall surface
Plasterboard and tile the cavity wall ensuring there is a gap between the tiles and the shower valve.