|
Step 1:
|
Mixer
|
Step 2:
|
|
|
|
|

|
Close the stops.
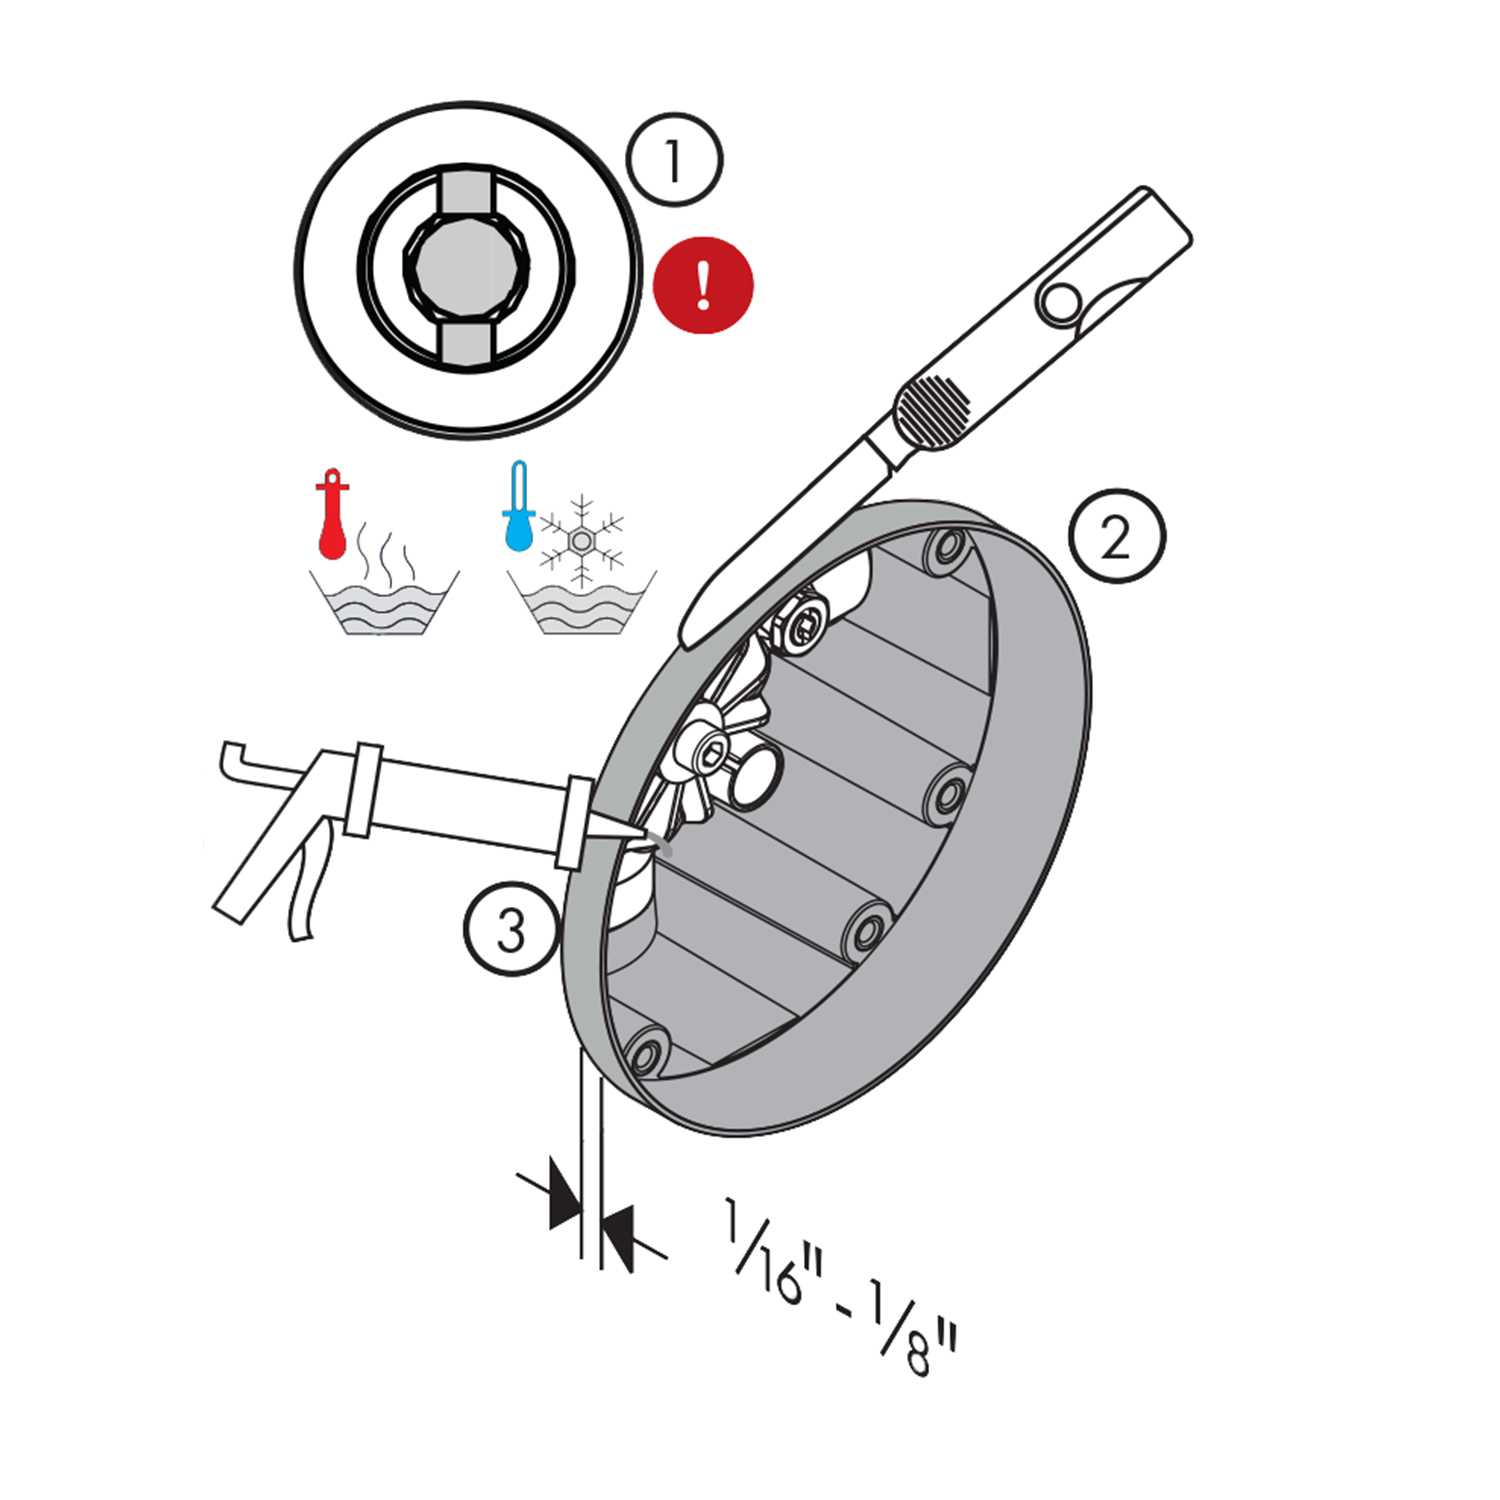
Cut the plaster shield so that it extends ¹⁄₁₆" - ⅛" from the finished wall surface.
|
|
Seal the wall around the plaster shield with a waterproof sealant.
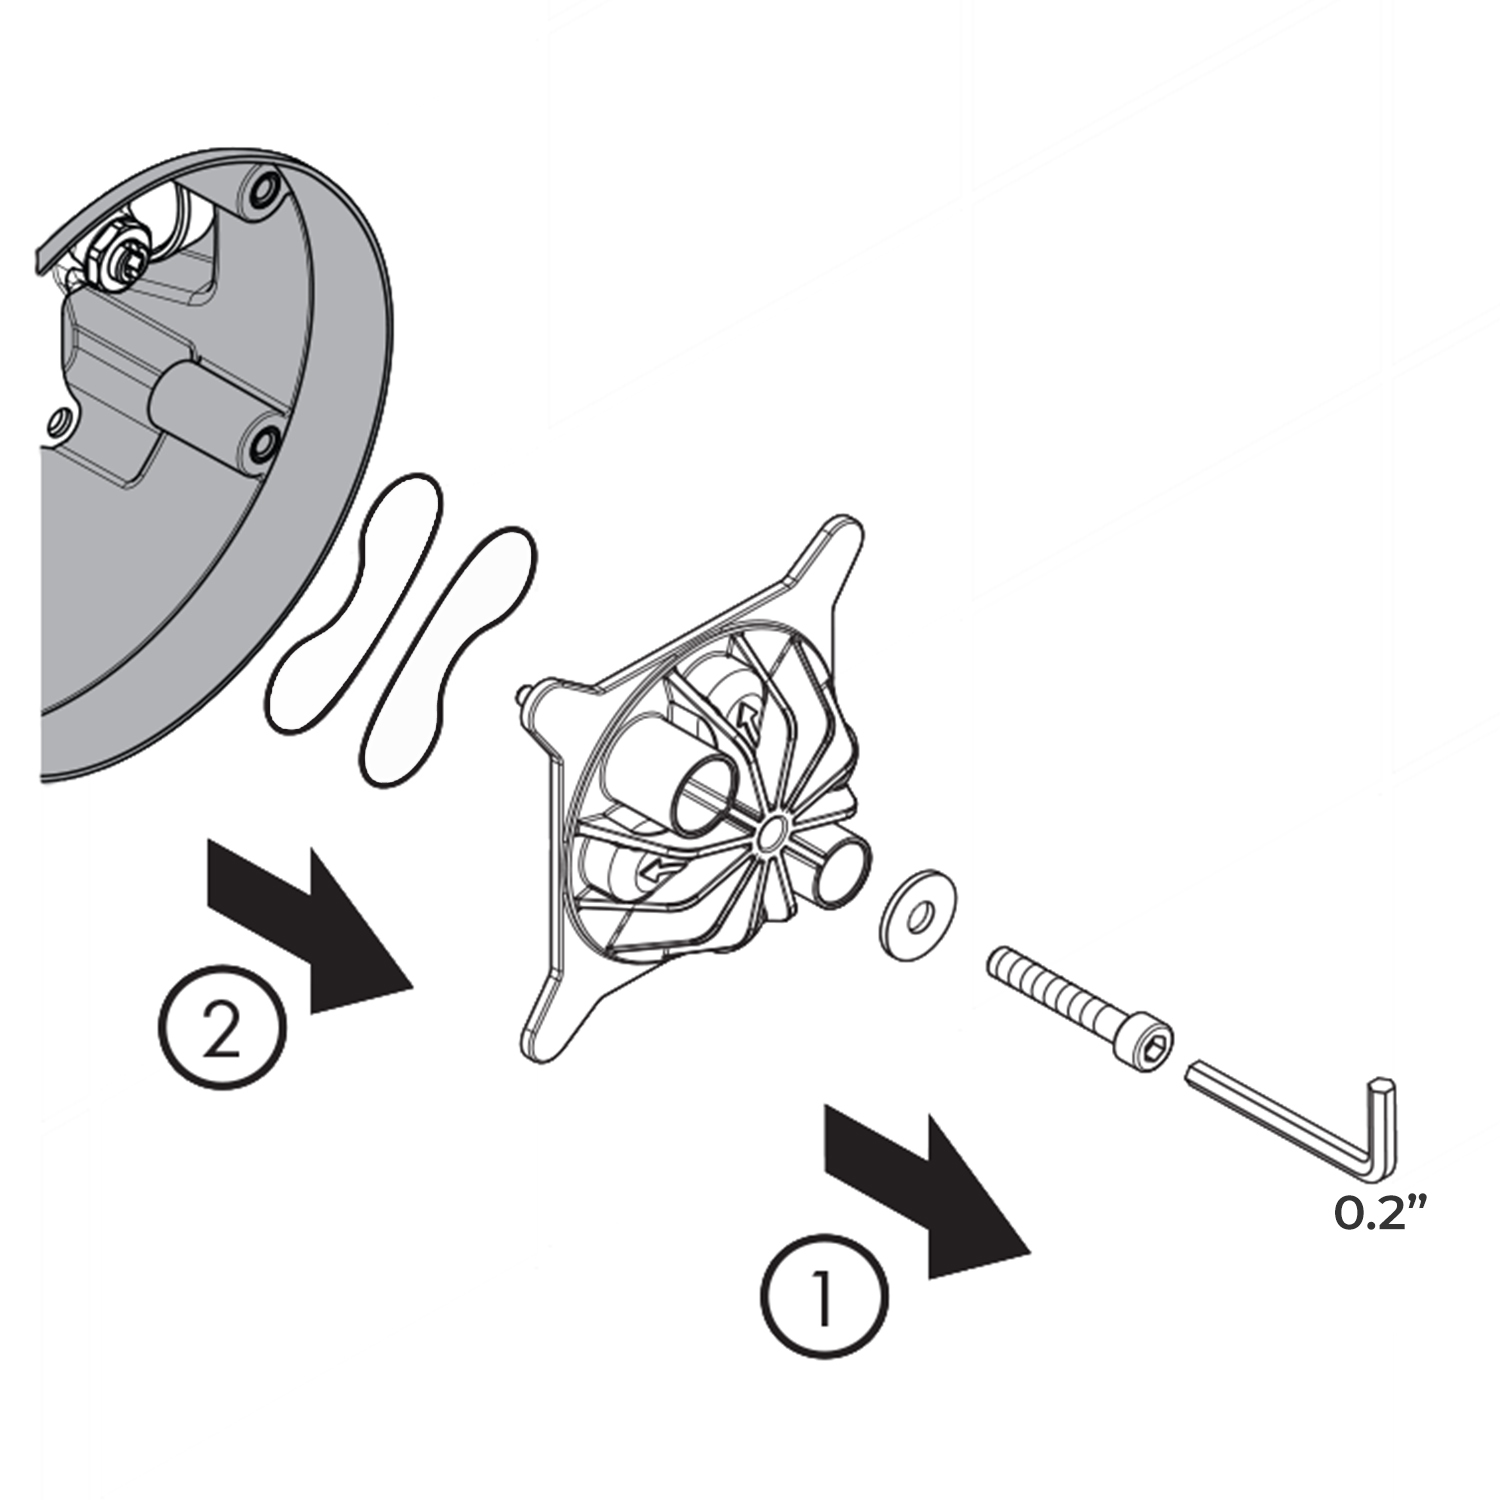
Remove the flush insert and the flush insert seals.
|
|
|
Thermostatic Valve Mixer Installation Instructions
|
|
|
|
|
Step 3:
|
|
Step 4:
|
|
|
|
|
|
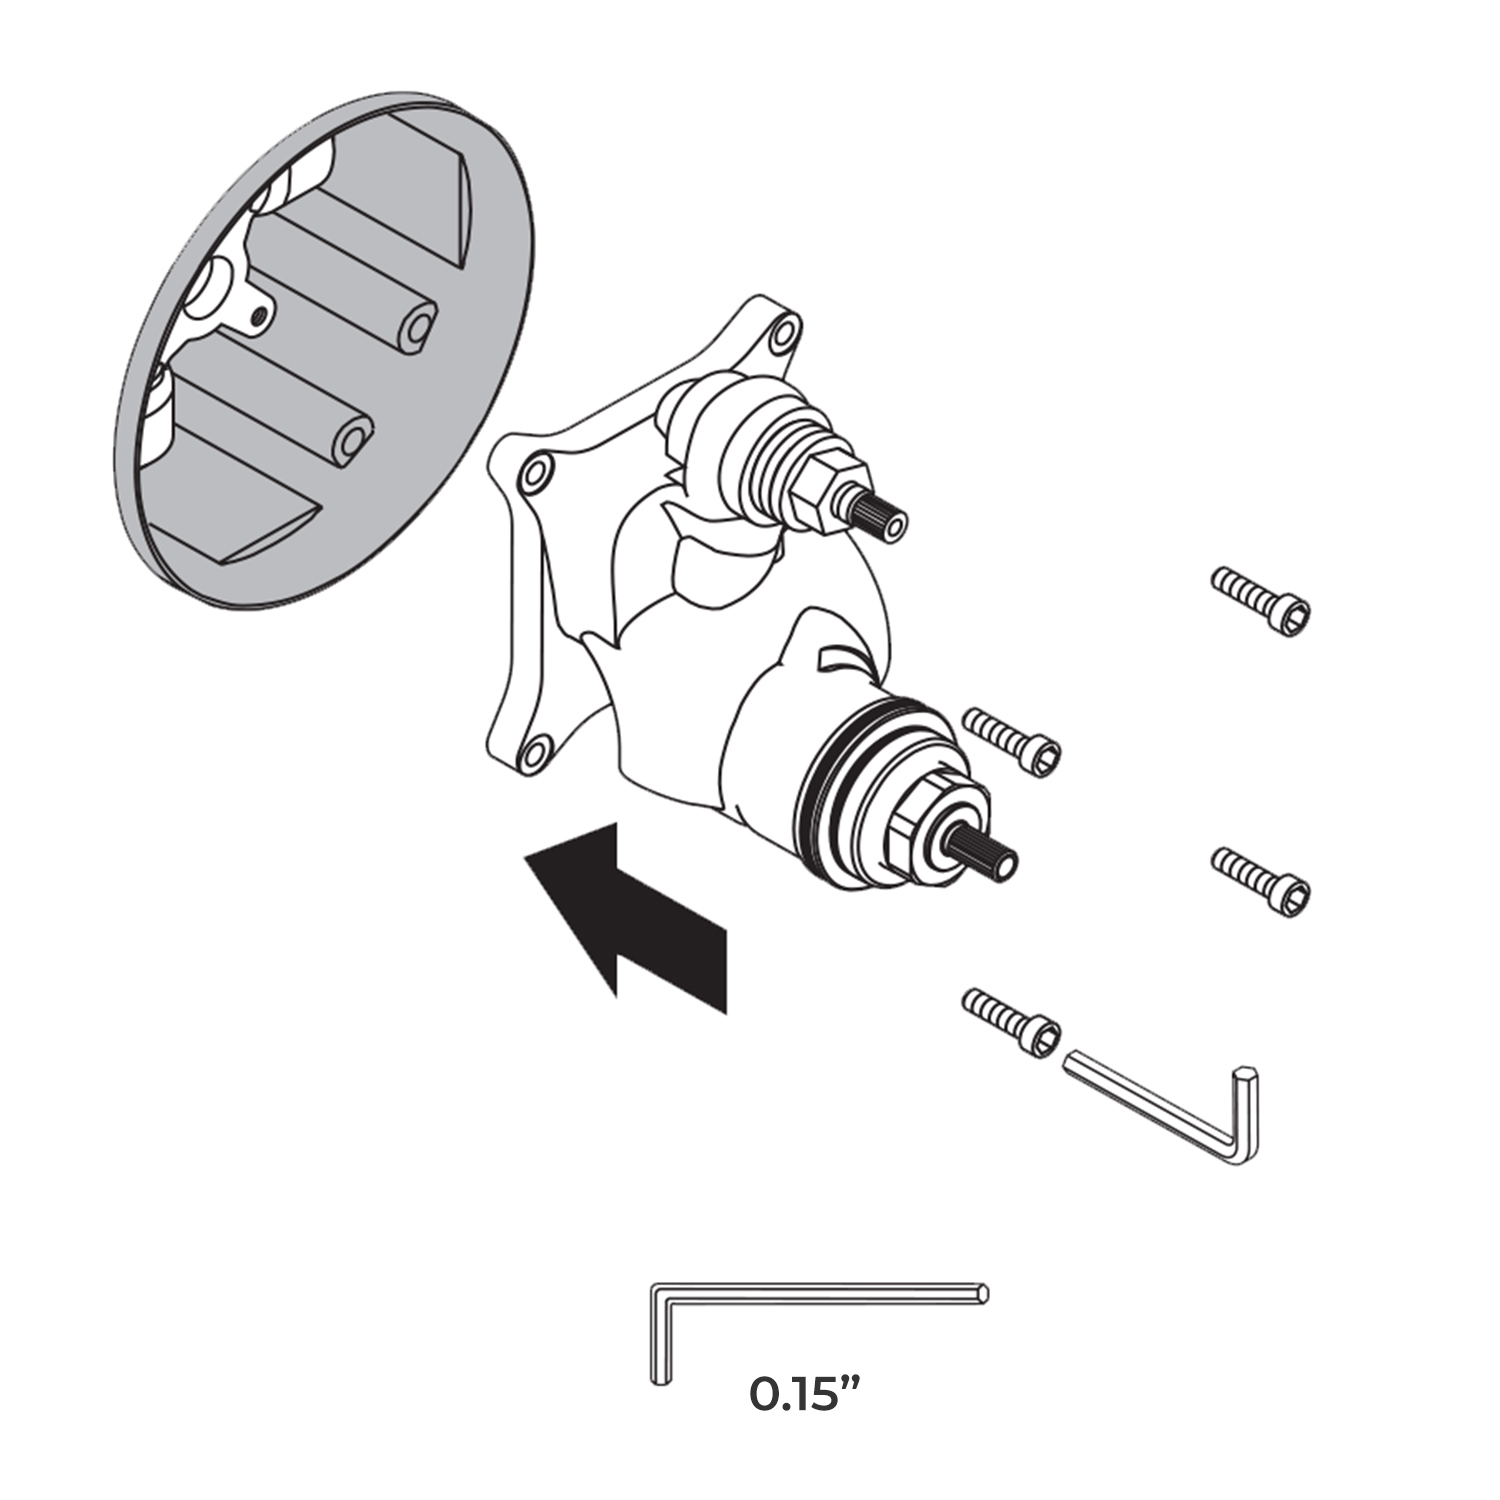
Install the function block.
Install and tighten the function block screws.
|
|
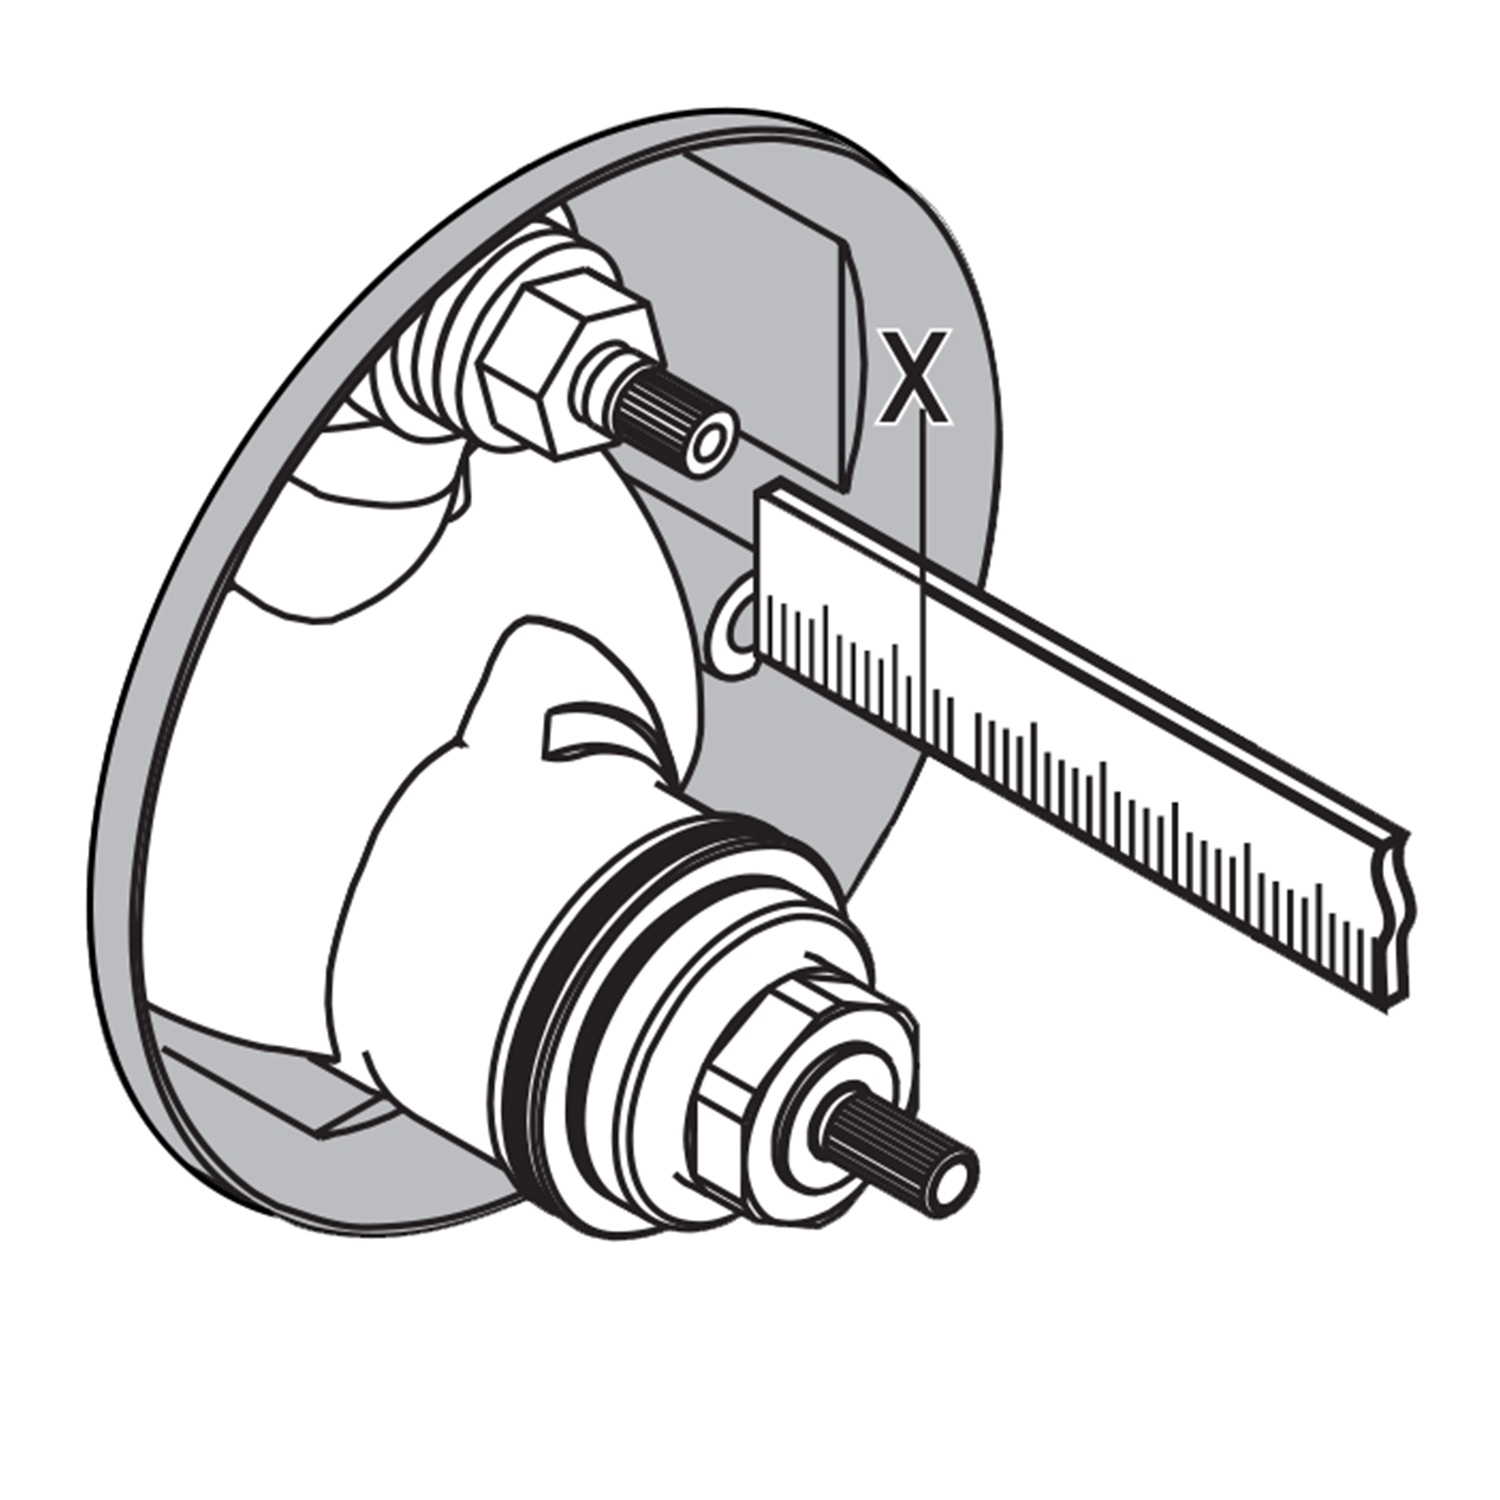
Measure the distance from the front of the plaster shield to one of the screw-in flanges ("X").
|
|
|
Thermostatic Valve Mixer Installation Instructions
|
|
|
|
|
Step 5:
|
|
Step 6:
|
|

|
|

|
|
|
Add ½" to this measurement. Cut each screw so that it is X + ½" long.
|
|
Open the stops.
Install the carrier plate so that the notch is at the bottom.
|
|
|
Thermostatic Valve Mixer Installation Instructions
|
|
|
|
|
Step 7:
|
|
Step 8:
|
|

|
|
|
|
Slide on the thermostatic mixer sleeve so that the indexing mark is at the 12:00 position.
Screw on the volume control sleeve. Install the escutcheon.
|
|
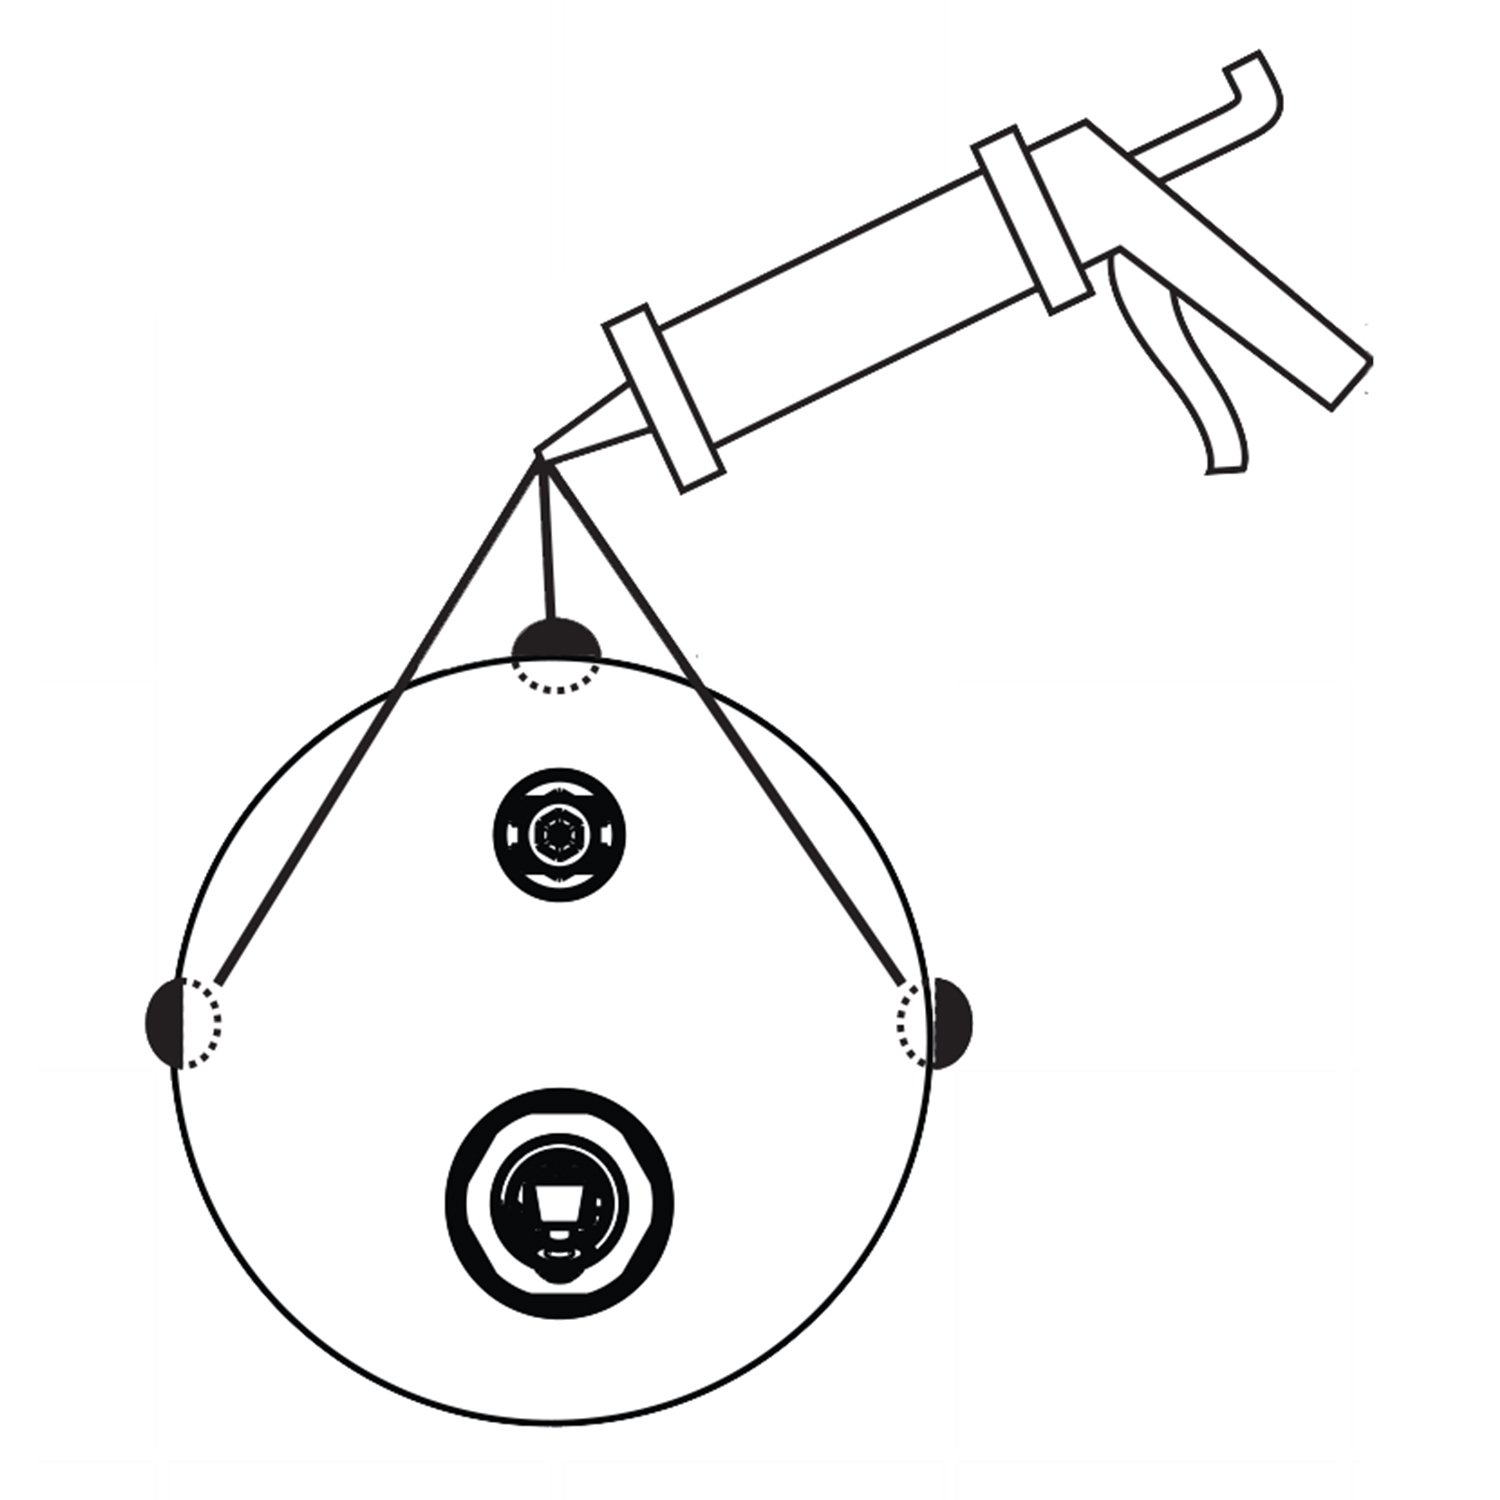
Place a dab of waterproof sealant at each grout joint.
|
|
|
Thermostatic Valve Mixer Installation Instructions
|
|
|
|
|
Step 9:
|
|
Step 10:
|
|
|
|
|
|
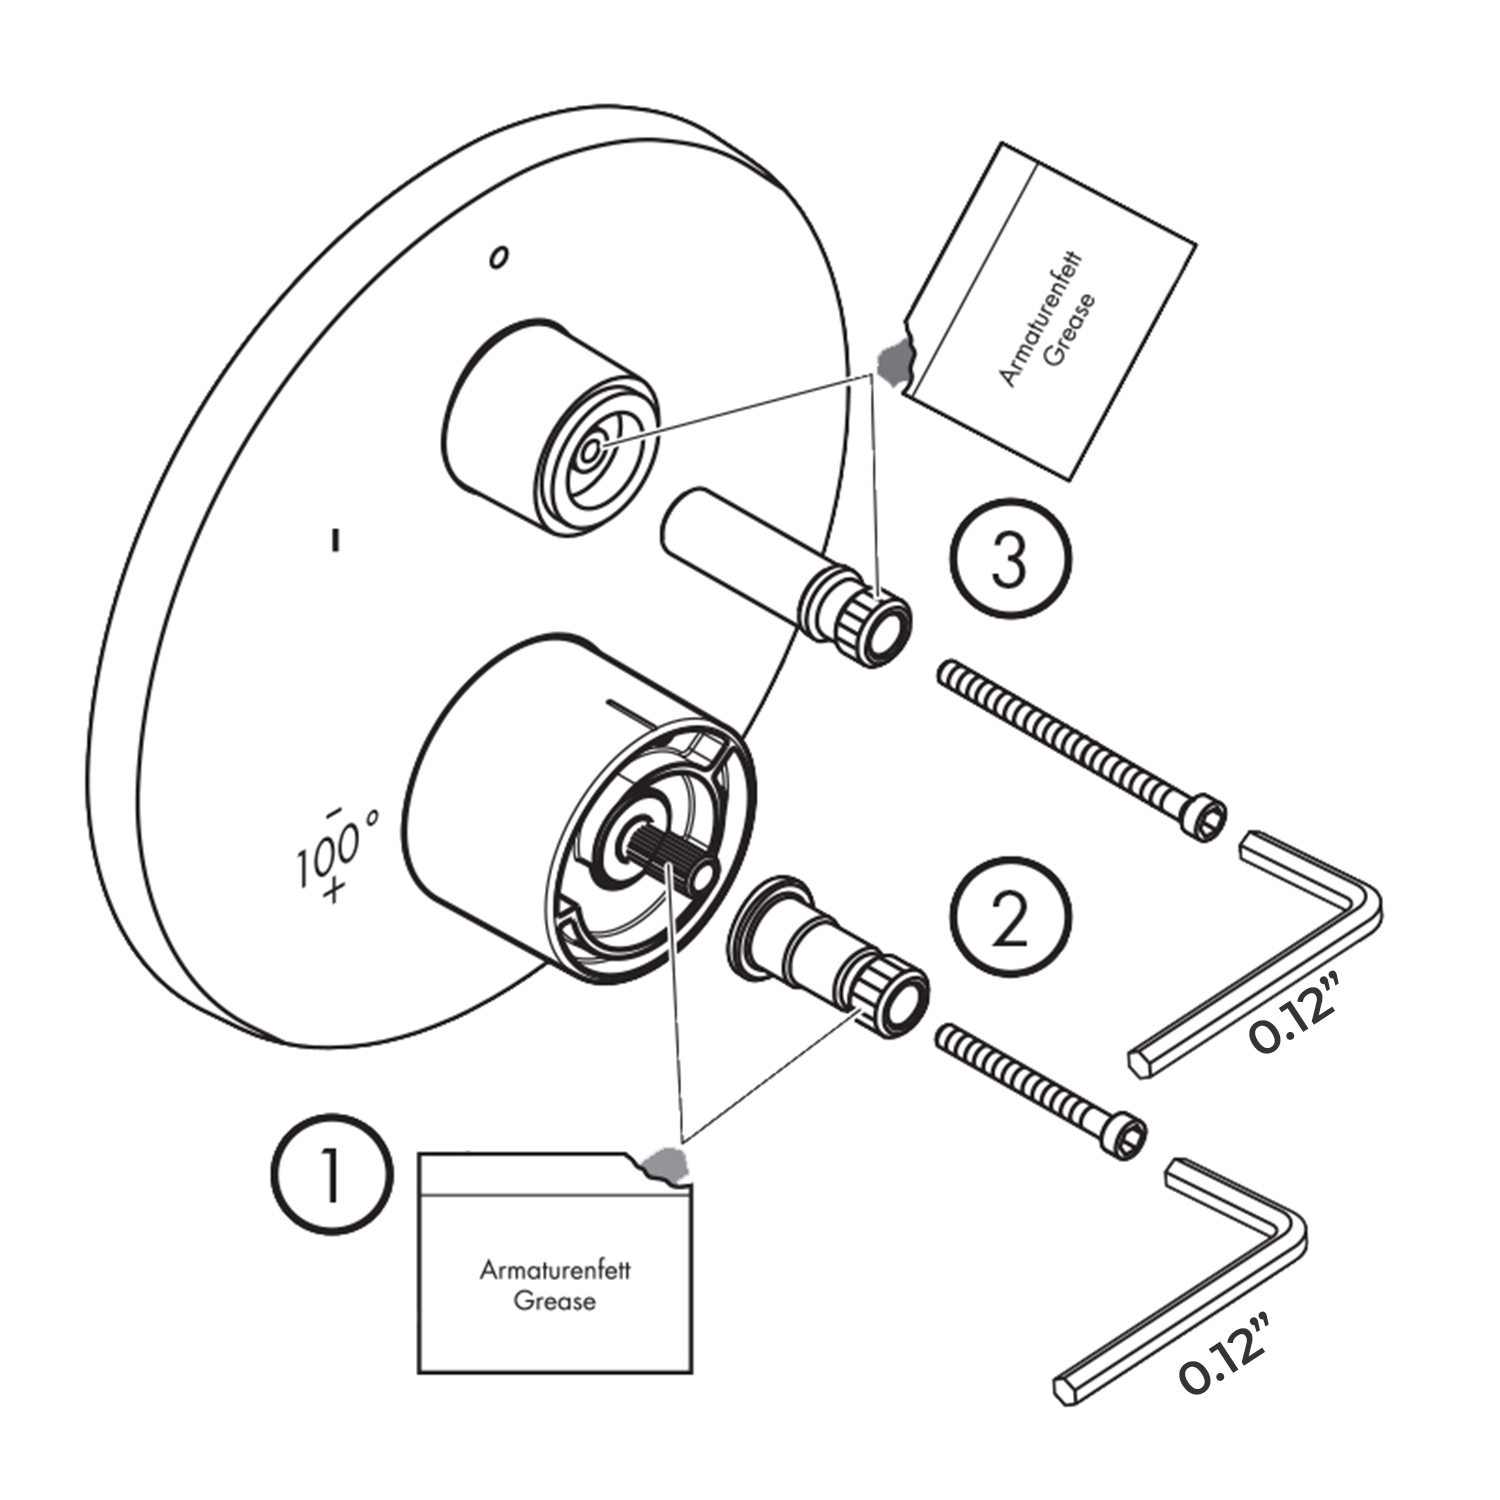
Lubricate the adapter stems with a small amount of white plumber's grease.
Install the handle adapters and screws. Tighten the screws.
|
|
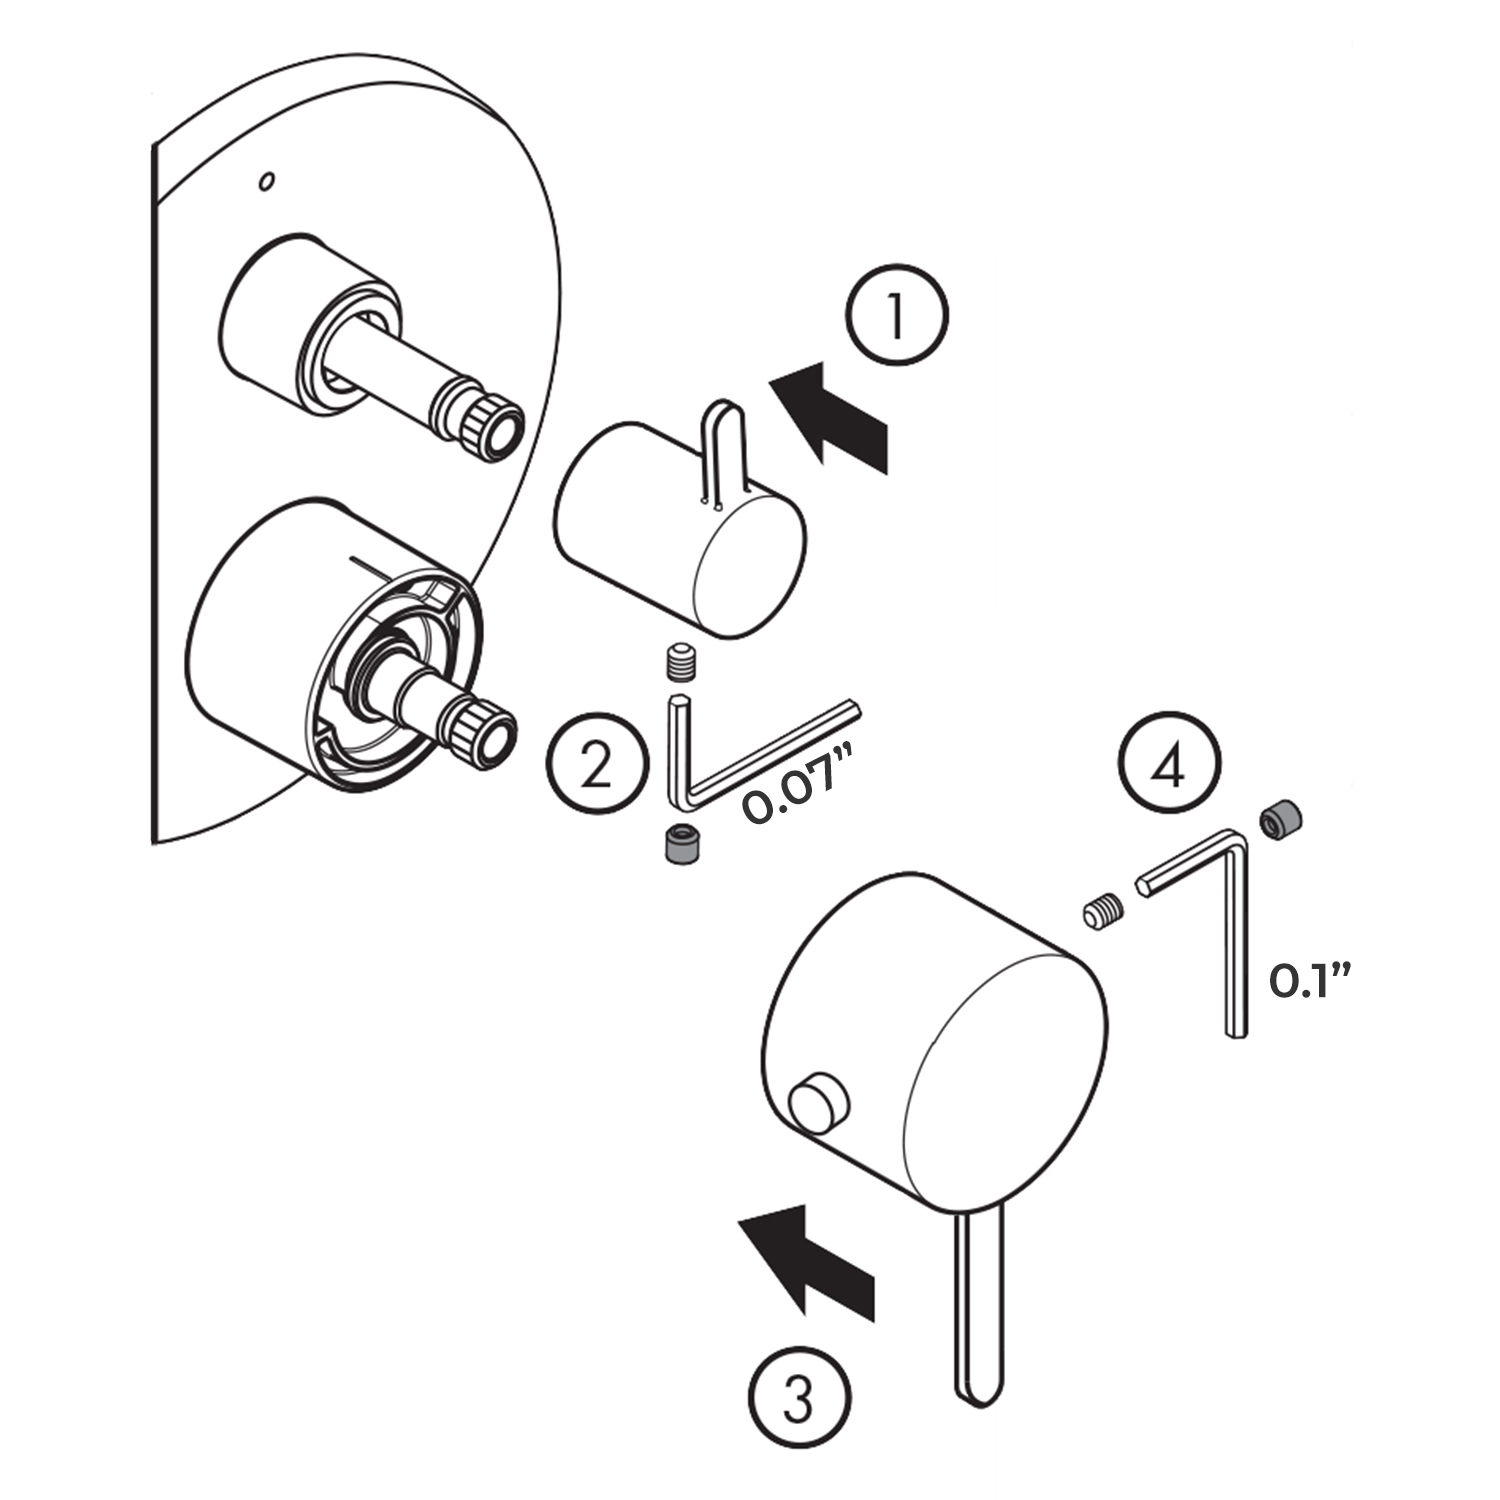
Install the volume control handle. Tighten the screw.
Install the thermostatic mixer handle so that the safety stop override button is at the 9:00 position.
Tighten the handle screw using a 2.5 mm Allen wrench.
|